DIY Toy Story Birthday Party
It is about that time again, because I am now looking to plan my son’s next birthday party, and this year, we’ve decided (partially due to a clearance of party supplies at KMart) on Toy Story.
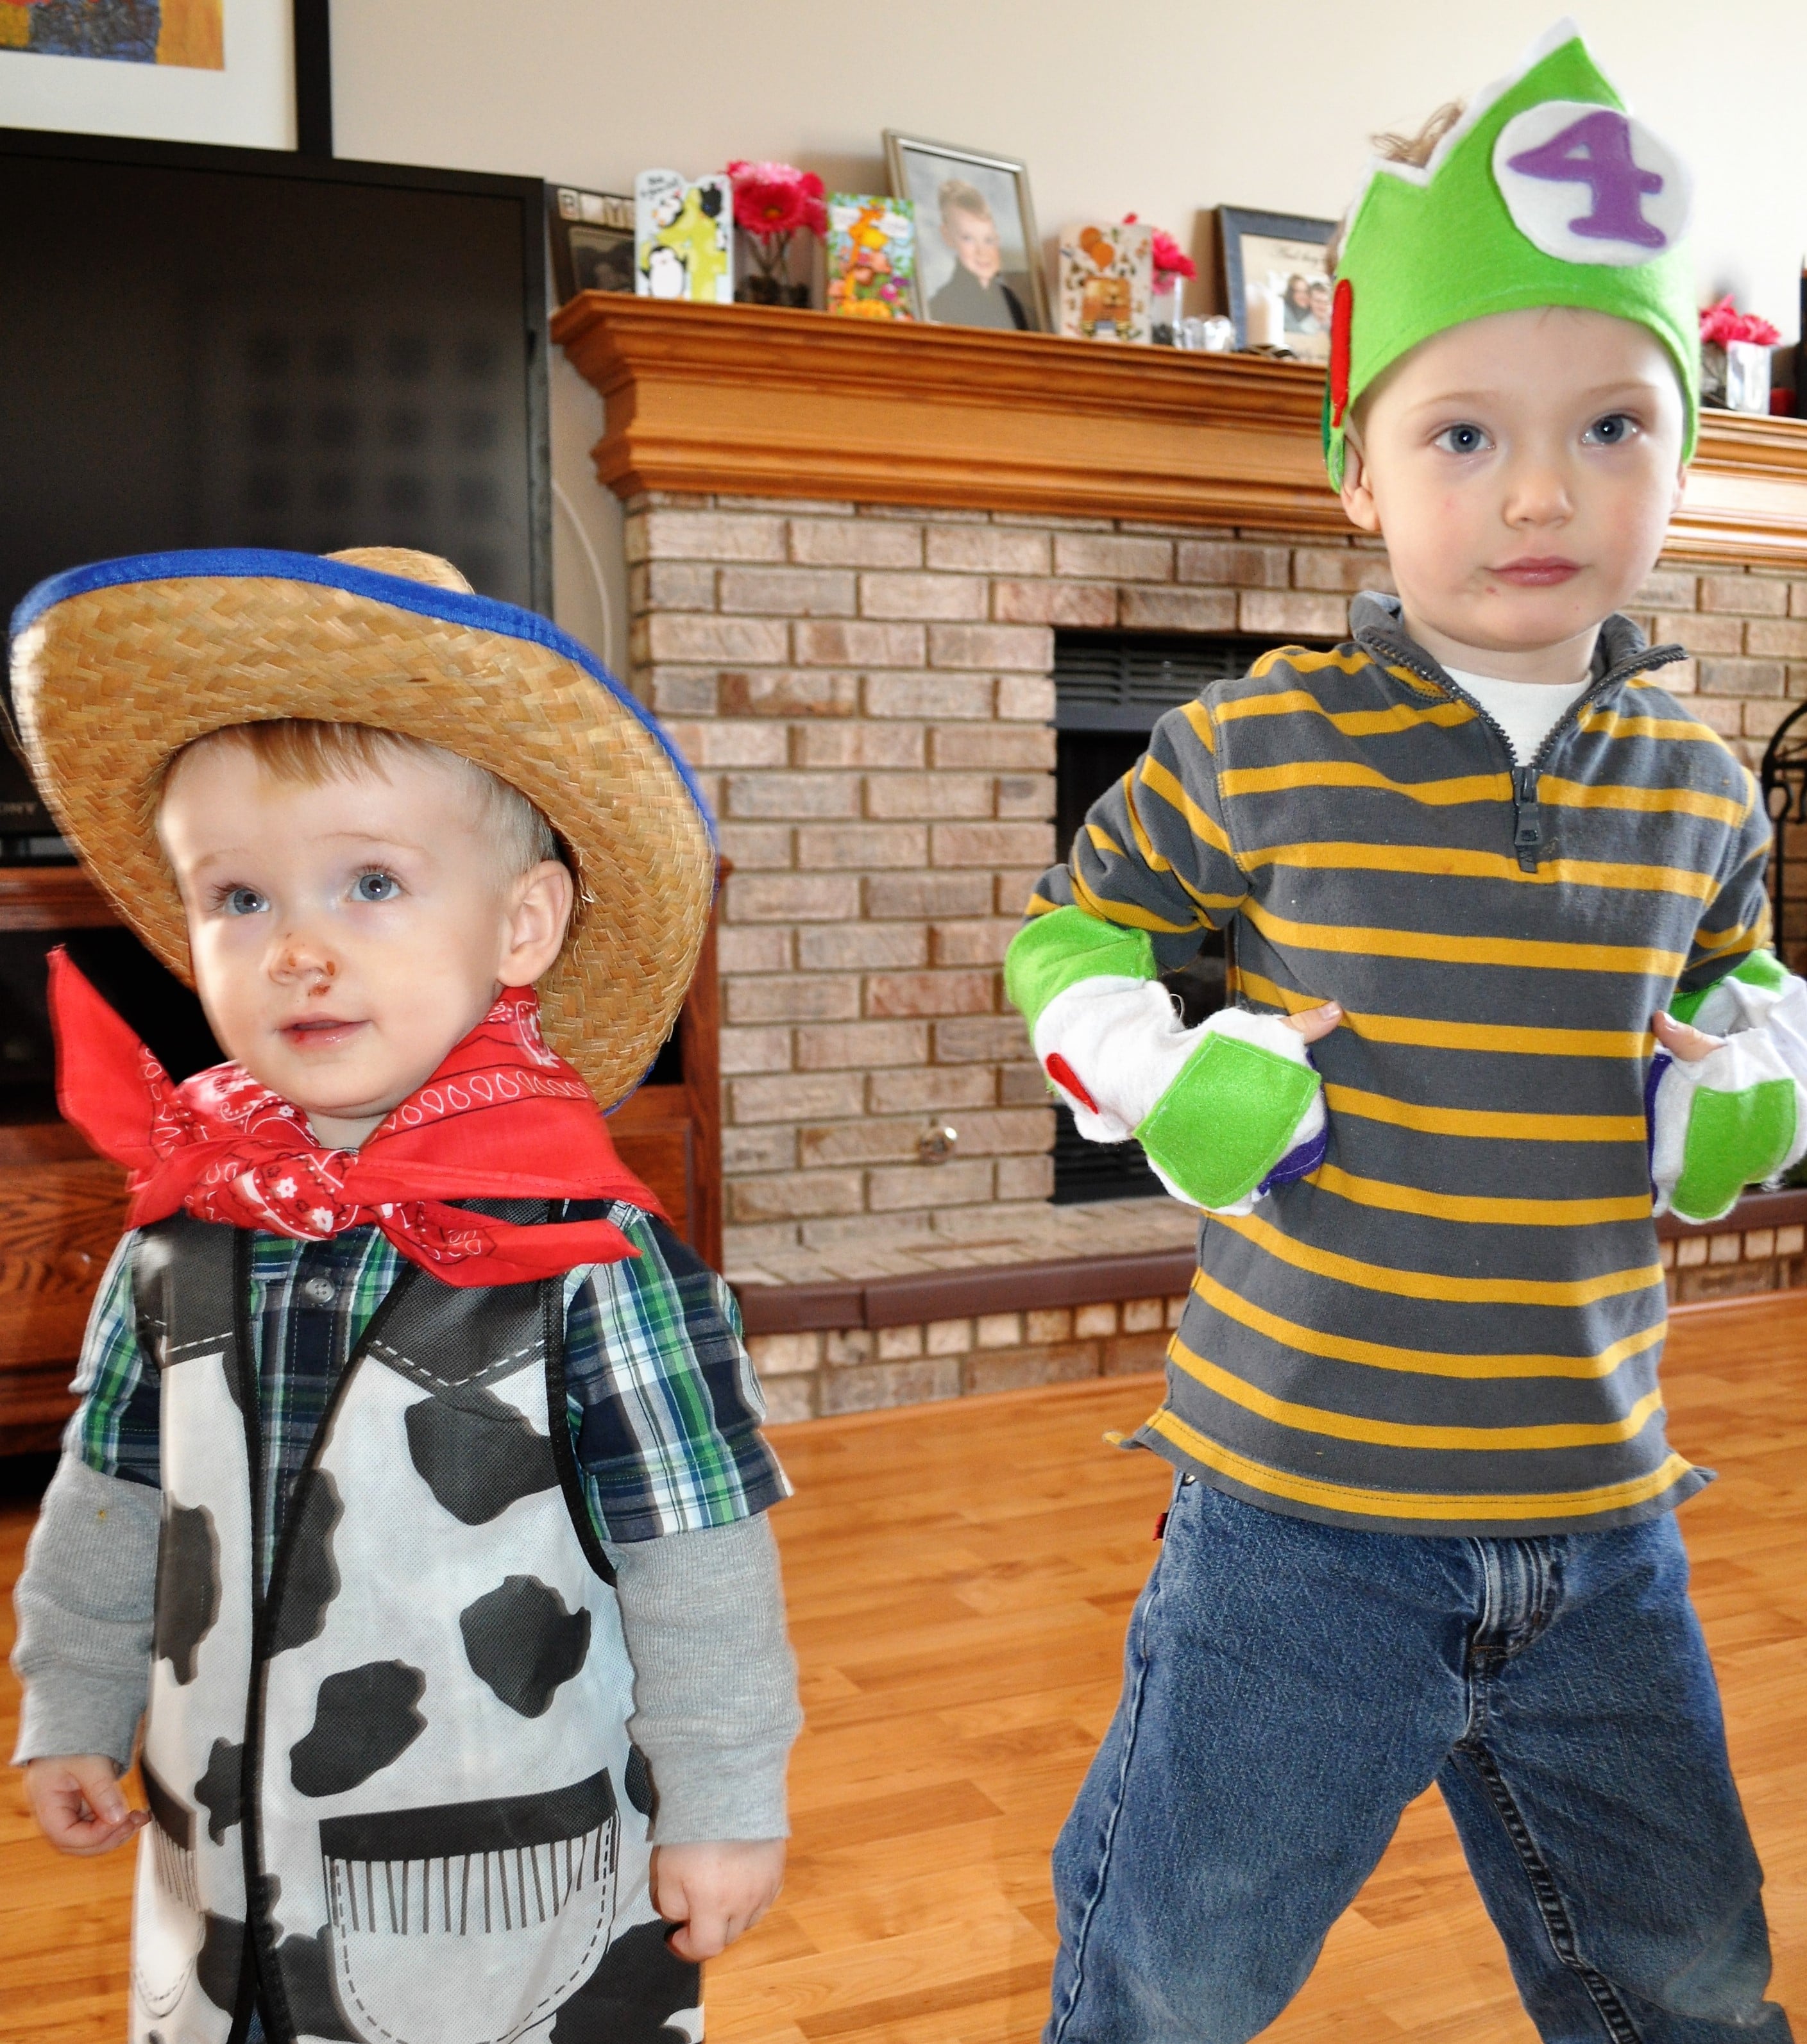
It is no secret that my oldest son loves horses and cowboys, so I was hoping to make a party that was themed for Woody, but while discussing it over with my 3-year-old, he informed me that he wanted a “Buzz” party. This changed things, so on to Pinterest, I went! 🙂
This post may contain affiliated links. See the Disclaimer and Disclosure Page fore details.

Dressing Up for the Toy Story Birthday Party
There were some really cute ideas for Toy Story Birthday Parties on Pinterest from some really amazing moms. One was of a birthday crown from Cutesy Crafts. She had a tutorial for both a pink crown and a blue crown. She wanted you to buy her pattern, but I didn’t want to spend the money. Birthday parties cost enough, so I didn’t want to add to that cost.
I took some notes from what she did say about her crown and made my own. I also made one that looks like it was made for Buzz Lightyear, which I also found on Pinterest. That lead me to Etsy, where they were selling the crown. That crown was made by The Lazy Owl. I used the picture of the Buzz crown and my makeshift tutorial to make one of each. You can find my tutorial for these crowns on my Birthday Crowns page.
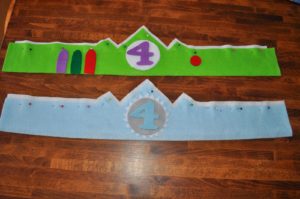
(This picture was before I sewed, so there aren’t any pins in it now!)
I also made my son some Buzz Lightyear sleeves that I first saw on Pinterest , but I have to say that I was a bit uneasy about it, since there wasn’t a straight-lined tutorial. Meaning, I had to wing it. I didn’t think I could pull it off. It took a couple of alterations until I got it right, but I think it turned out great! I’m so thankful, but what would a Toy Story Birthday be without a decent Buzz Lightyear!?!

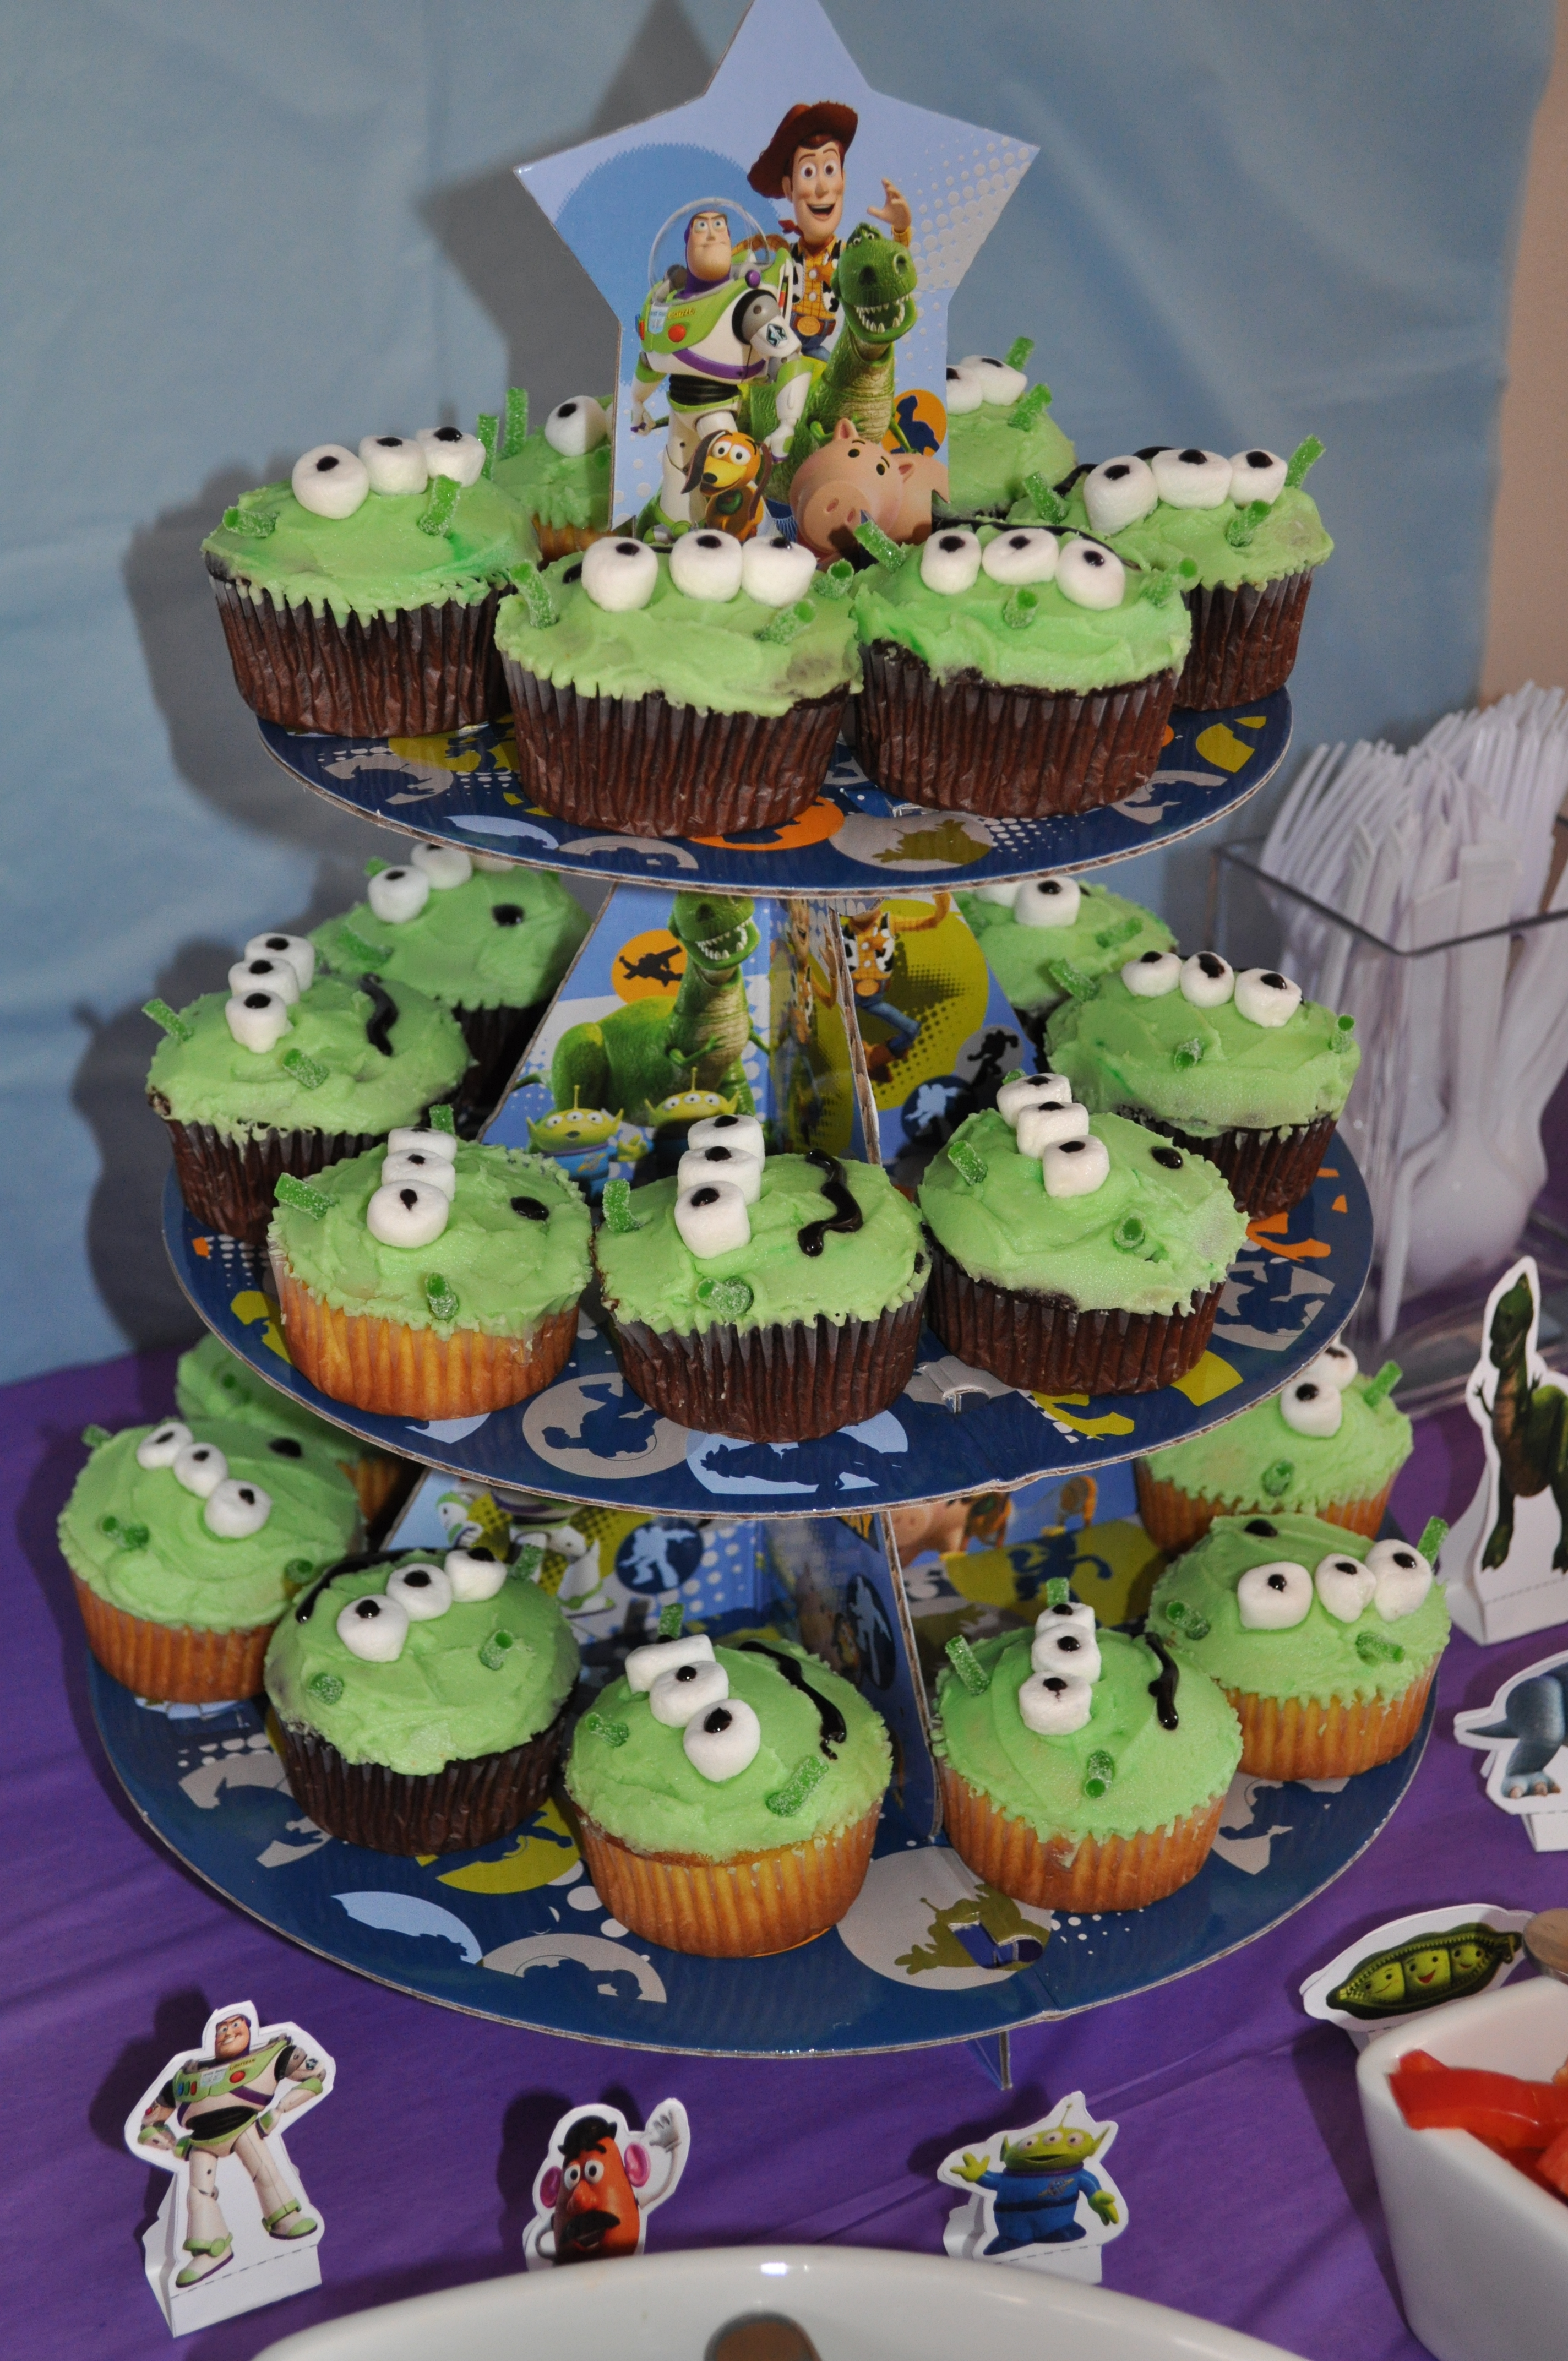
Toy Story Alien Cupcakes
I also went to disney.com, which has a link on the bottom of their homepage to Spoonful, which is an awesome site for snacks and crafts,etc. that have a Disney theme. This is where I got the idea to make the Green Alien Cupcakes,
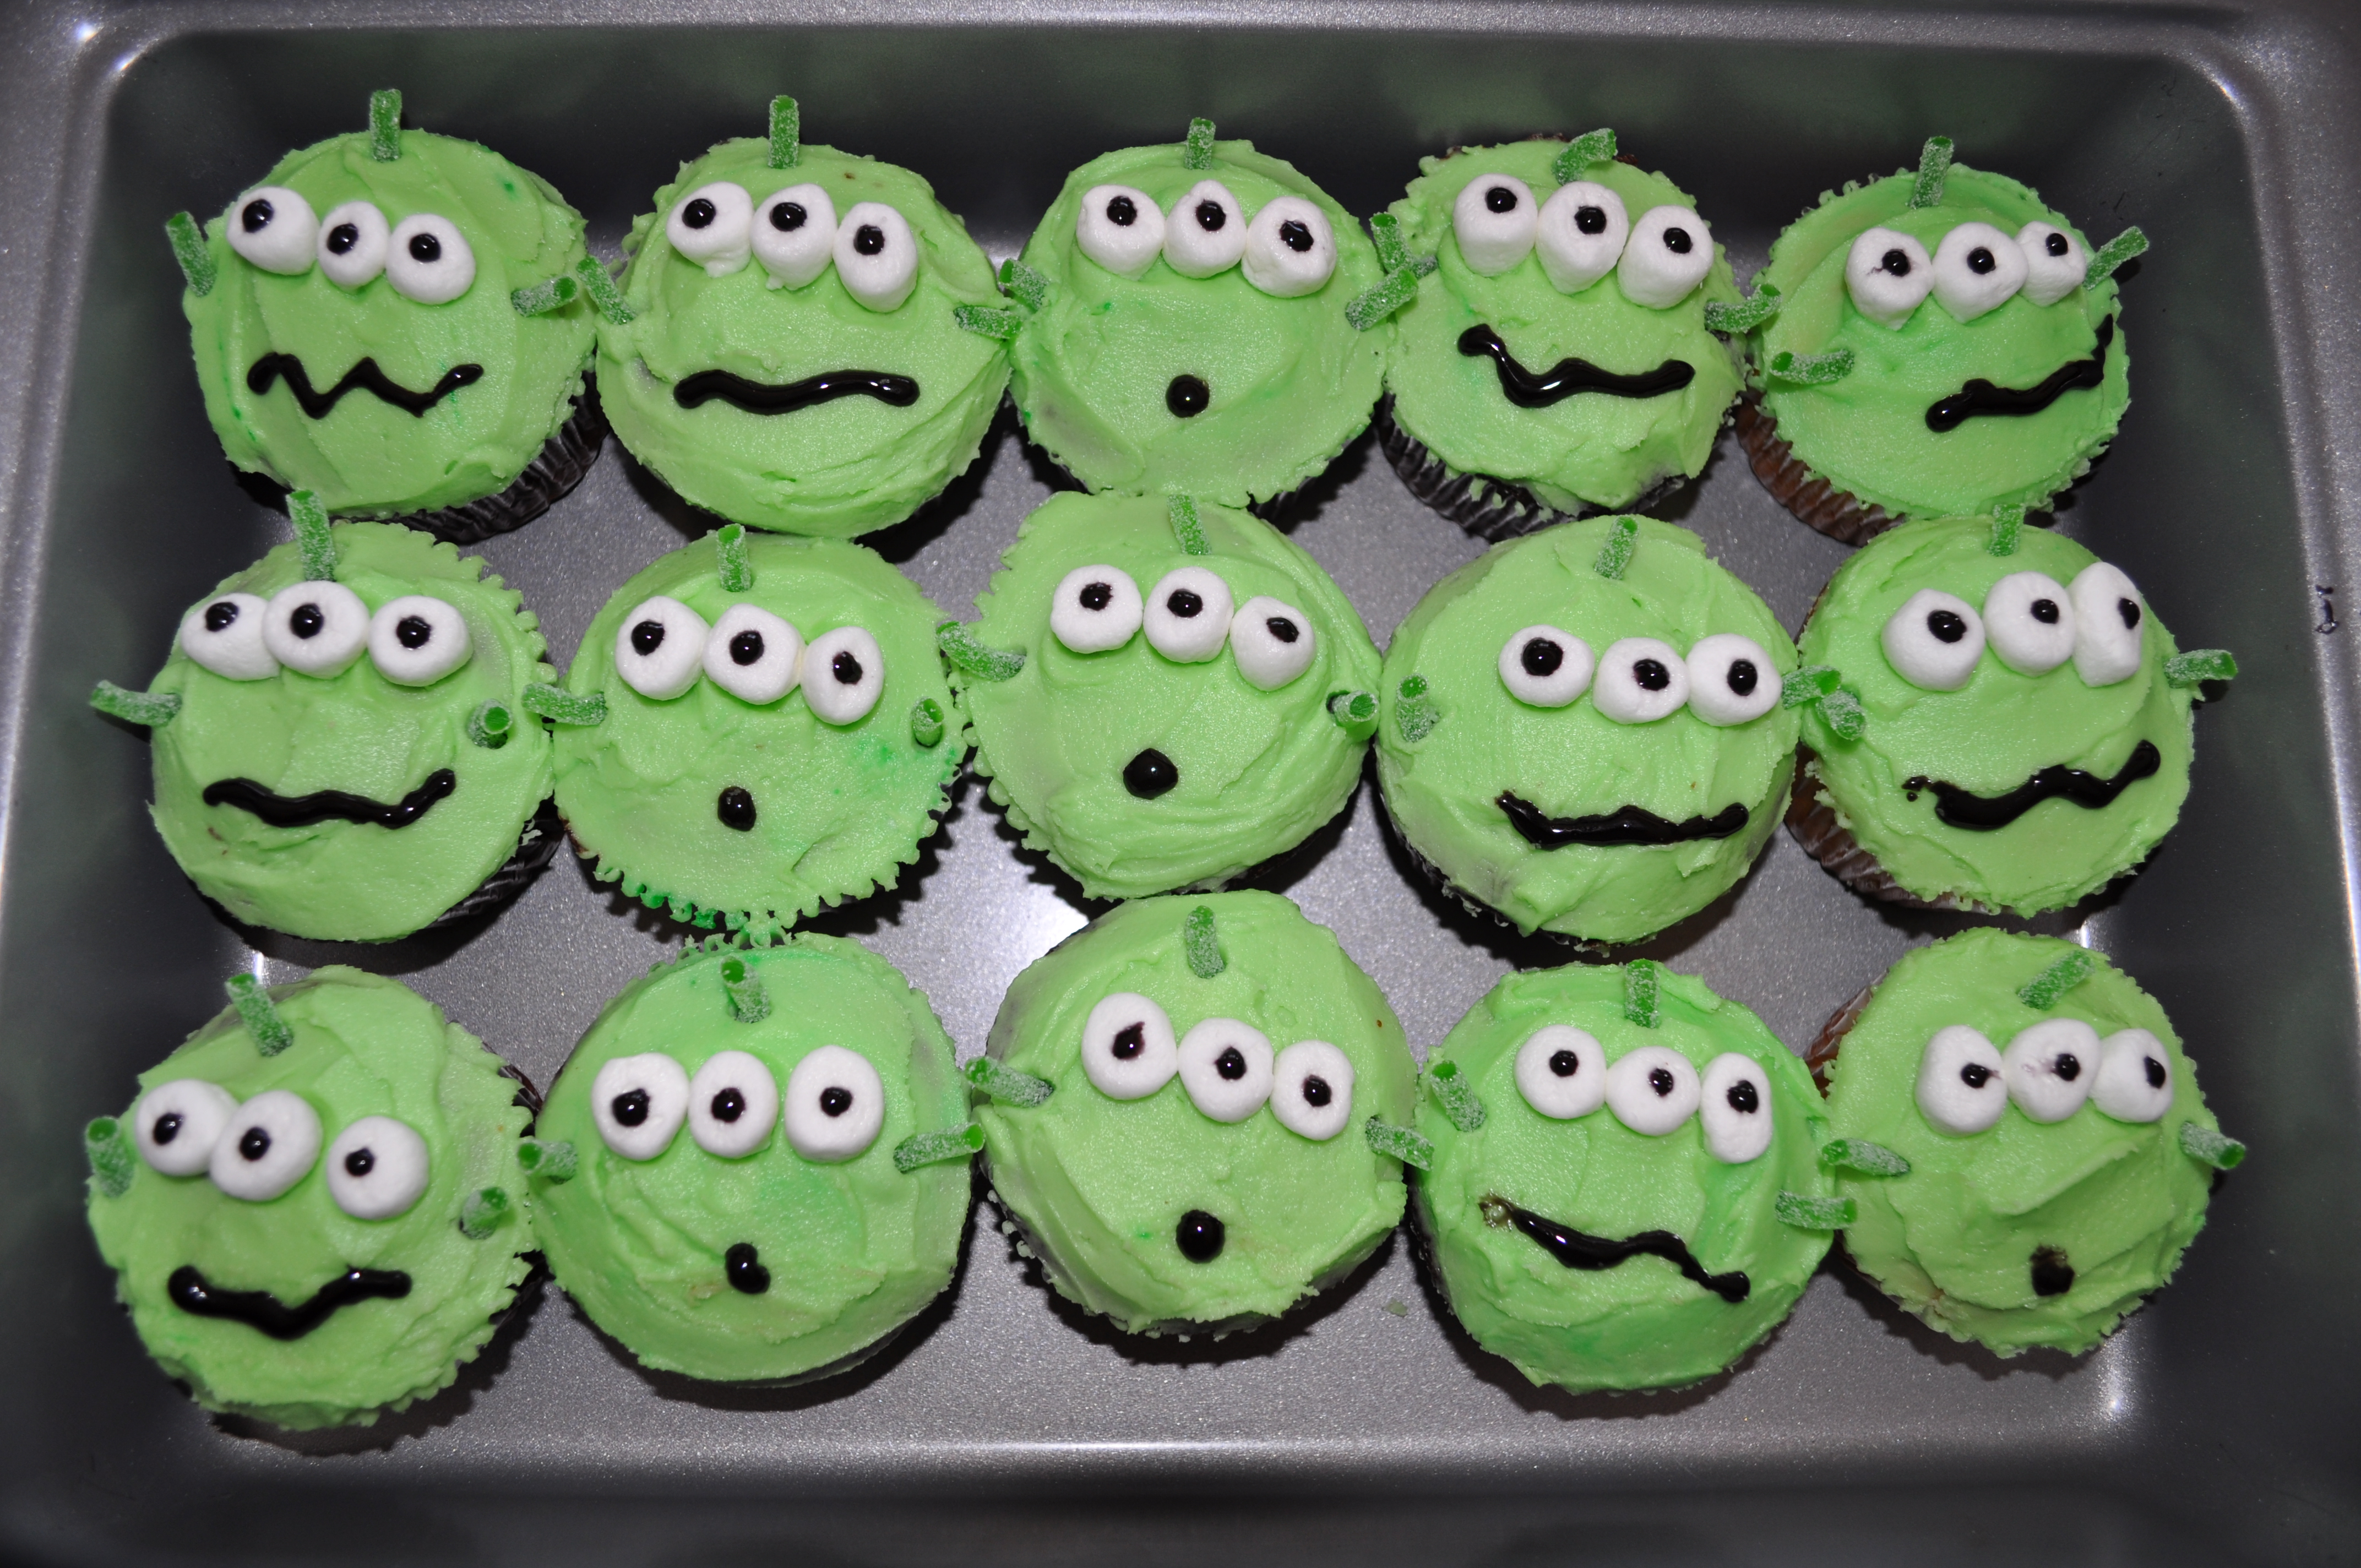
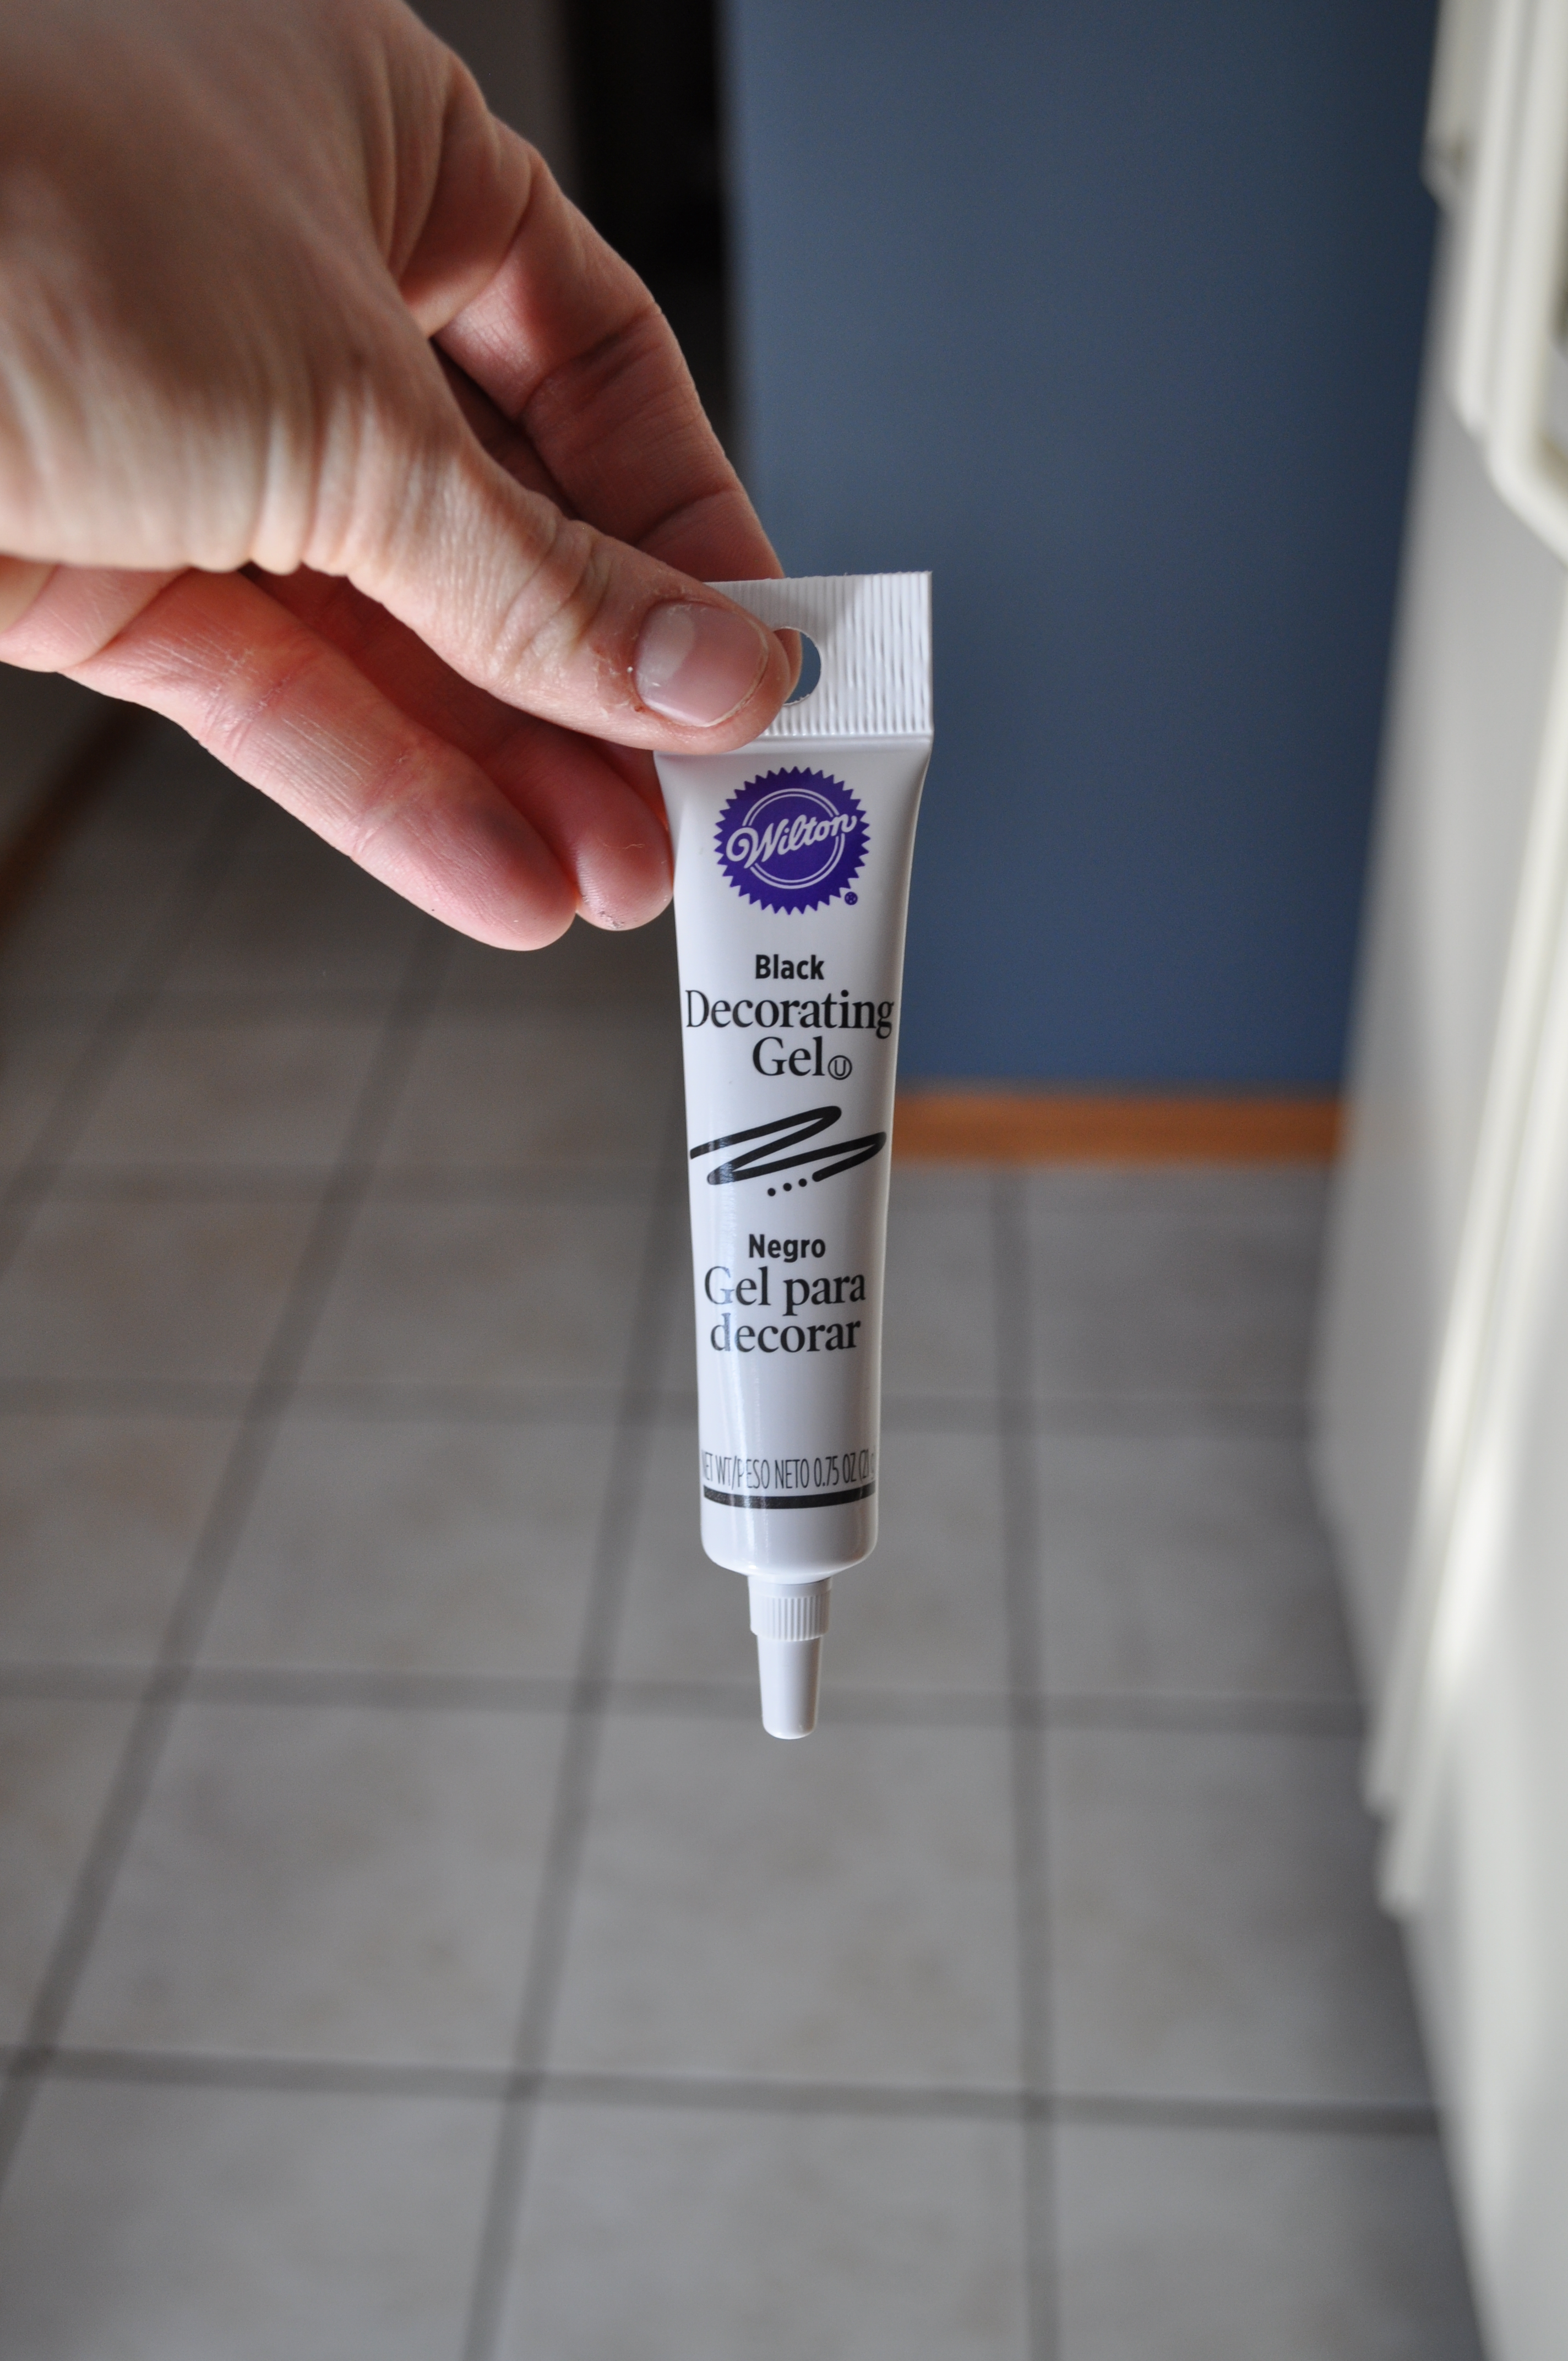
but I choose to use mini marshmallows instead of mint candies; I bought a small tube of black icing from Michaels for the accents.
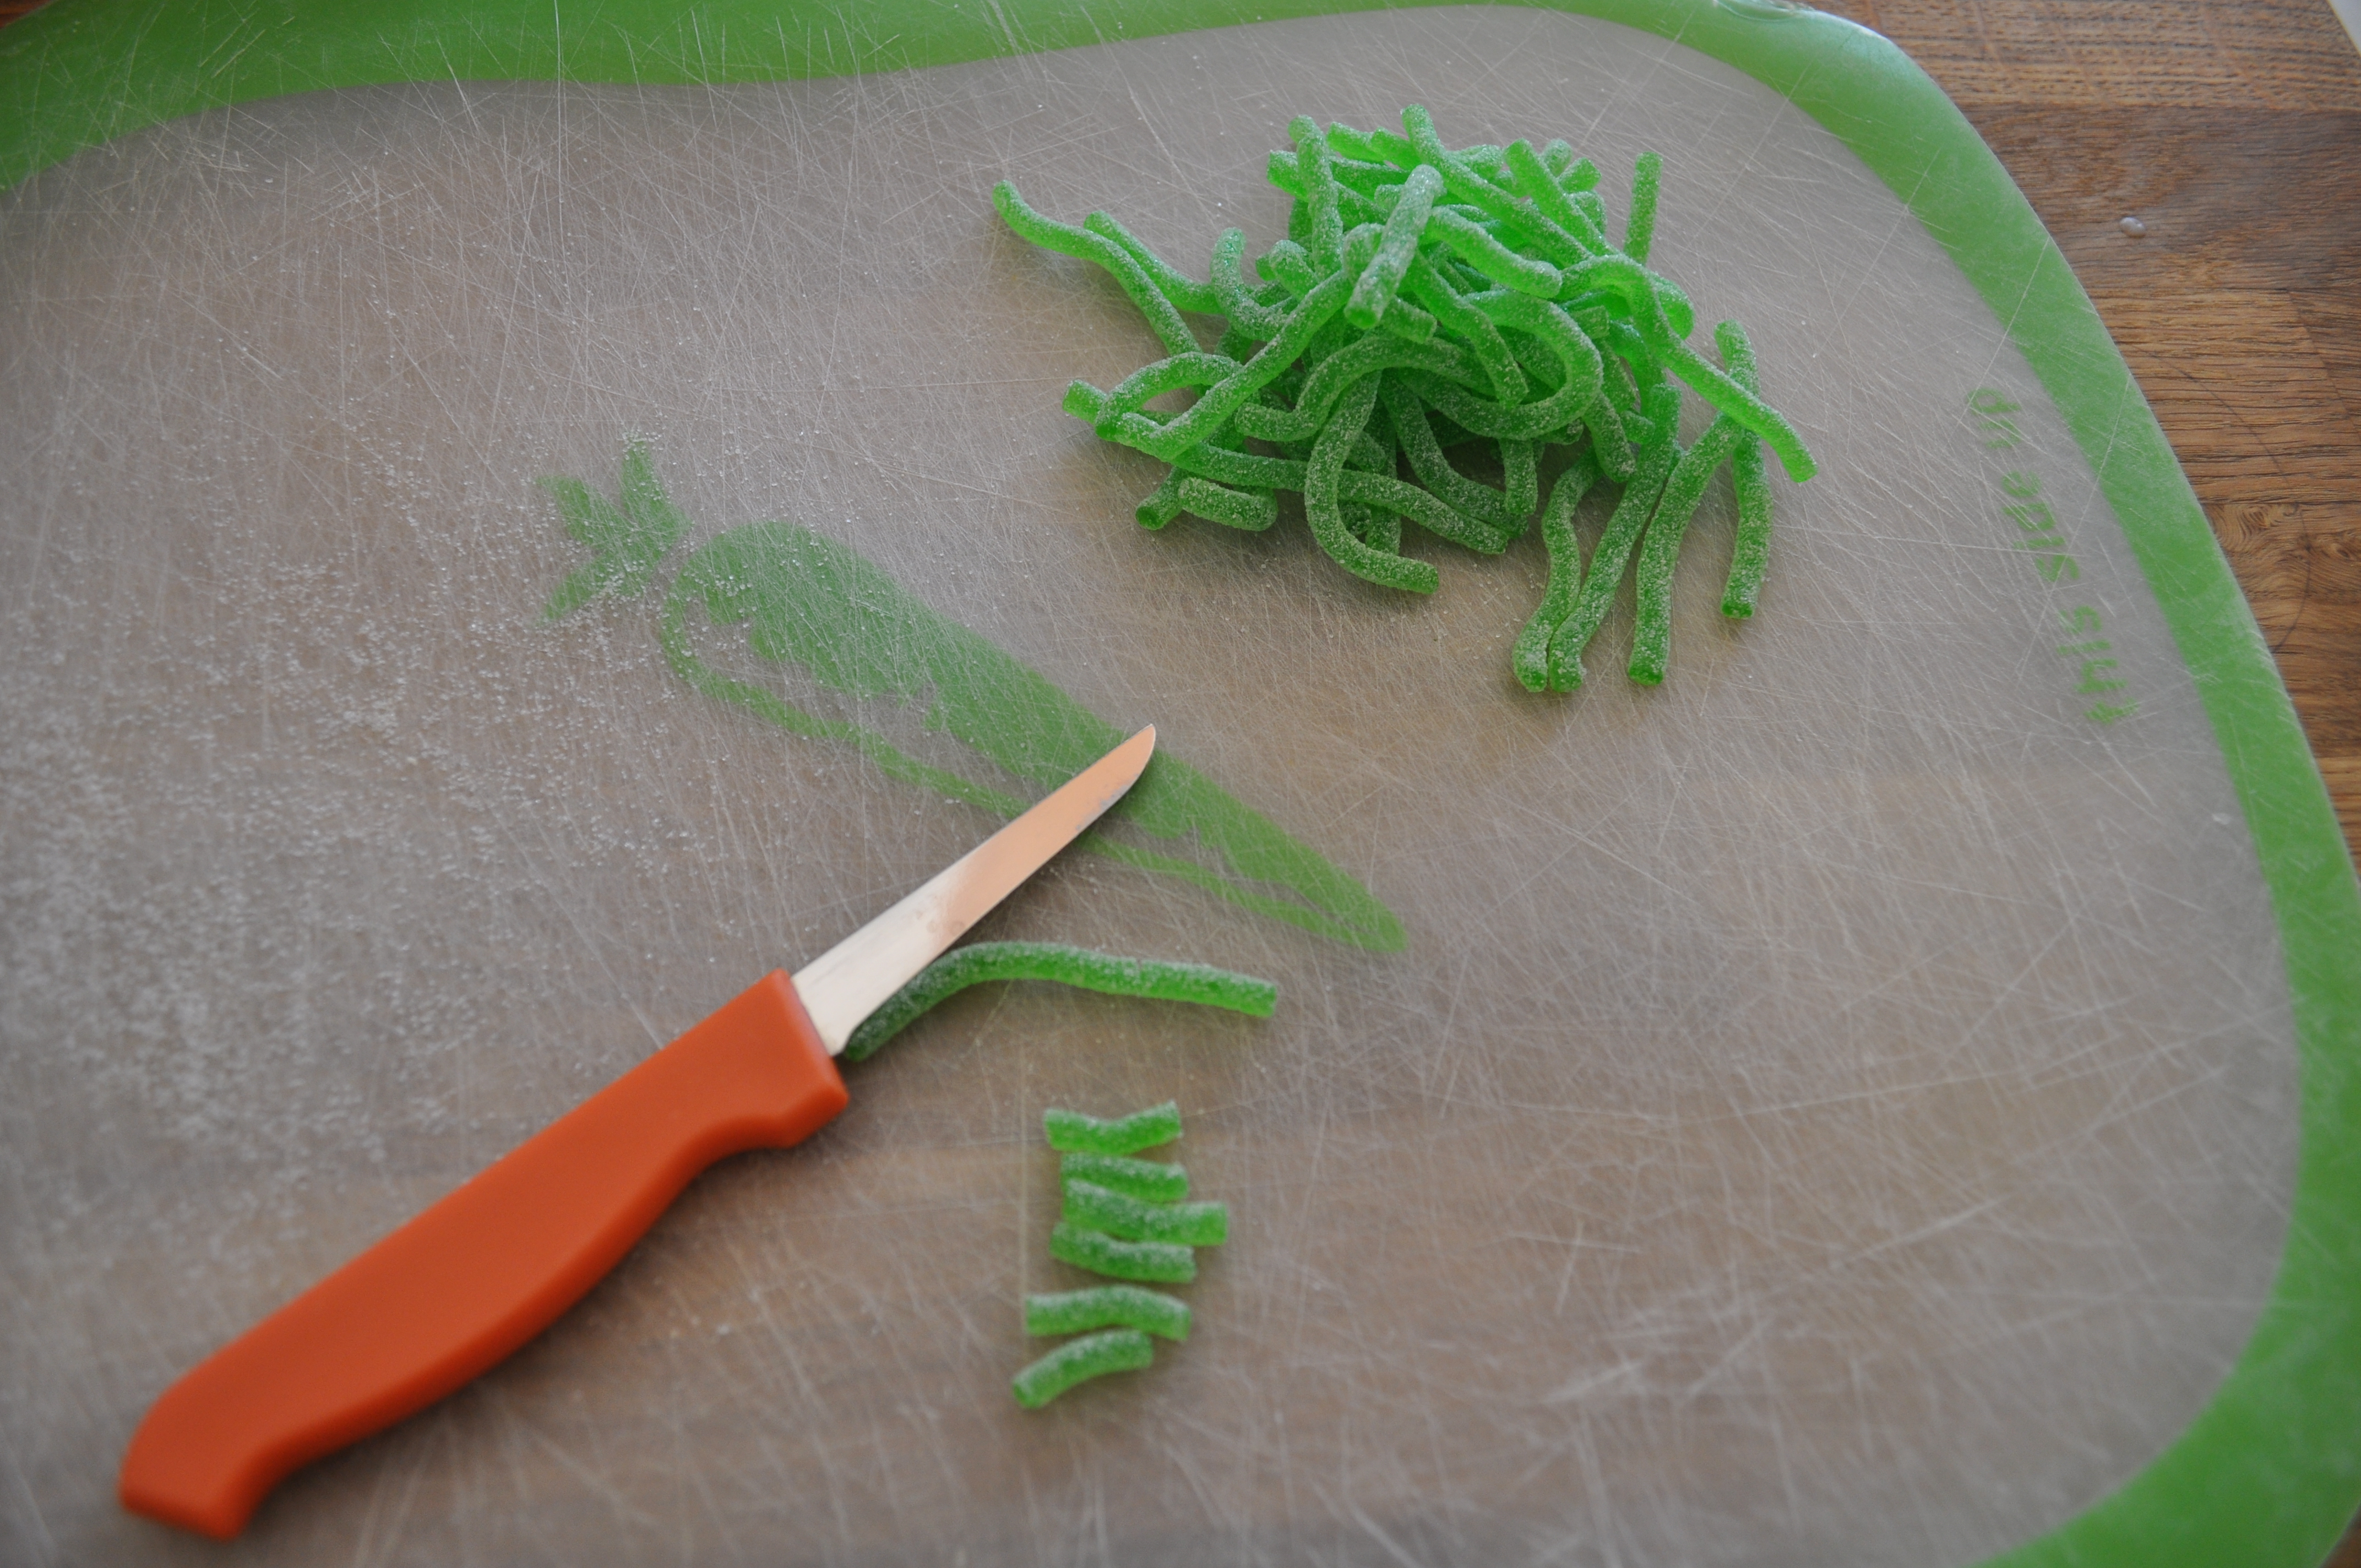
My mom made the icing from things she had at home (powdered sugar, crisco, etc.), so I didn’t have to buy any. She also had some yellow and green food coloring that I used to make the shade of green that I needed for the aliens. I wanted it to be super easy without having to buy lots of extra stuff. We always seem to have marshmallows! Because it is always appreciated at my house (by my husband), I bought some gummy spaghetti and cut small pieces of the green to make the antenna and ears for the aliens.:)

I wasn’t sure how to display them, so I looked online for a cupcake holder. I thought that if I could find a generic one, I could use it more often, since I liked the idea of using cupcakes for the “friend” parties. I didn’t find anything that caught my eye, and when I found a cardboard Toy Story cupcake holder, they wanted an arm and a leg for them. No thanks!
It was by chance and fate that I found one on clearance at Walmart. When I mean one, I mean one. That was all they had left. It was $4.50, which didn’t quite seem like a clearance price to me, but I really wanted it! It was mine, and it was a solution to my “where to put the cupcakes” issue.
Buzz Lightyear Cake
For the family party, my mom made a sheet cake that is really two regular-sized cakes (one chocolate and one vanilla) side by side and covered with white icing. She also put a cute trim around the edges of the cake.
I then found a picture of Buzz online that I printed off and cut out. I used a toothpick to trace the shape of the outside shape, and then I would cut and trace different parts of the design.
I kept the original picture to know which colors of icing I would need and just used the 4 basic colors you get in a food coloring kit to make the colors I needed. In order to get the lime green looking color, I added just a smidge of yellow to green. I also used cocoa powder to make the tan.
I was happy that we had this laying around, since we don’t normally have it in our pantry. In order for his nose and chin “curl” to stand out, I just added a bit more cocoa to that icing. If I made a mistake, I used a toothpick to remove that part of the icing from the cake. I have to say that I am really happy with the way it turned out, and my son loved it! 🙂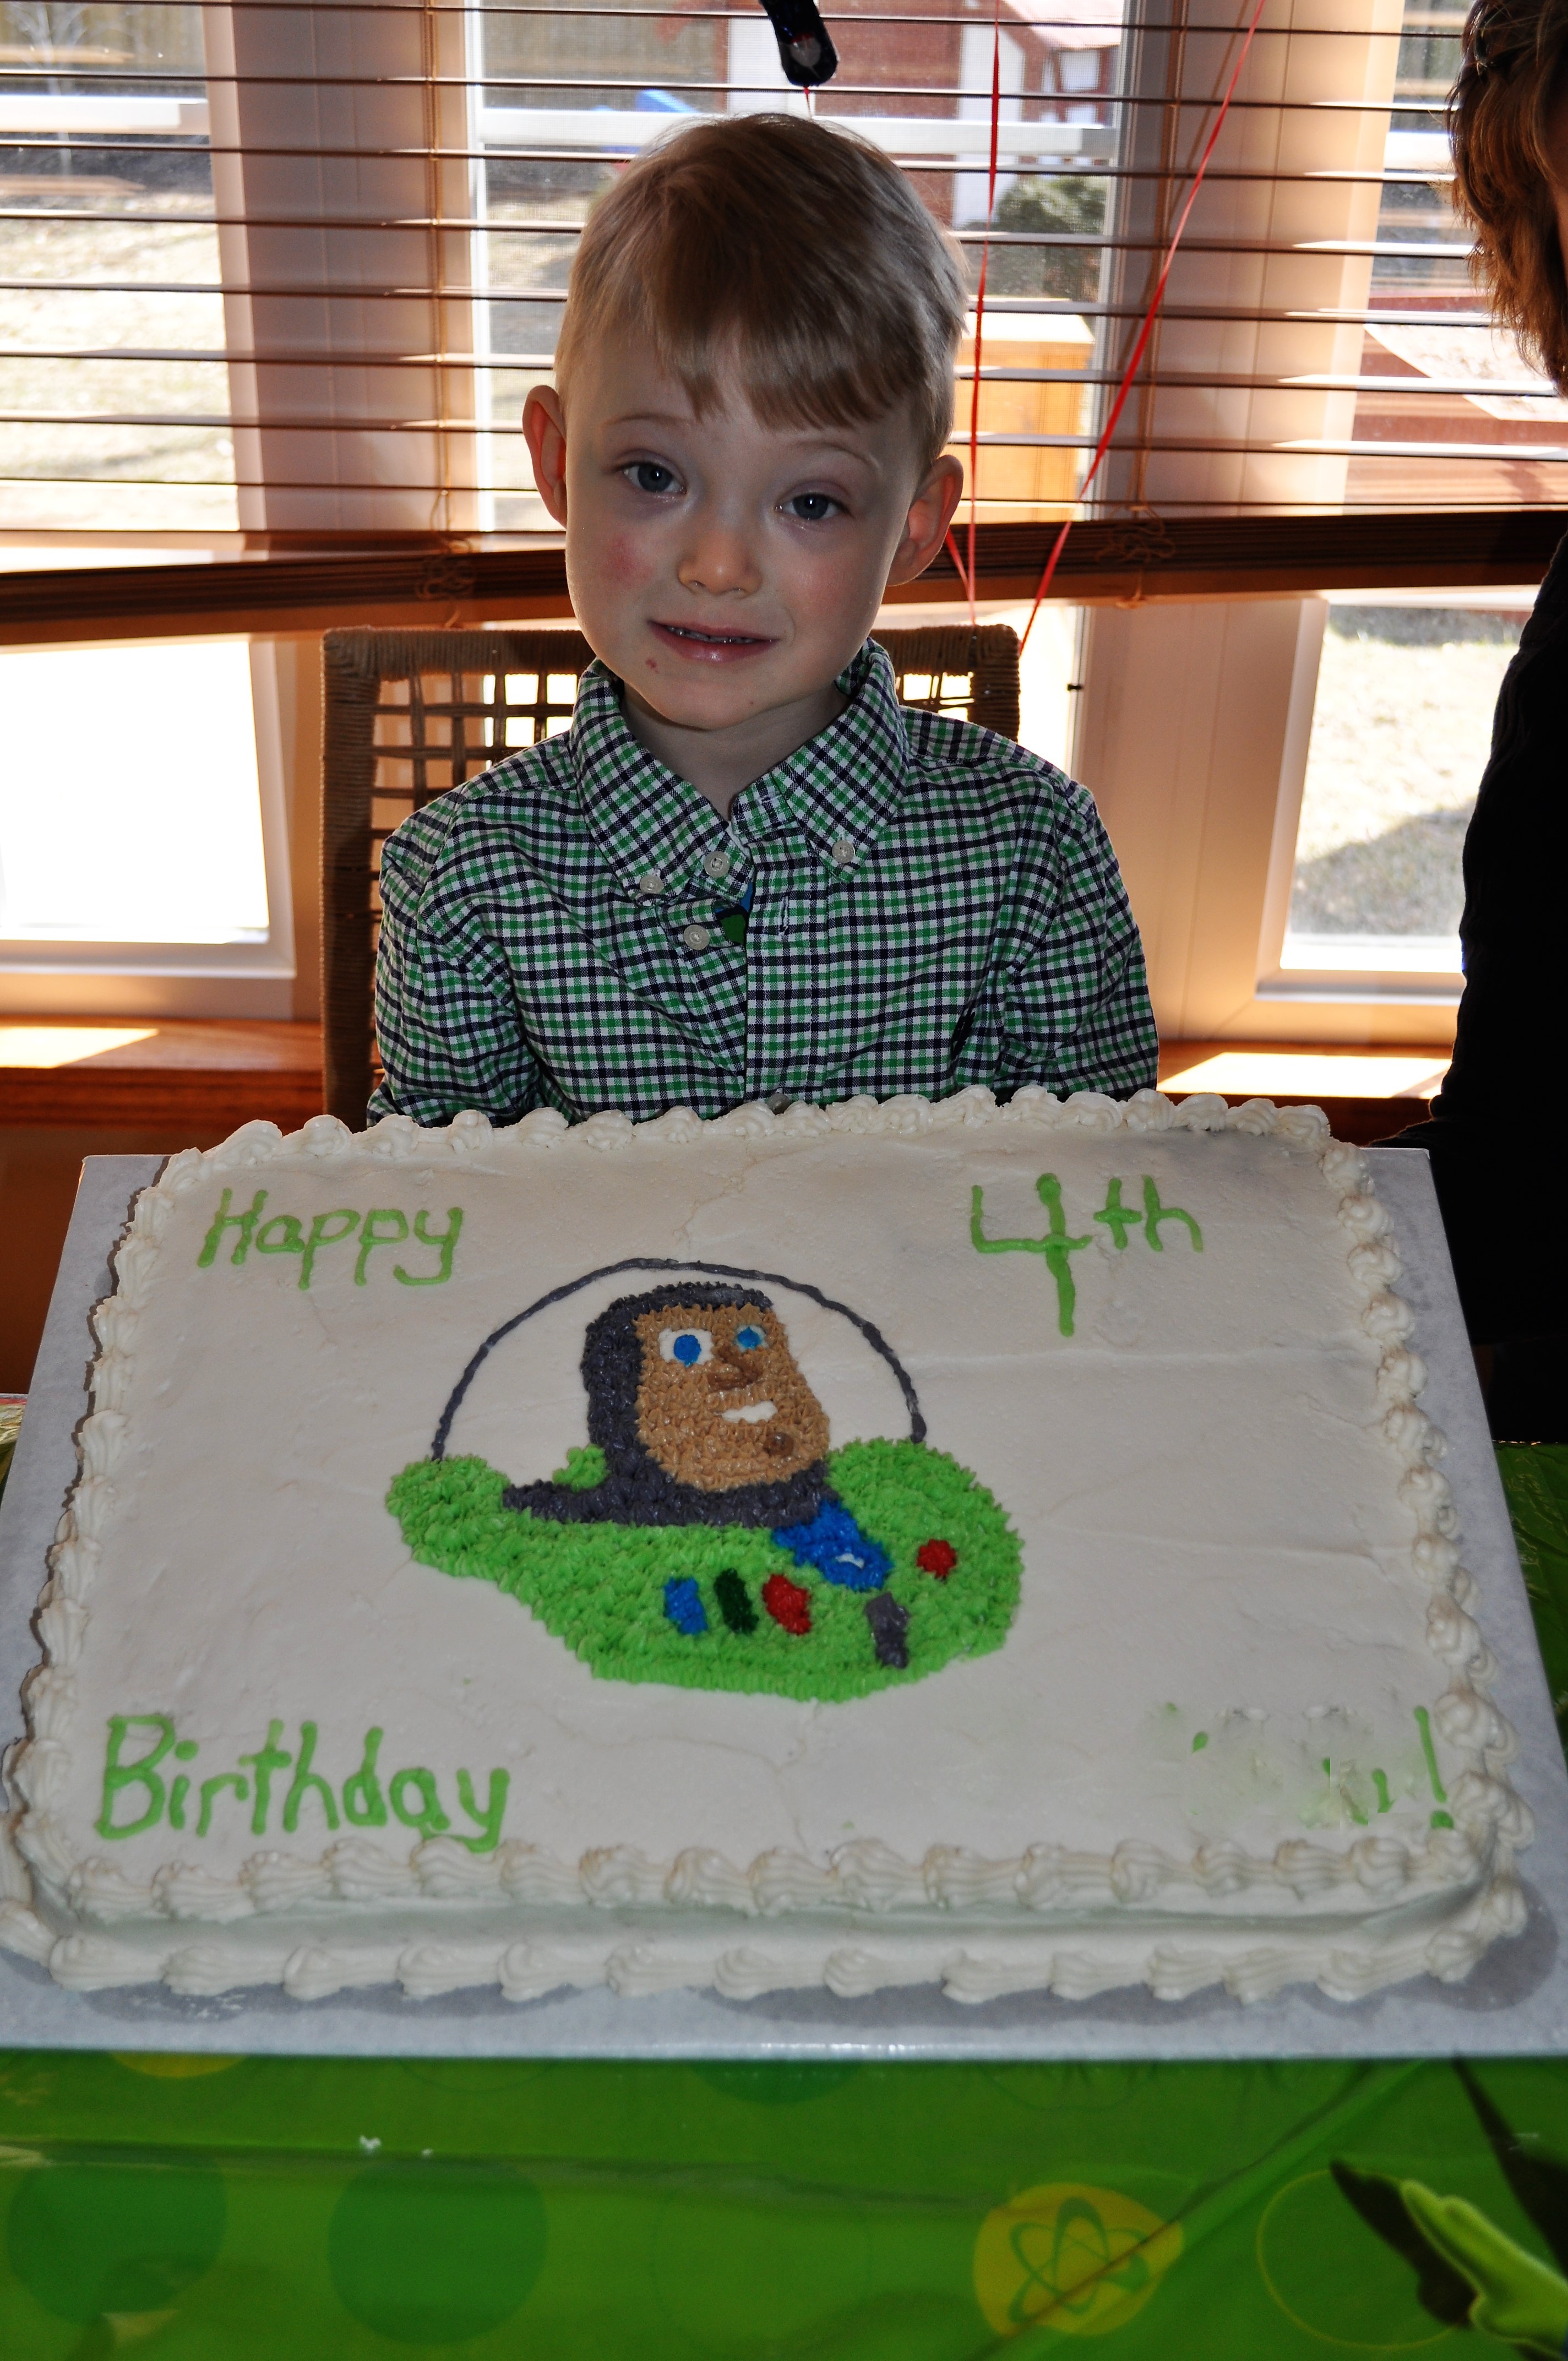
Toy Story Food
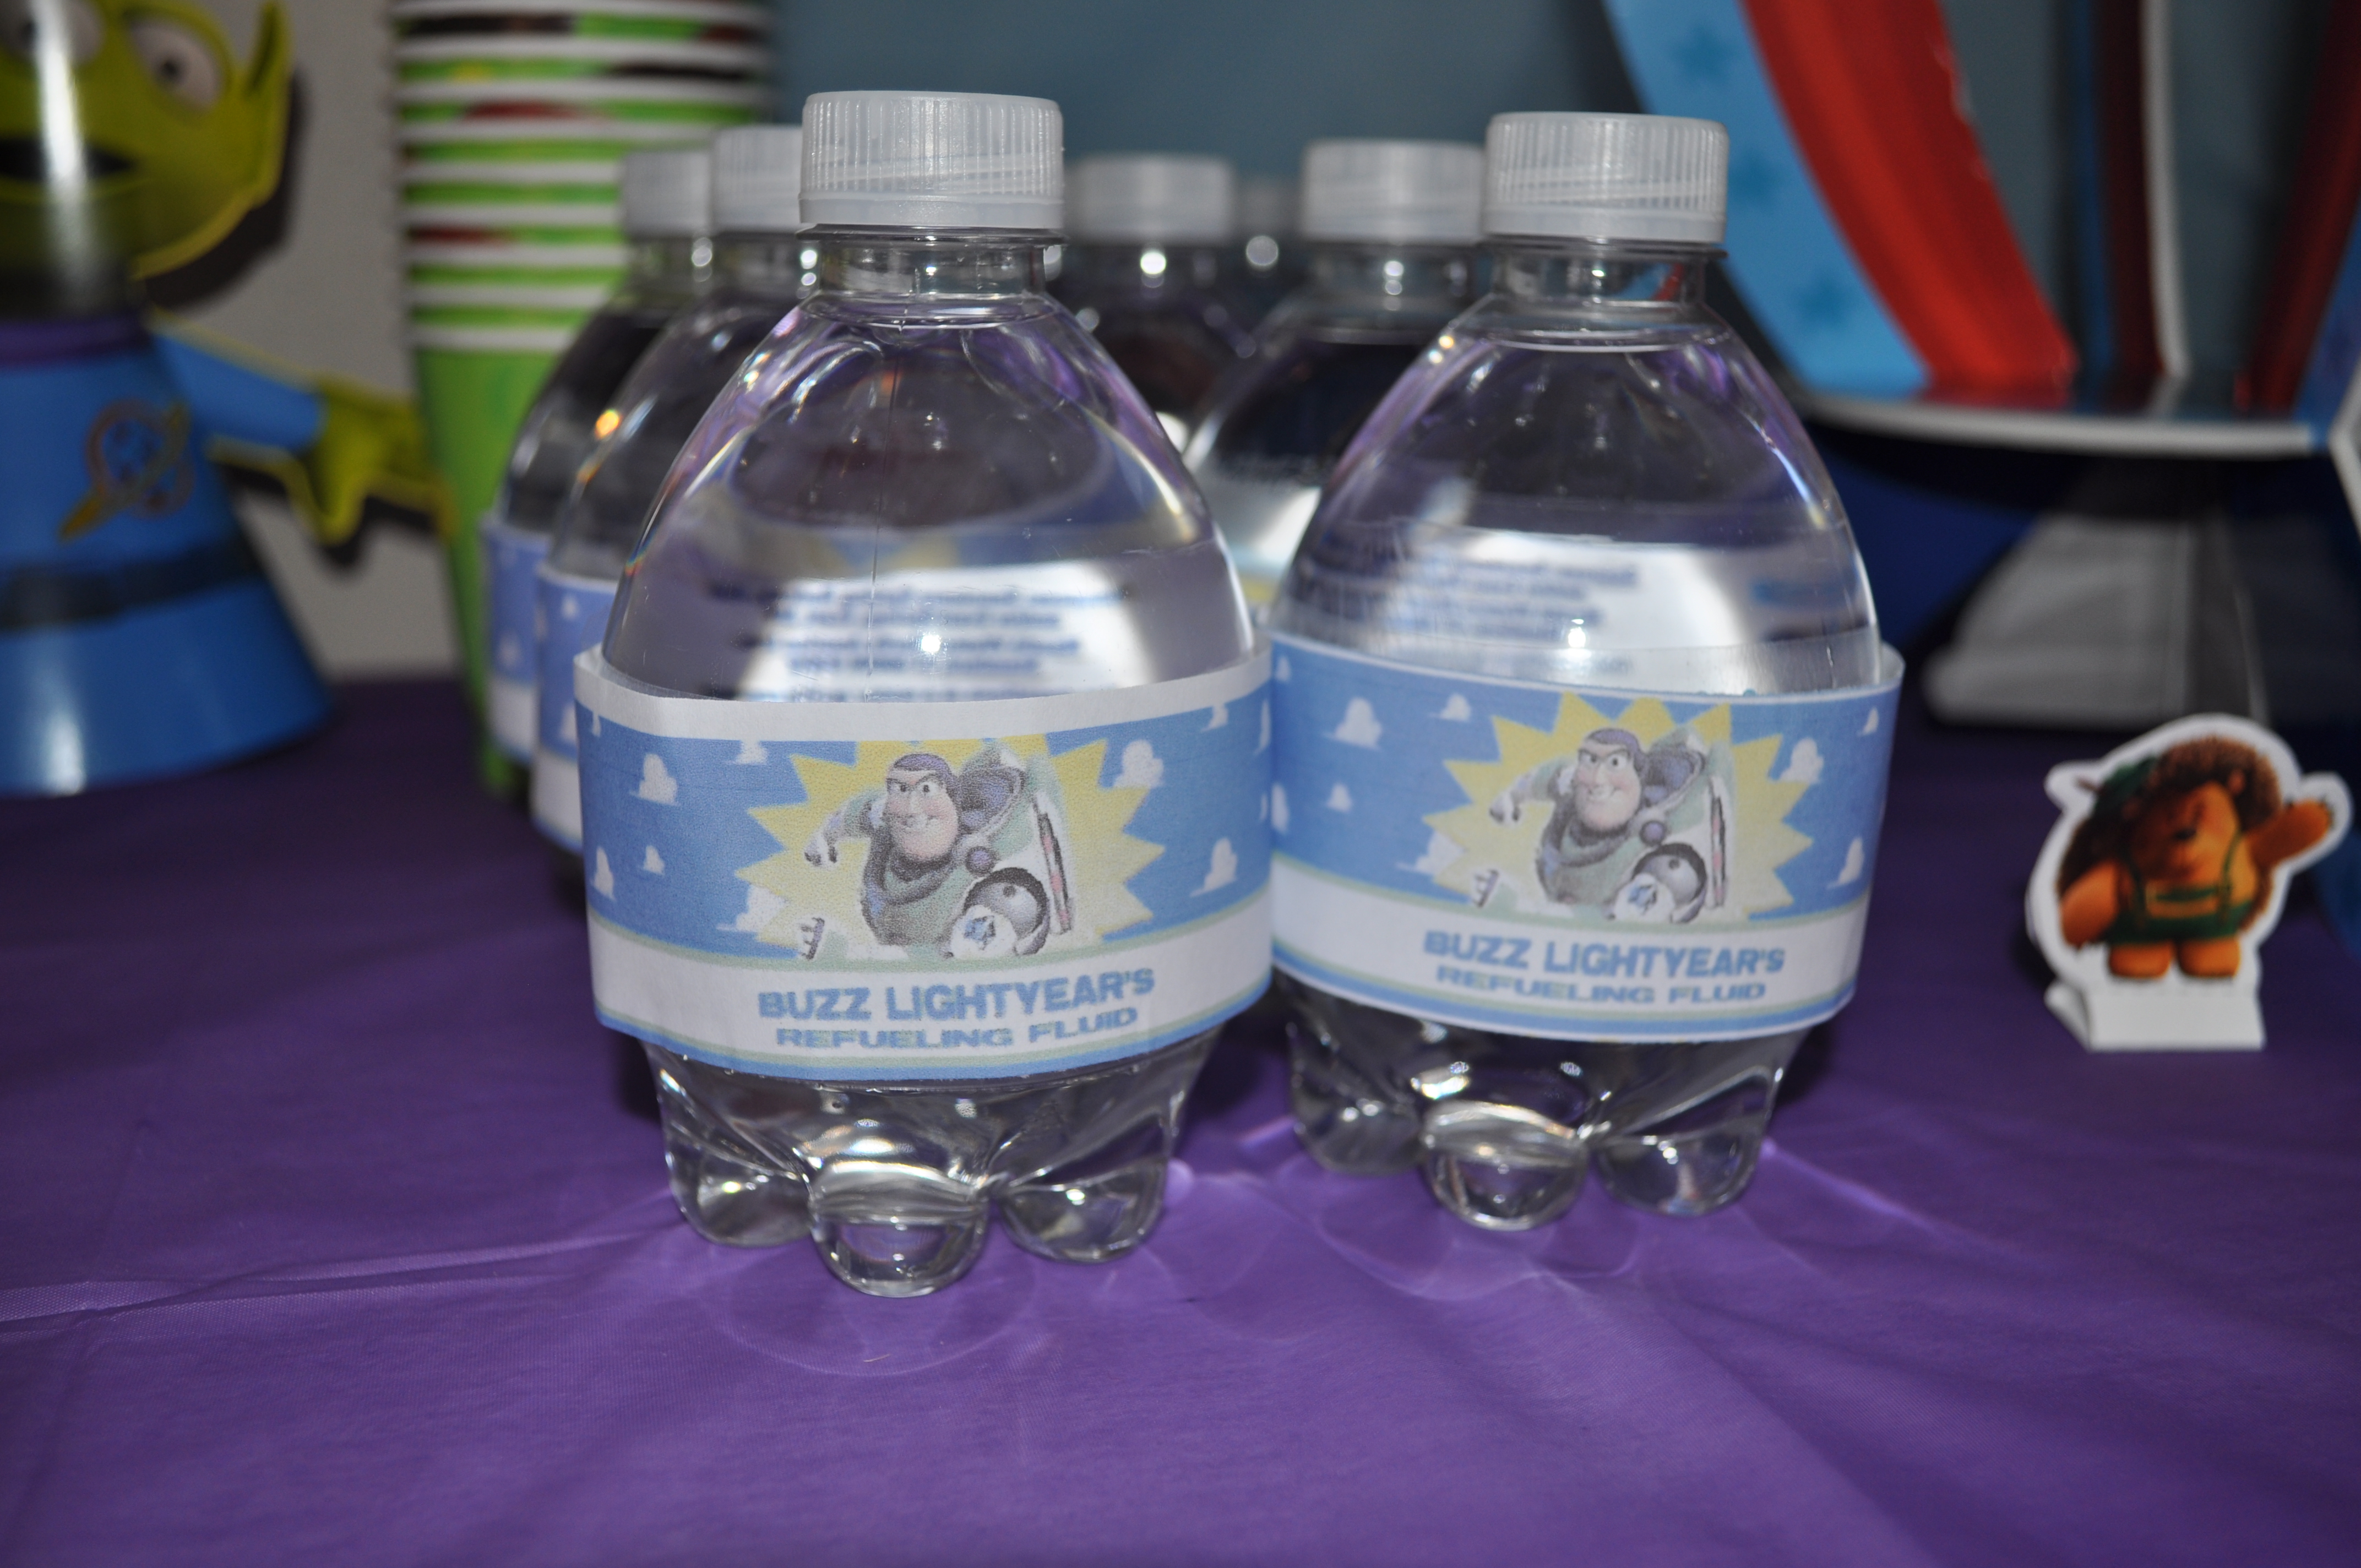
I found water bottle labels at Design Dazzle, as well as, Etch-A-Scetch printables. I didn’t end up using the Etch-A-Scetch printables, but I did have small water bottles that I used the labels on. It was great! 🙂
I really wanted to make stars out of fruit, just as it was on Spoonful.com, but I just didn’t have the time. Instead, I bought a big container of green grapes. I also had pretzels, veggies (red peppers, carrots, tomatoes, cucumbers), hummus, cheese (muenster and mozzarella) and crackers for the snack. The party was from 3-5pm, so I didn’t expect them to get a meal out of this, but at least, their snack was healthy.
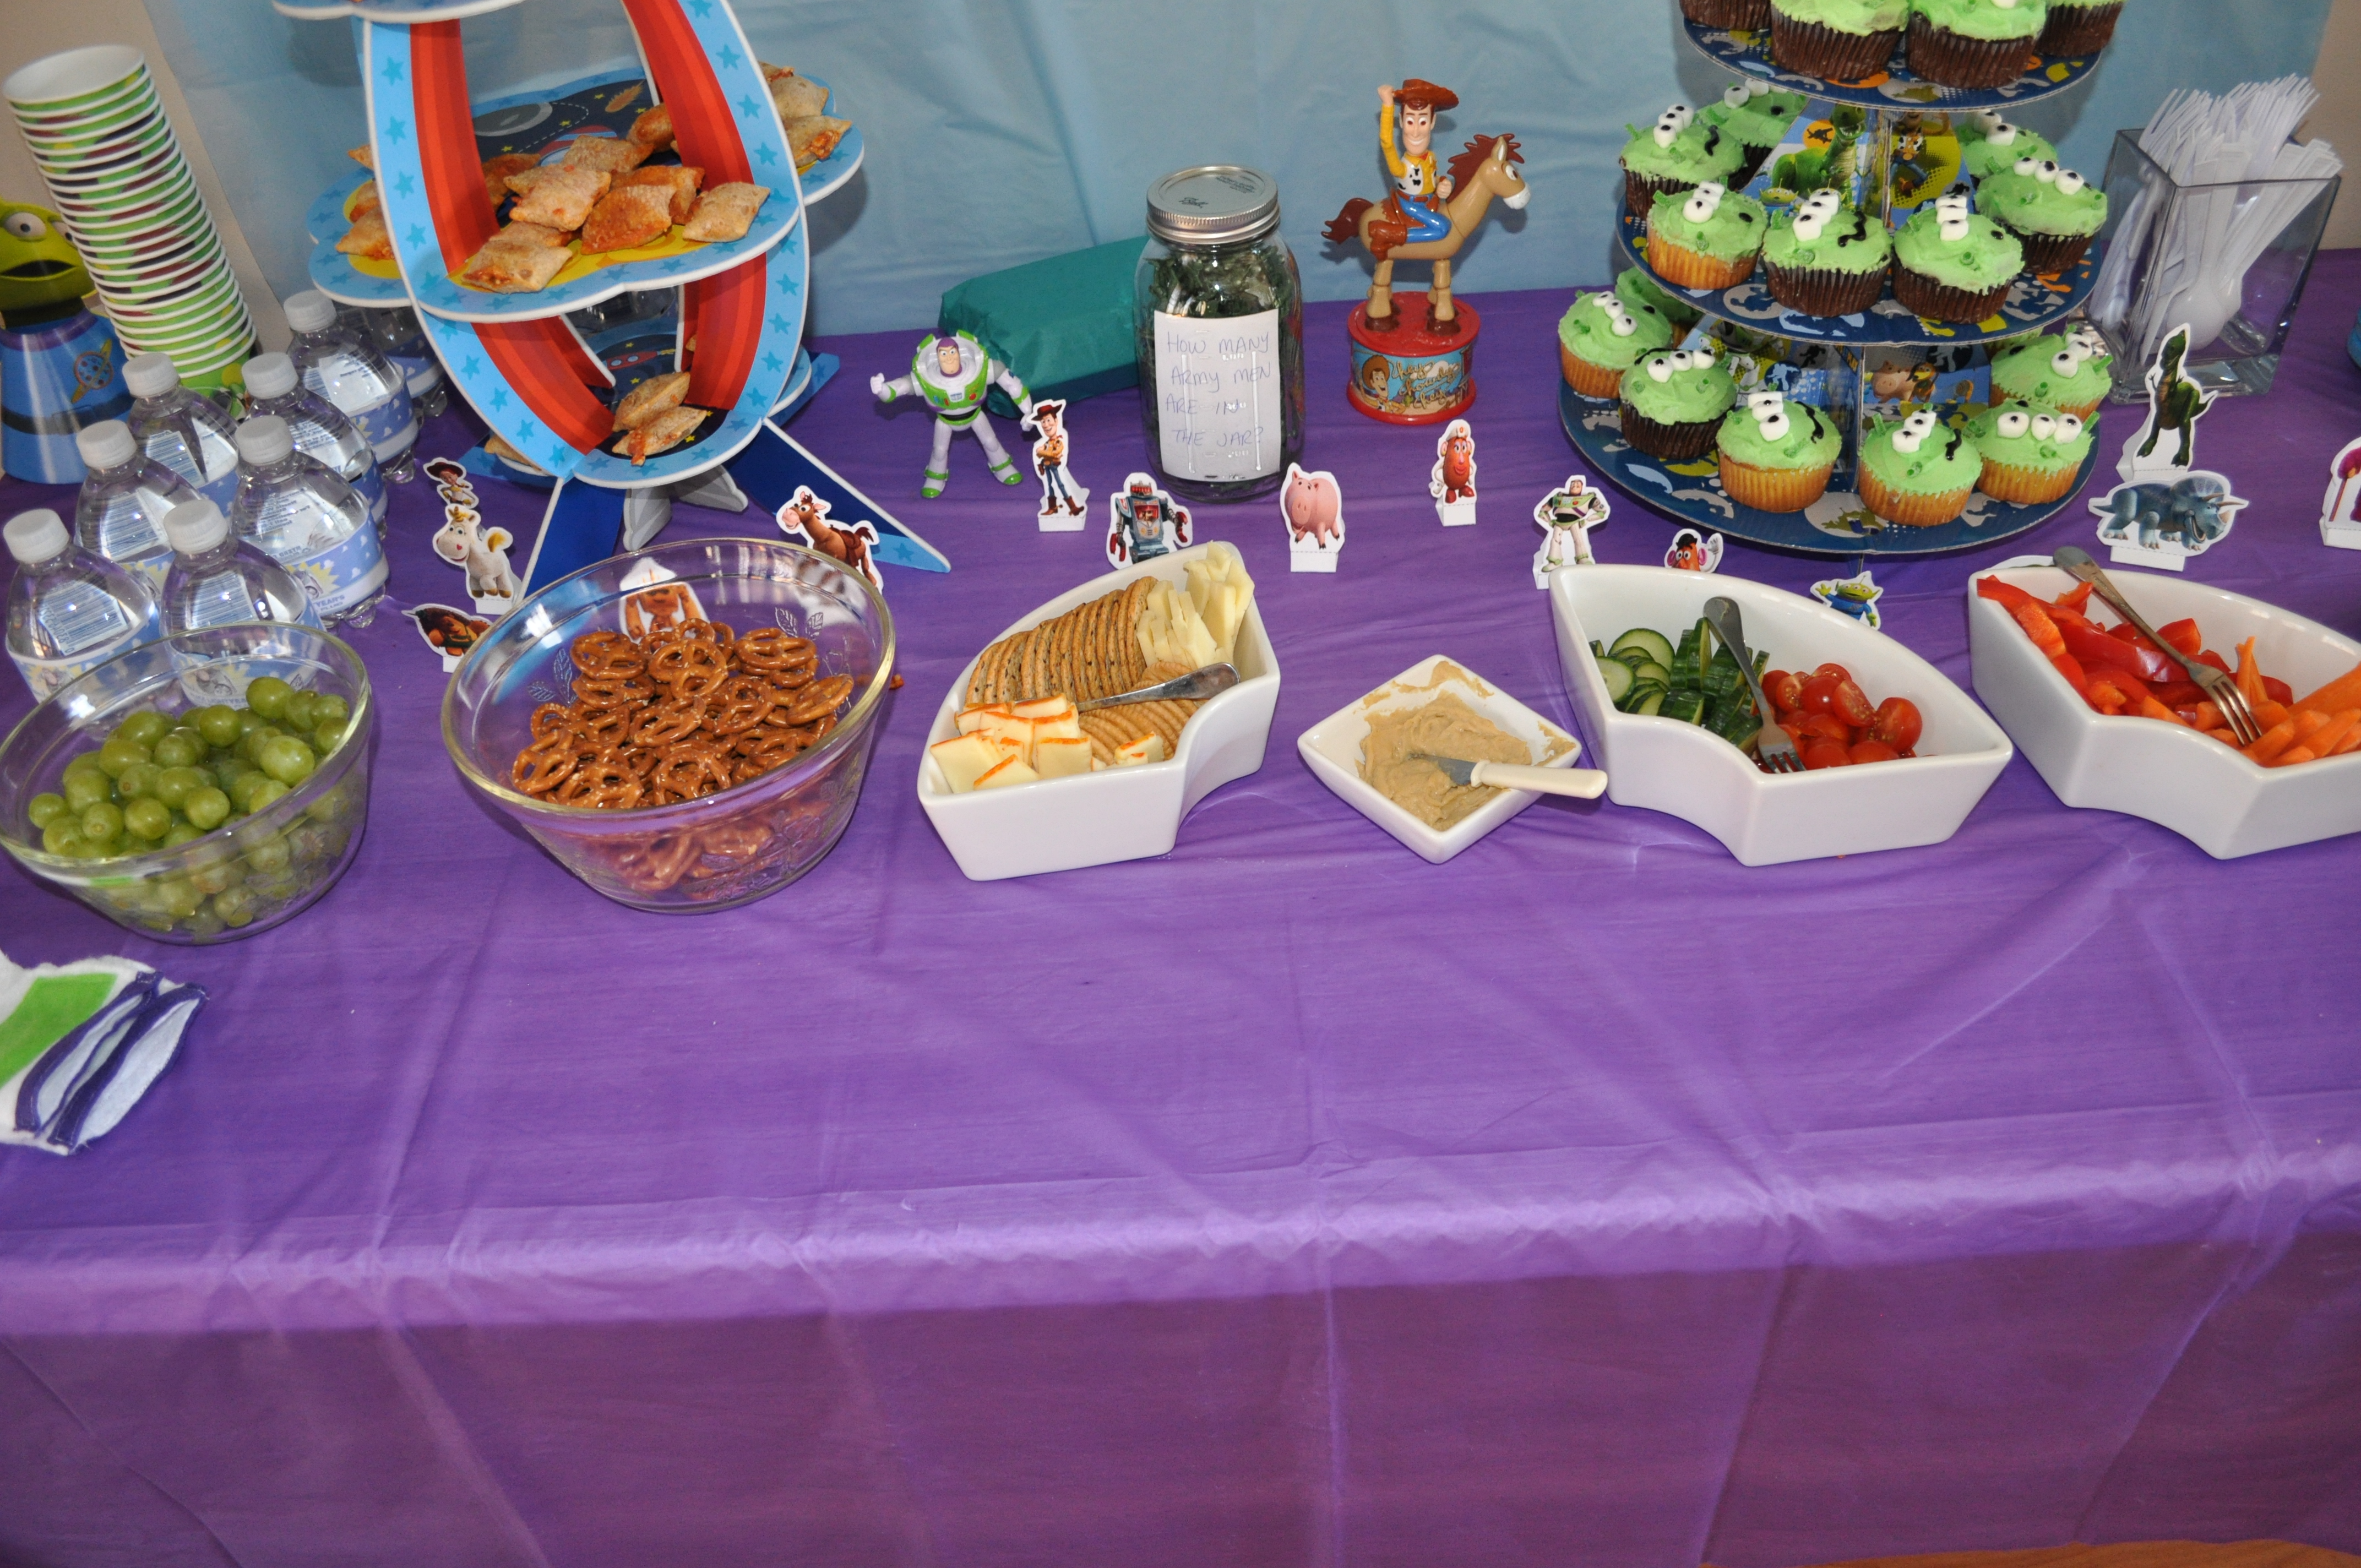
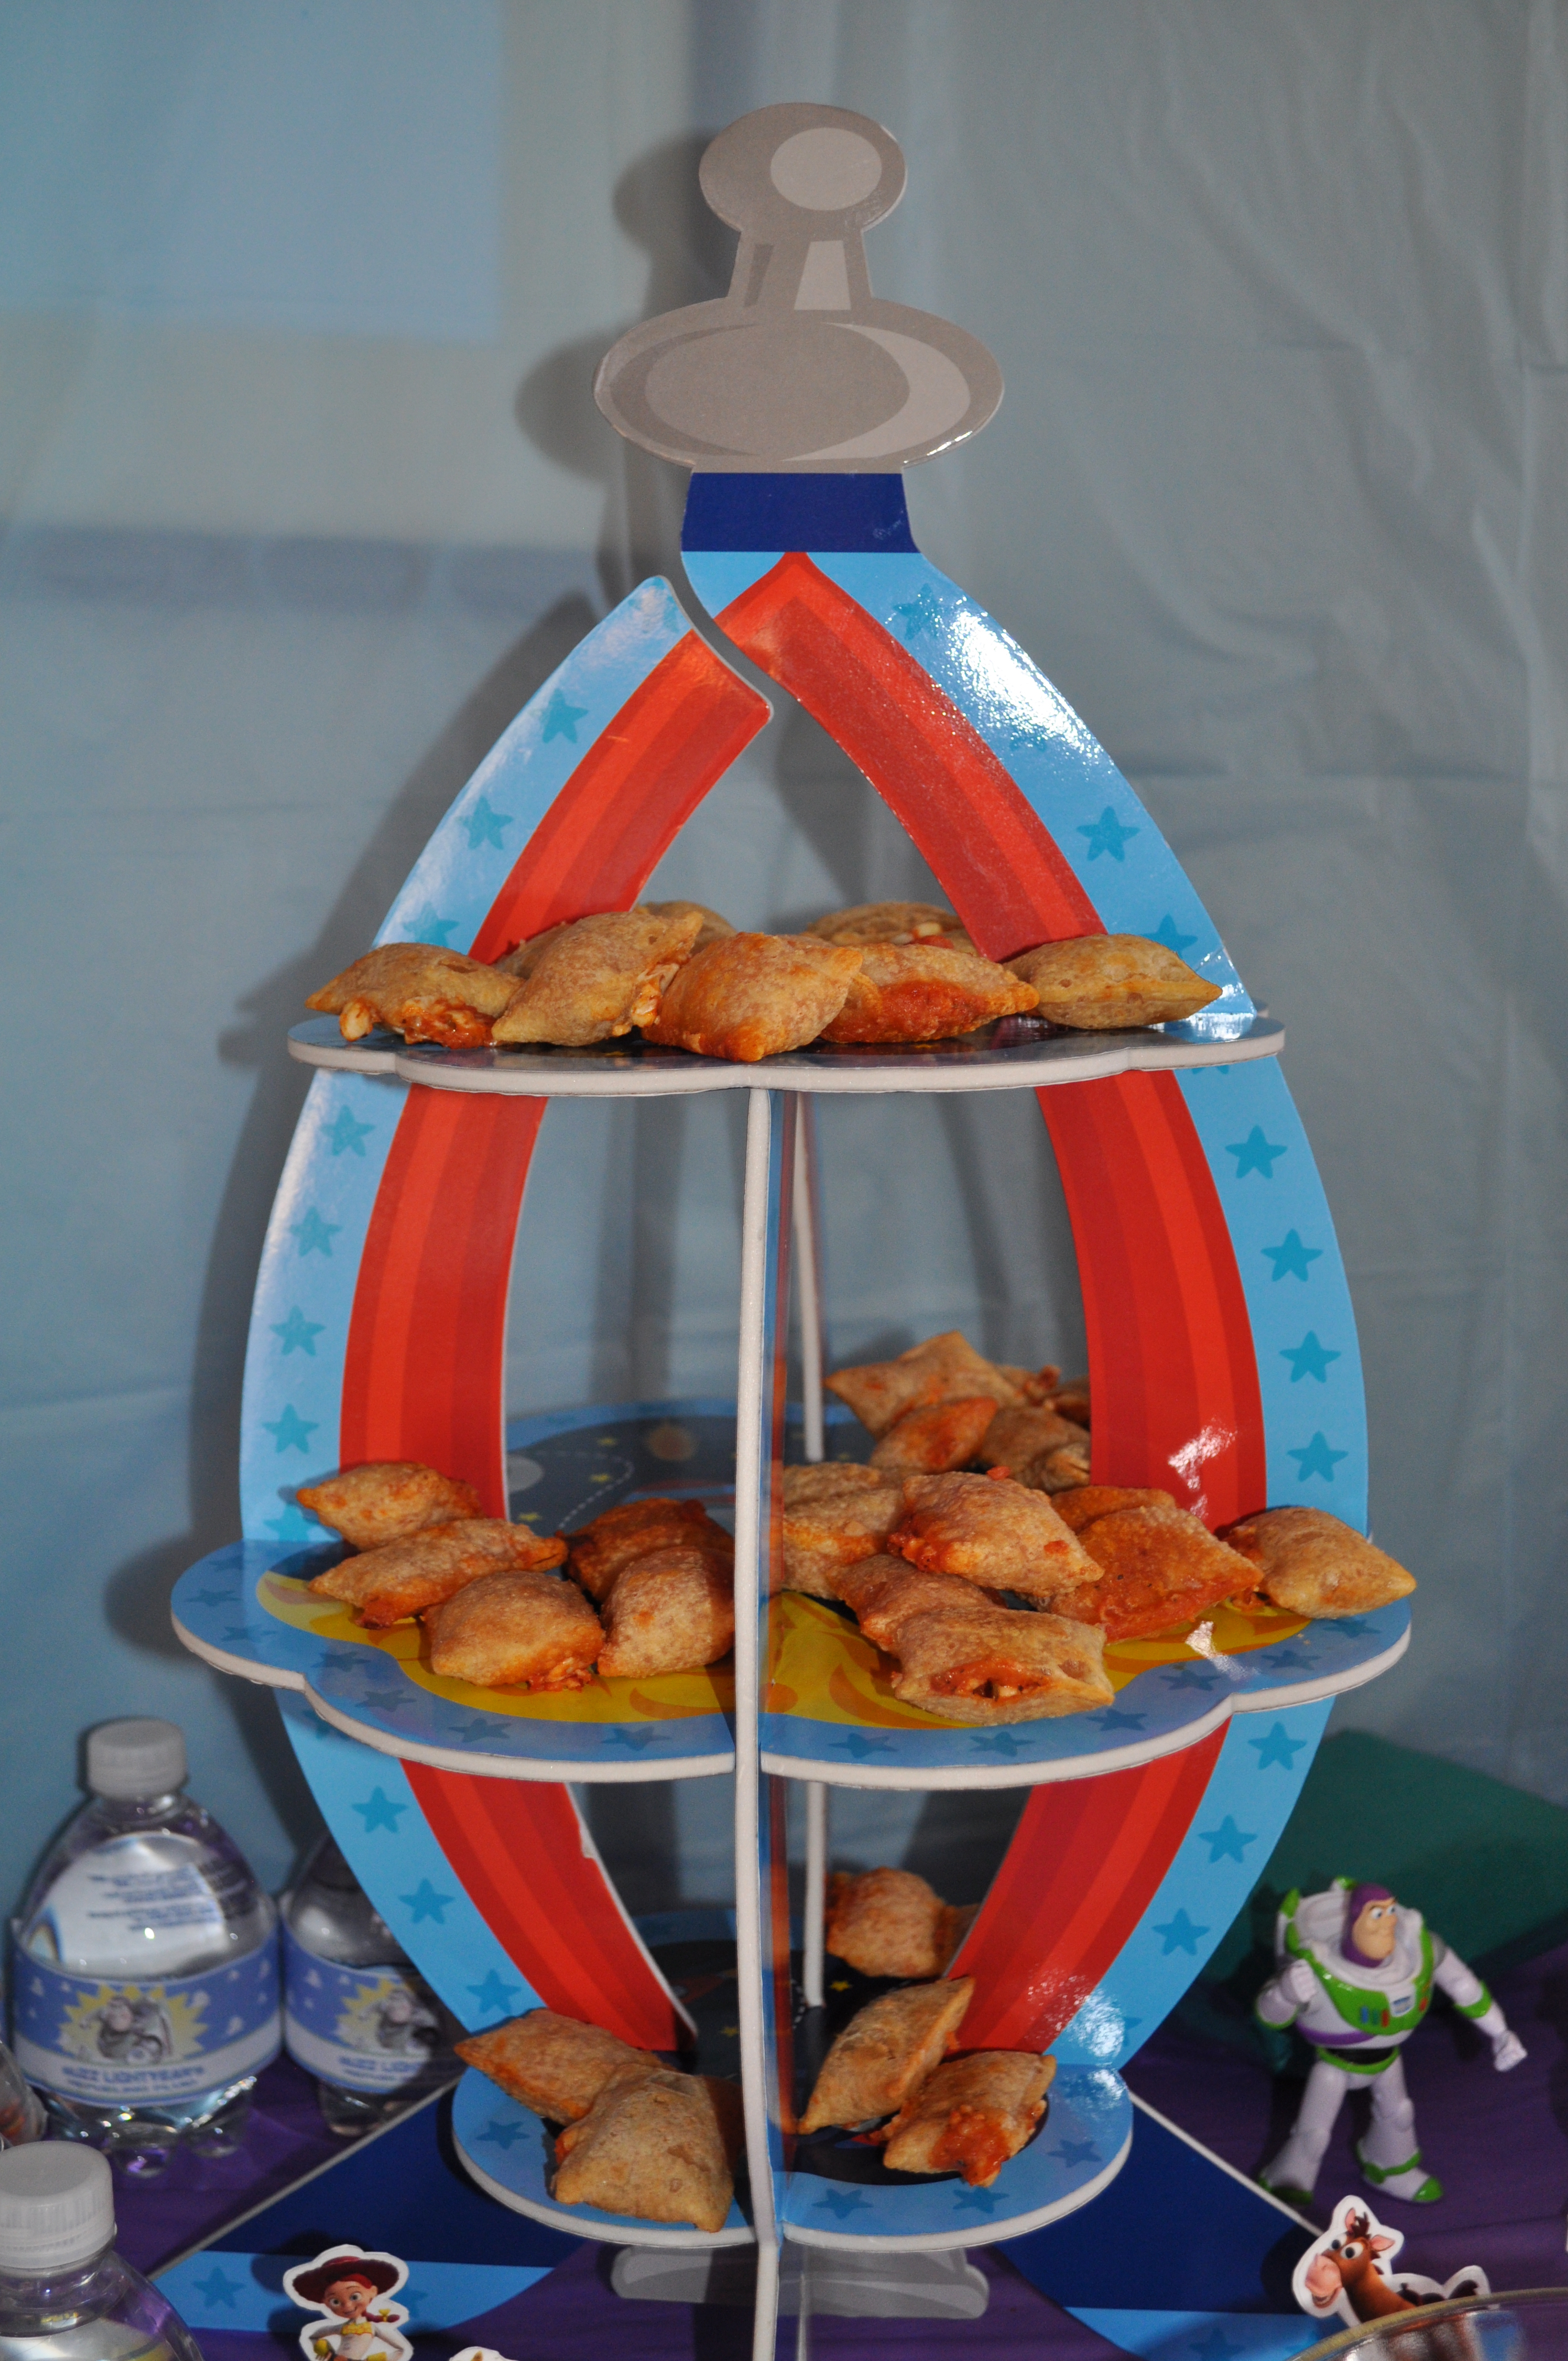
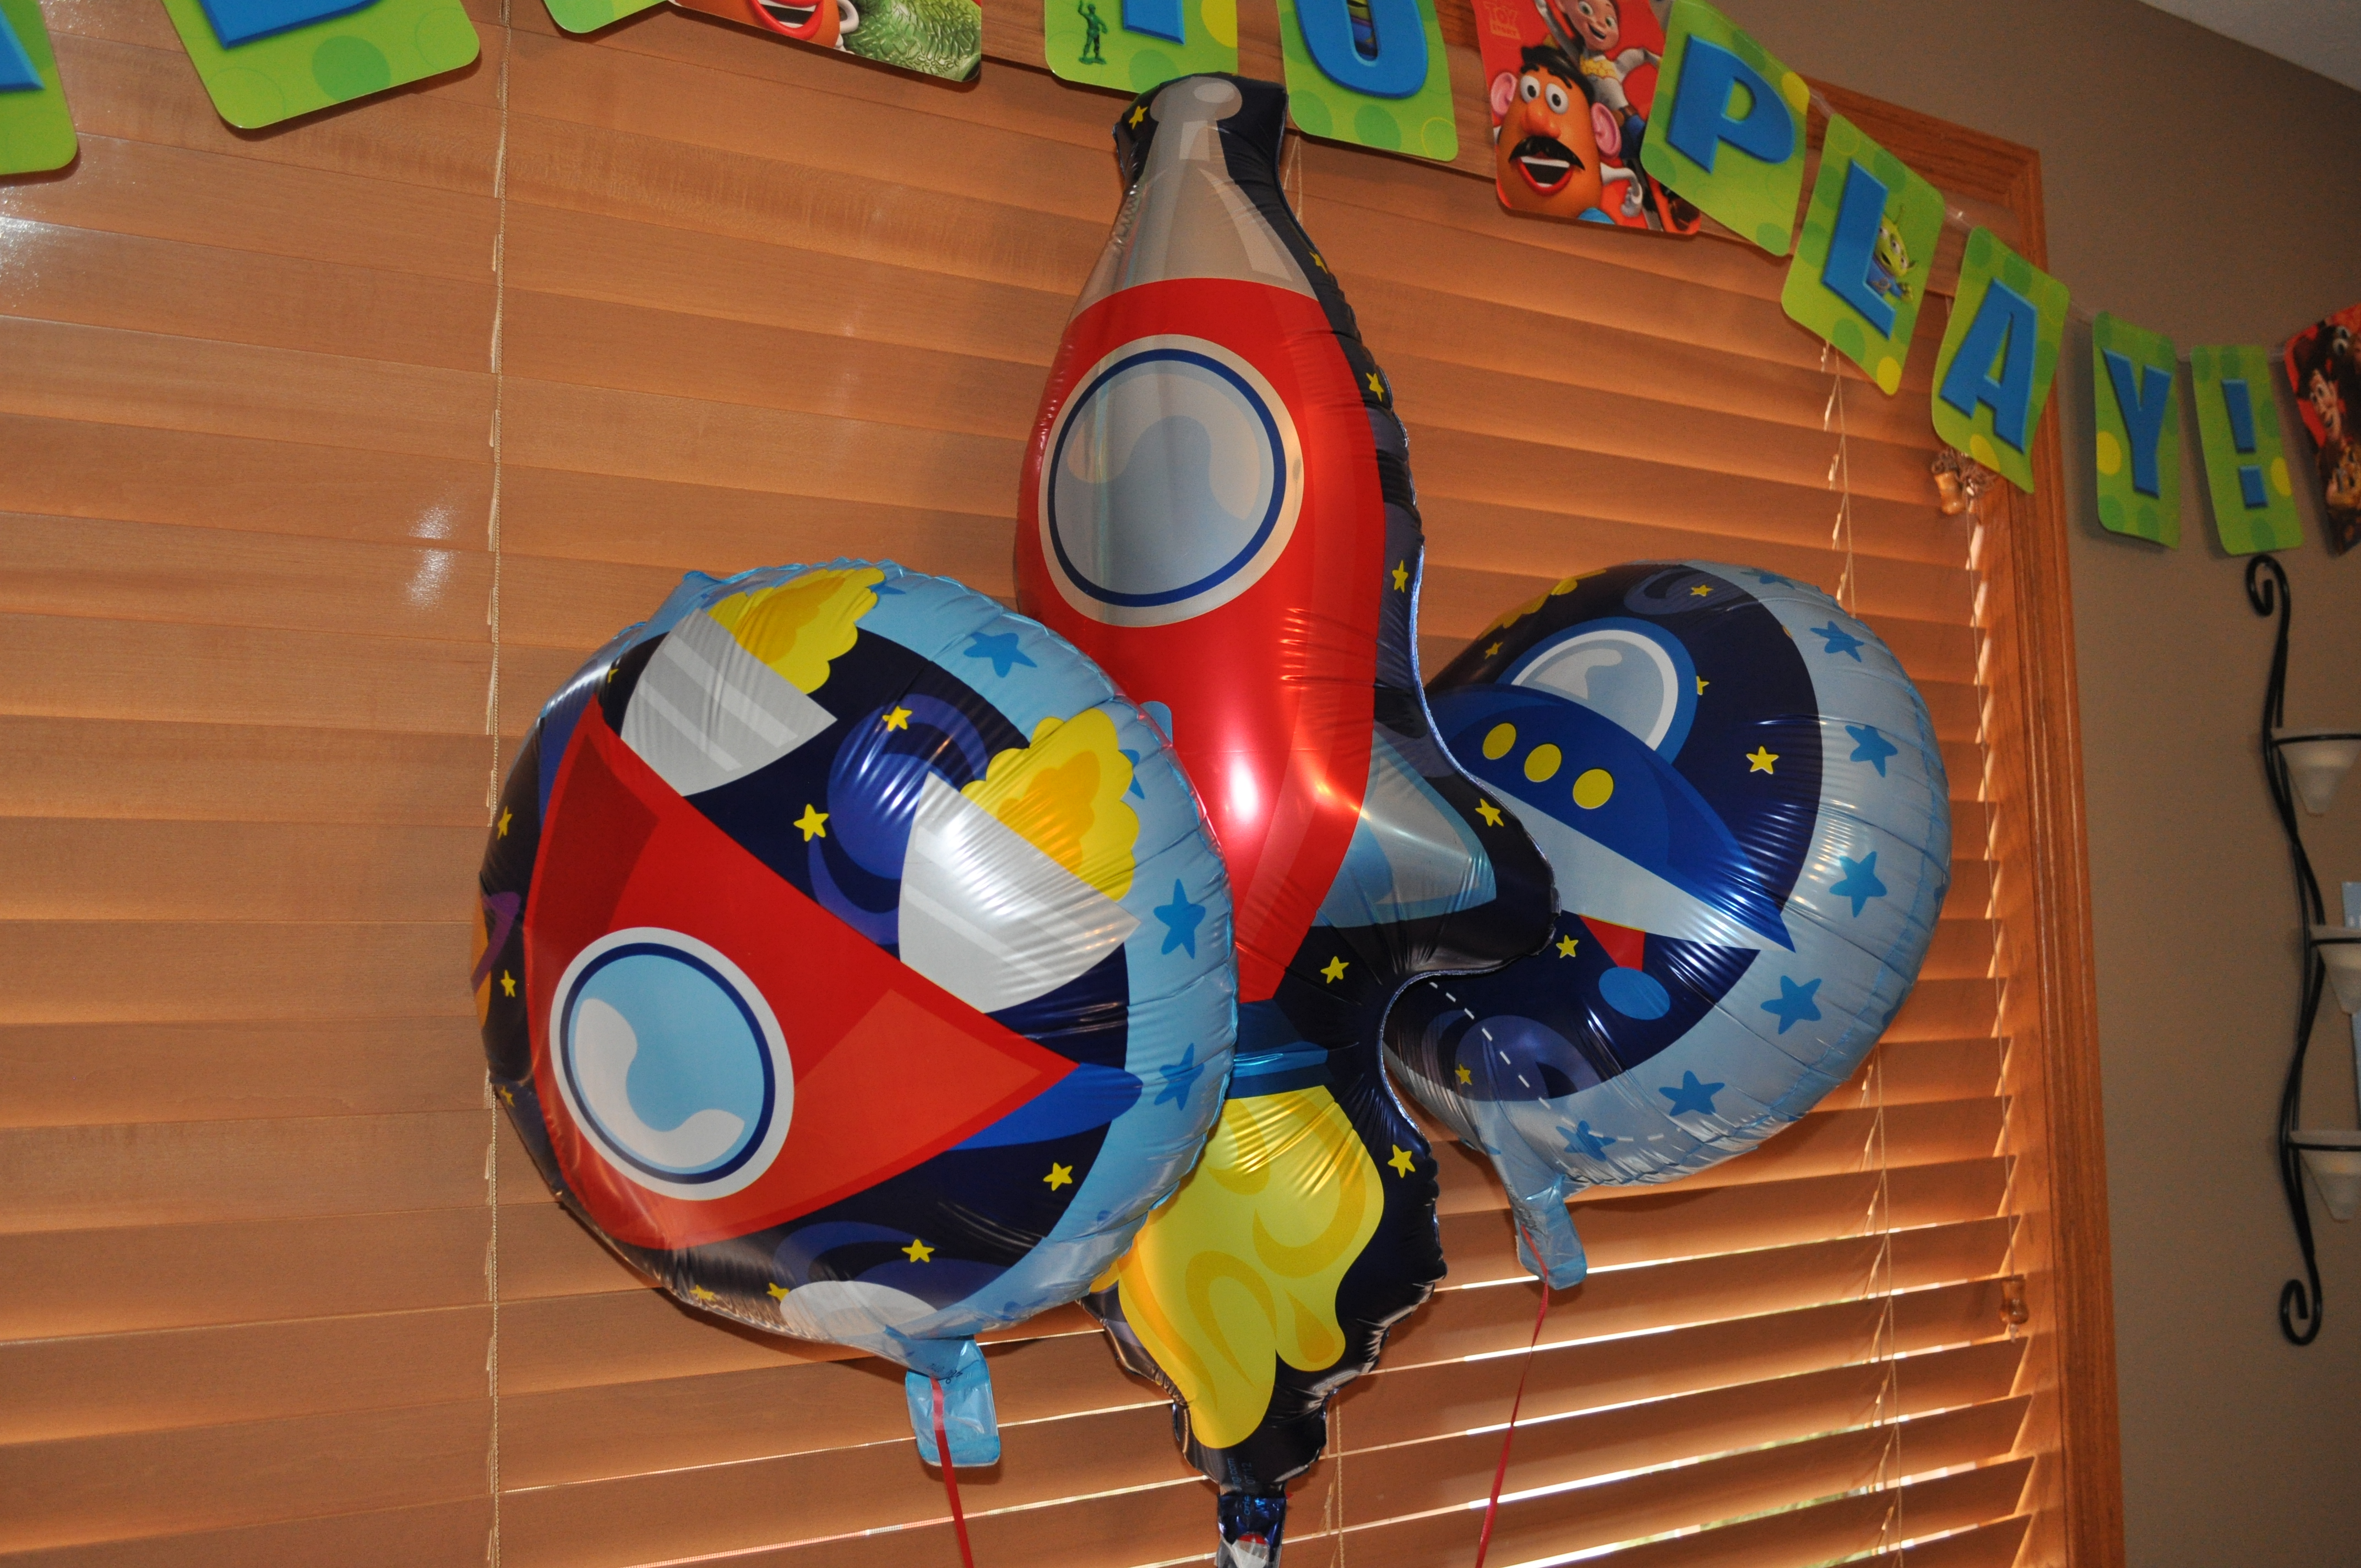
Keeping with the toy story theme, I bought two 40 piece bags of Totino Pizza Rolls (one cheese, and one pepperoni). Since Andy liked to get pizza from Pizza Planet in the movie, I put the pizza rolls on the rocket ship cupcake holder! 🙂 I got this holder online at Oriental Trading Company on clearance. It was really cheap, and I also found three rocket balloons that matched. Buying all 4 cost less than $7, and getting the balloons blown up at the Dollar Tree was only $2.
Do you like to plan birthday parties? Check out this post on a Pokemon Birthday Party!
Toy Story Decorations
Here are the balloons that I mentioned before that I got at Oriental Trading Company for cheap.
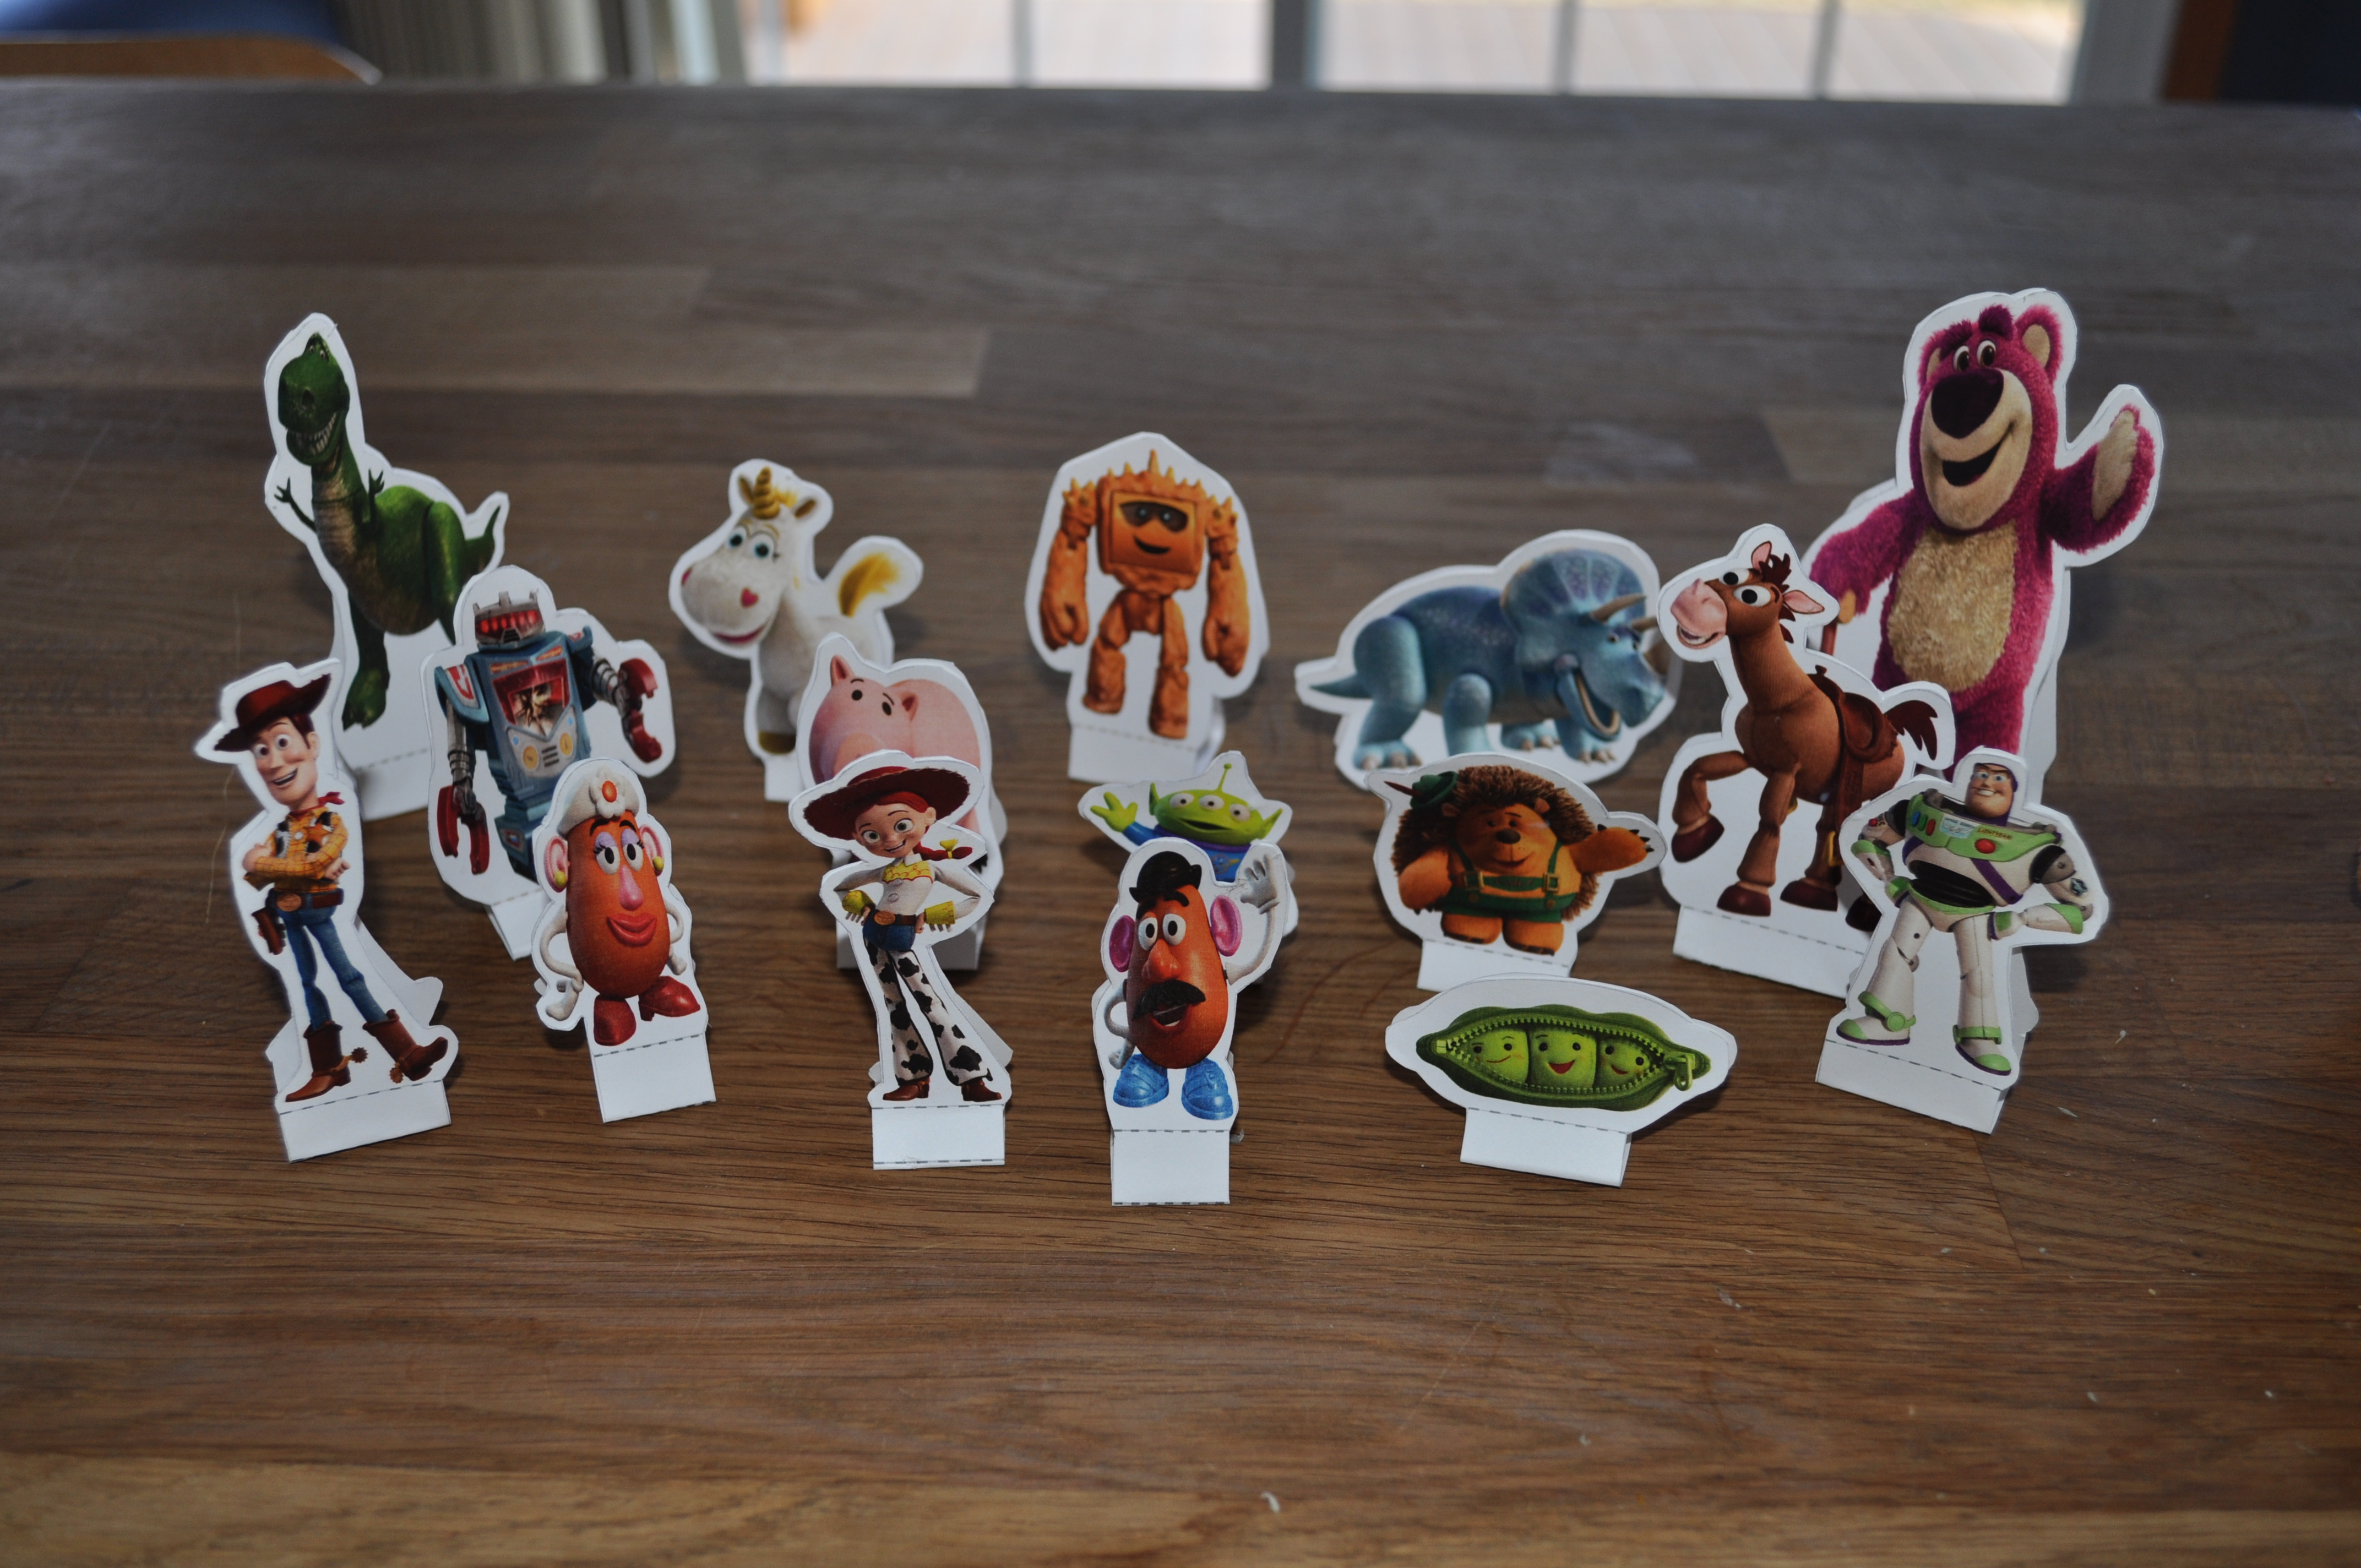
As I said from before, I found a lot of great ideas at Spoonfull.com. I found some cut outs of different Toy Story Characters (I think from Toy Story 3), and cut them out. They were the type that I folded and glued, so that they would stand upright. This was great, since we only had a few Toy Story toys to use as decorations. I’m pretty sure that this is the link to that Toy Story Playset.
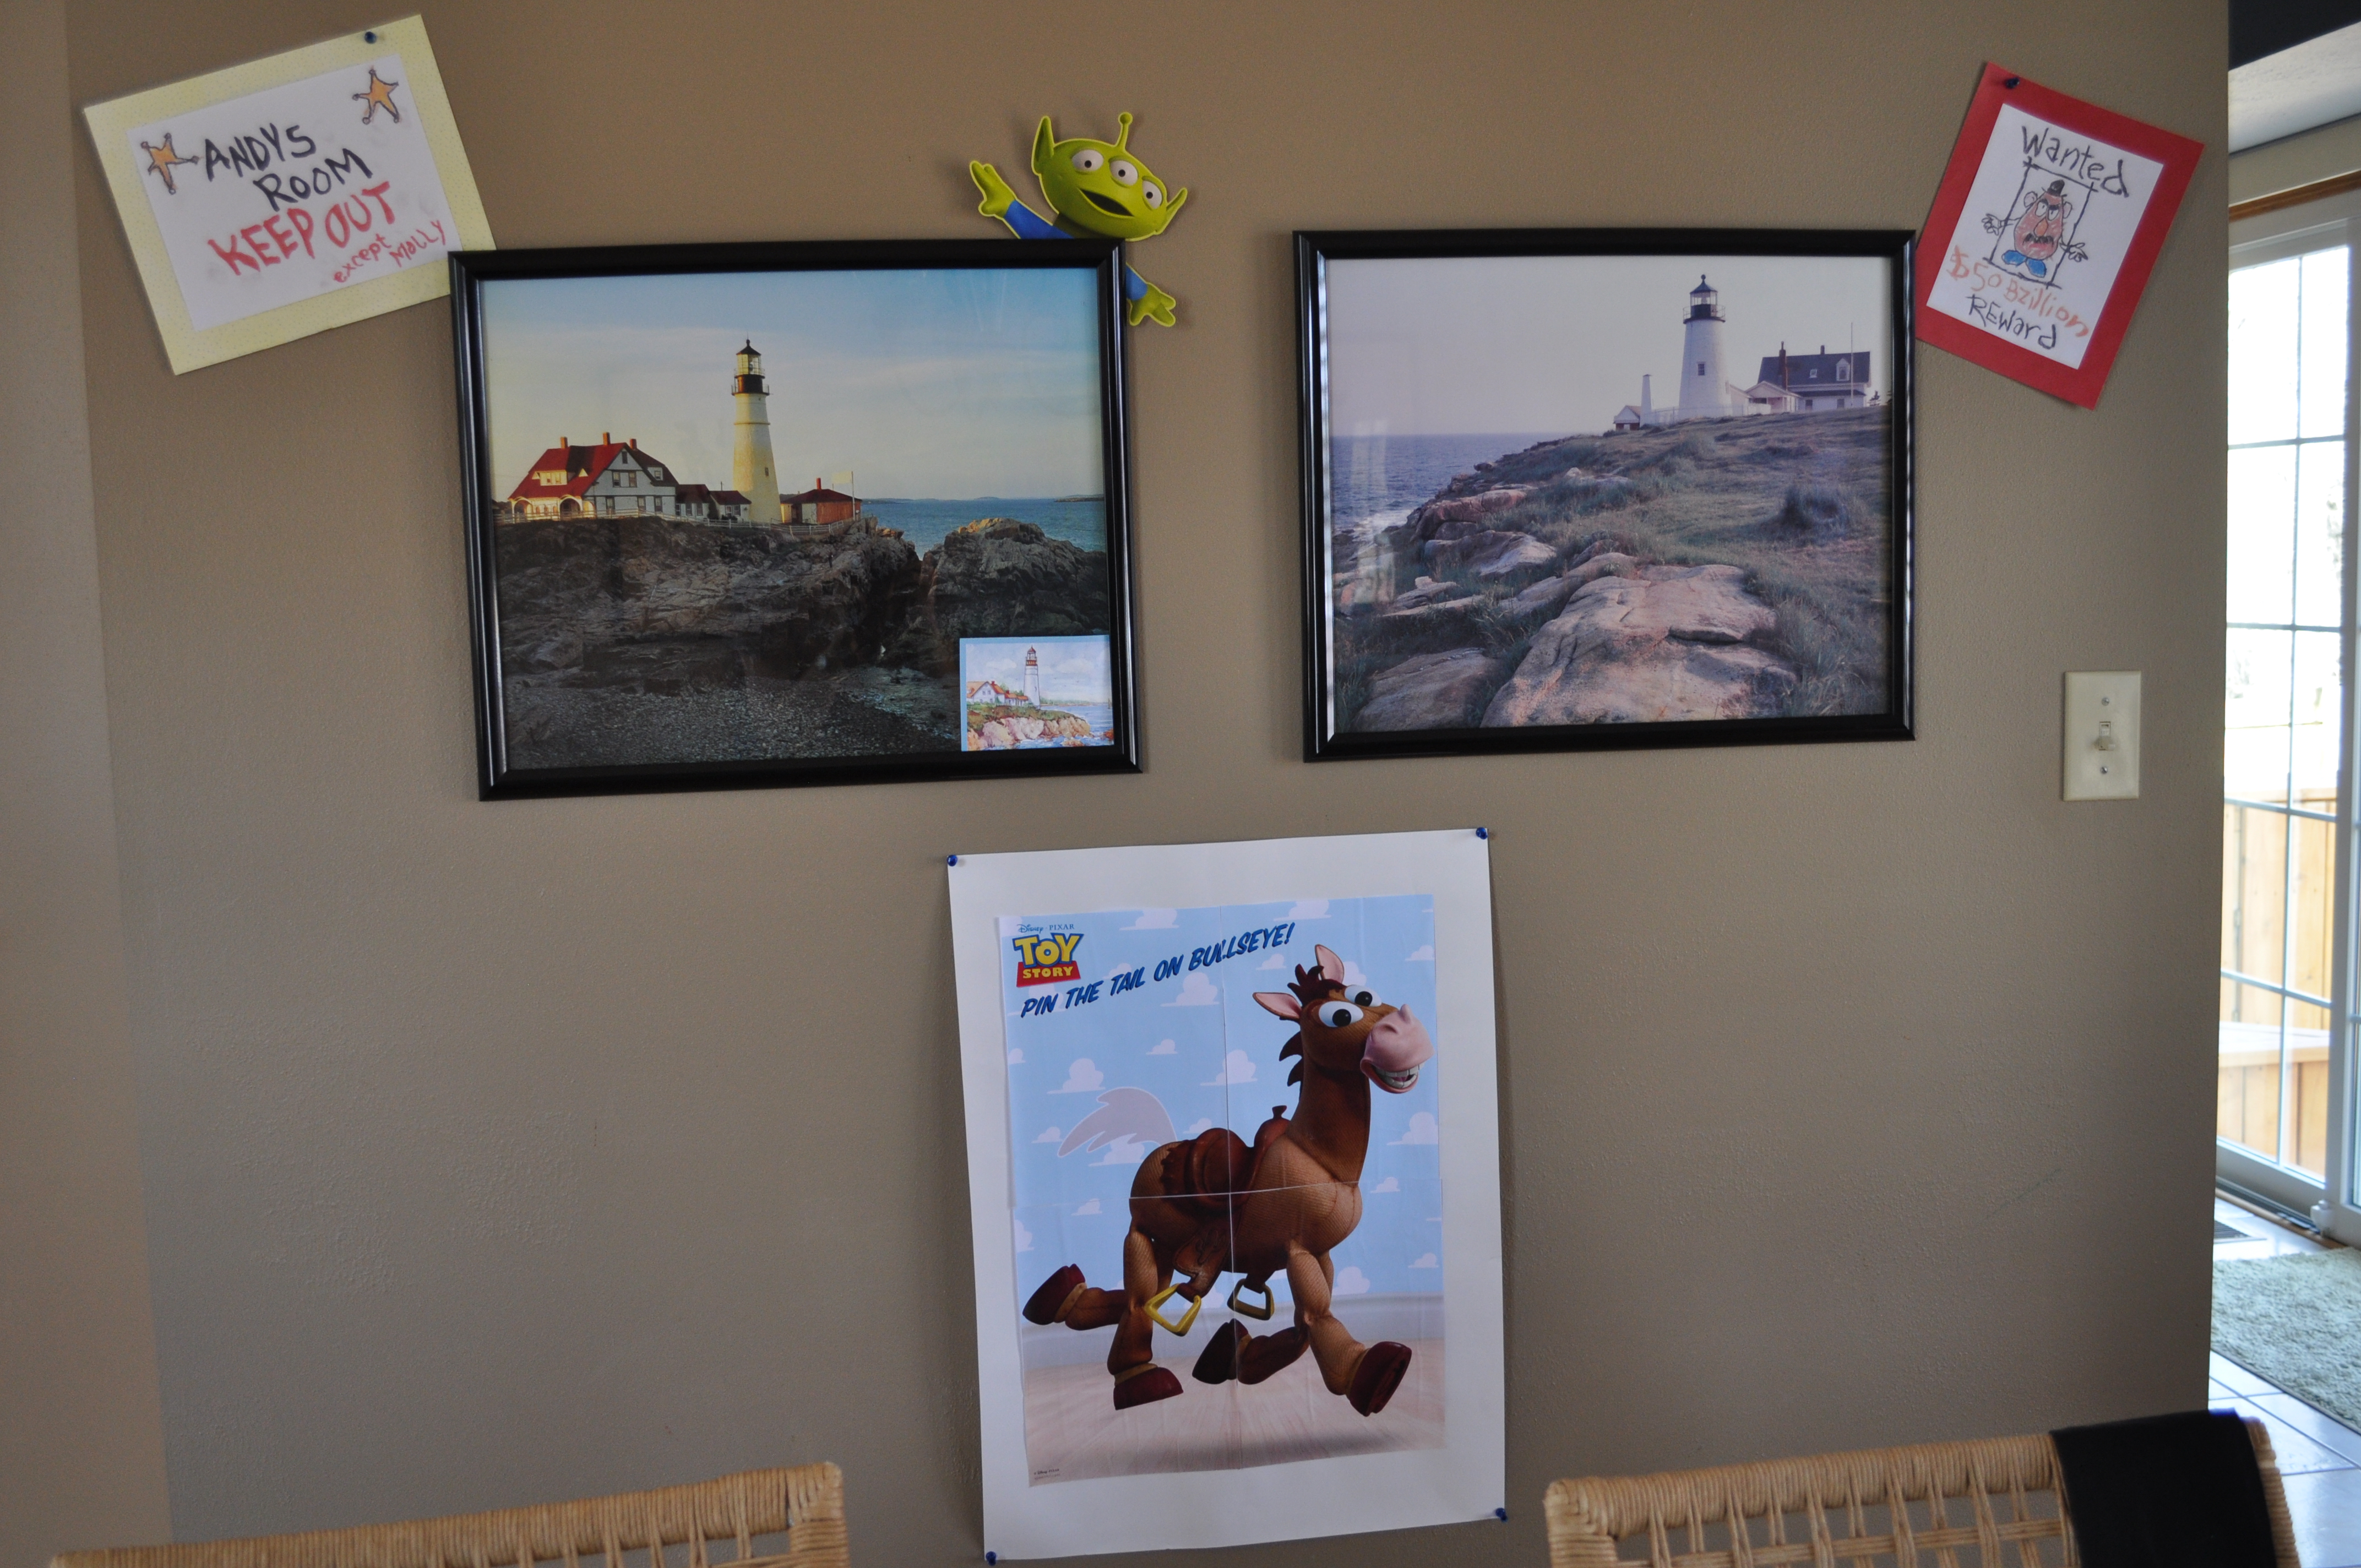
Spoonful was also where I got the idea to do the “pin the Tail on Bullseye” game. This is just something you have to print out. I have to warn you that I had an issue at first with printing this, and I found out that I had to open it with Internet Explorer instead of Chrome. FYI!
You will need to use the template to make tails out of something. We decided to cut ours out of felt, since I had some leftover brown felt from making the party favors. I thought we would just use some rolled tape on the back to put them up, and each kid could have his/her name written on them to determine whose was whose.
I also hung this low so that the kids could reach it without difficulty. I even bought a black bandanna to use as a blindfold. (Maybe, I’ll keep the blindfold in the party box for another year. I’m sure this game will come up again.)
(To be completely honest, we had about 10 kids at the party, and because they were so busy playing in our playroom, we never got to the game. I don’t think their attention spans could have handled it. They were all 3 or 4 years old. Maybe, it would work better for older kids at age 5 or 6, but it wasn’t happening for this group.)
I also bought a cheap purple tablecloth for the food table and a cheap, light blue tablecloth for the wall. I used my Cricut machine to cut out letters that read Happy Birthday and used double-sided tape to attach them to the tablecloth. I used the same Cricut cartridge as I did for the crowns, but I used 2 1/2″ size for them. I attached the tablecloth to the wall with push pins.
I found some really cute and free printouts of pictures that Andy (from the movie) drew at Pixar Planet. My favorite was the “Wanted” Poster of Mr. Potato head. There were also cute pictures of Buzz, Woody and a sign that says “Andy’s Room”.
I thought that these pictures could be cute decorations in the party room. I had some extra scrapbook paper, so used double-sided tape to secure the pictures to the scrapbook paper. Then I cut the scrapbook paper down so that it was just 2 inches longer than the picture on all sides. This made a nice, colorful border.

Party Supplies
I have to say that this party was another persuasive suggestion from me. 🙂 My mom told me about all the Toy Story stuff she found on clearance at KMart back in September, so I had her stock up on it while it was still there! 🙂 She got me the following for just over $23 (all of which can be used for the two parties we are planning with 24 people at each party with extra stuff left over. Pictures below may only show one package of everything, but I had multiples):
cake plates and dinner plates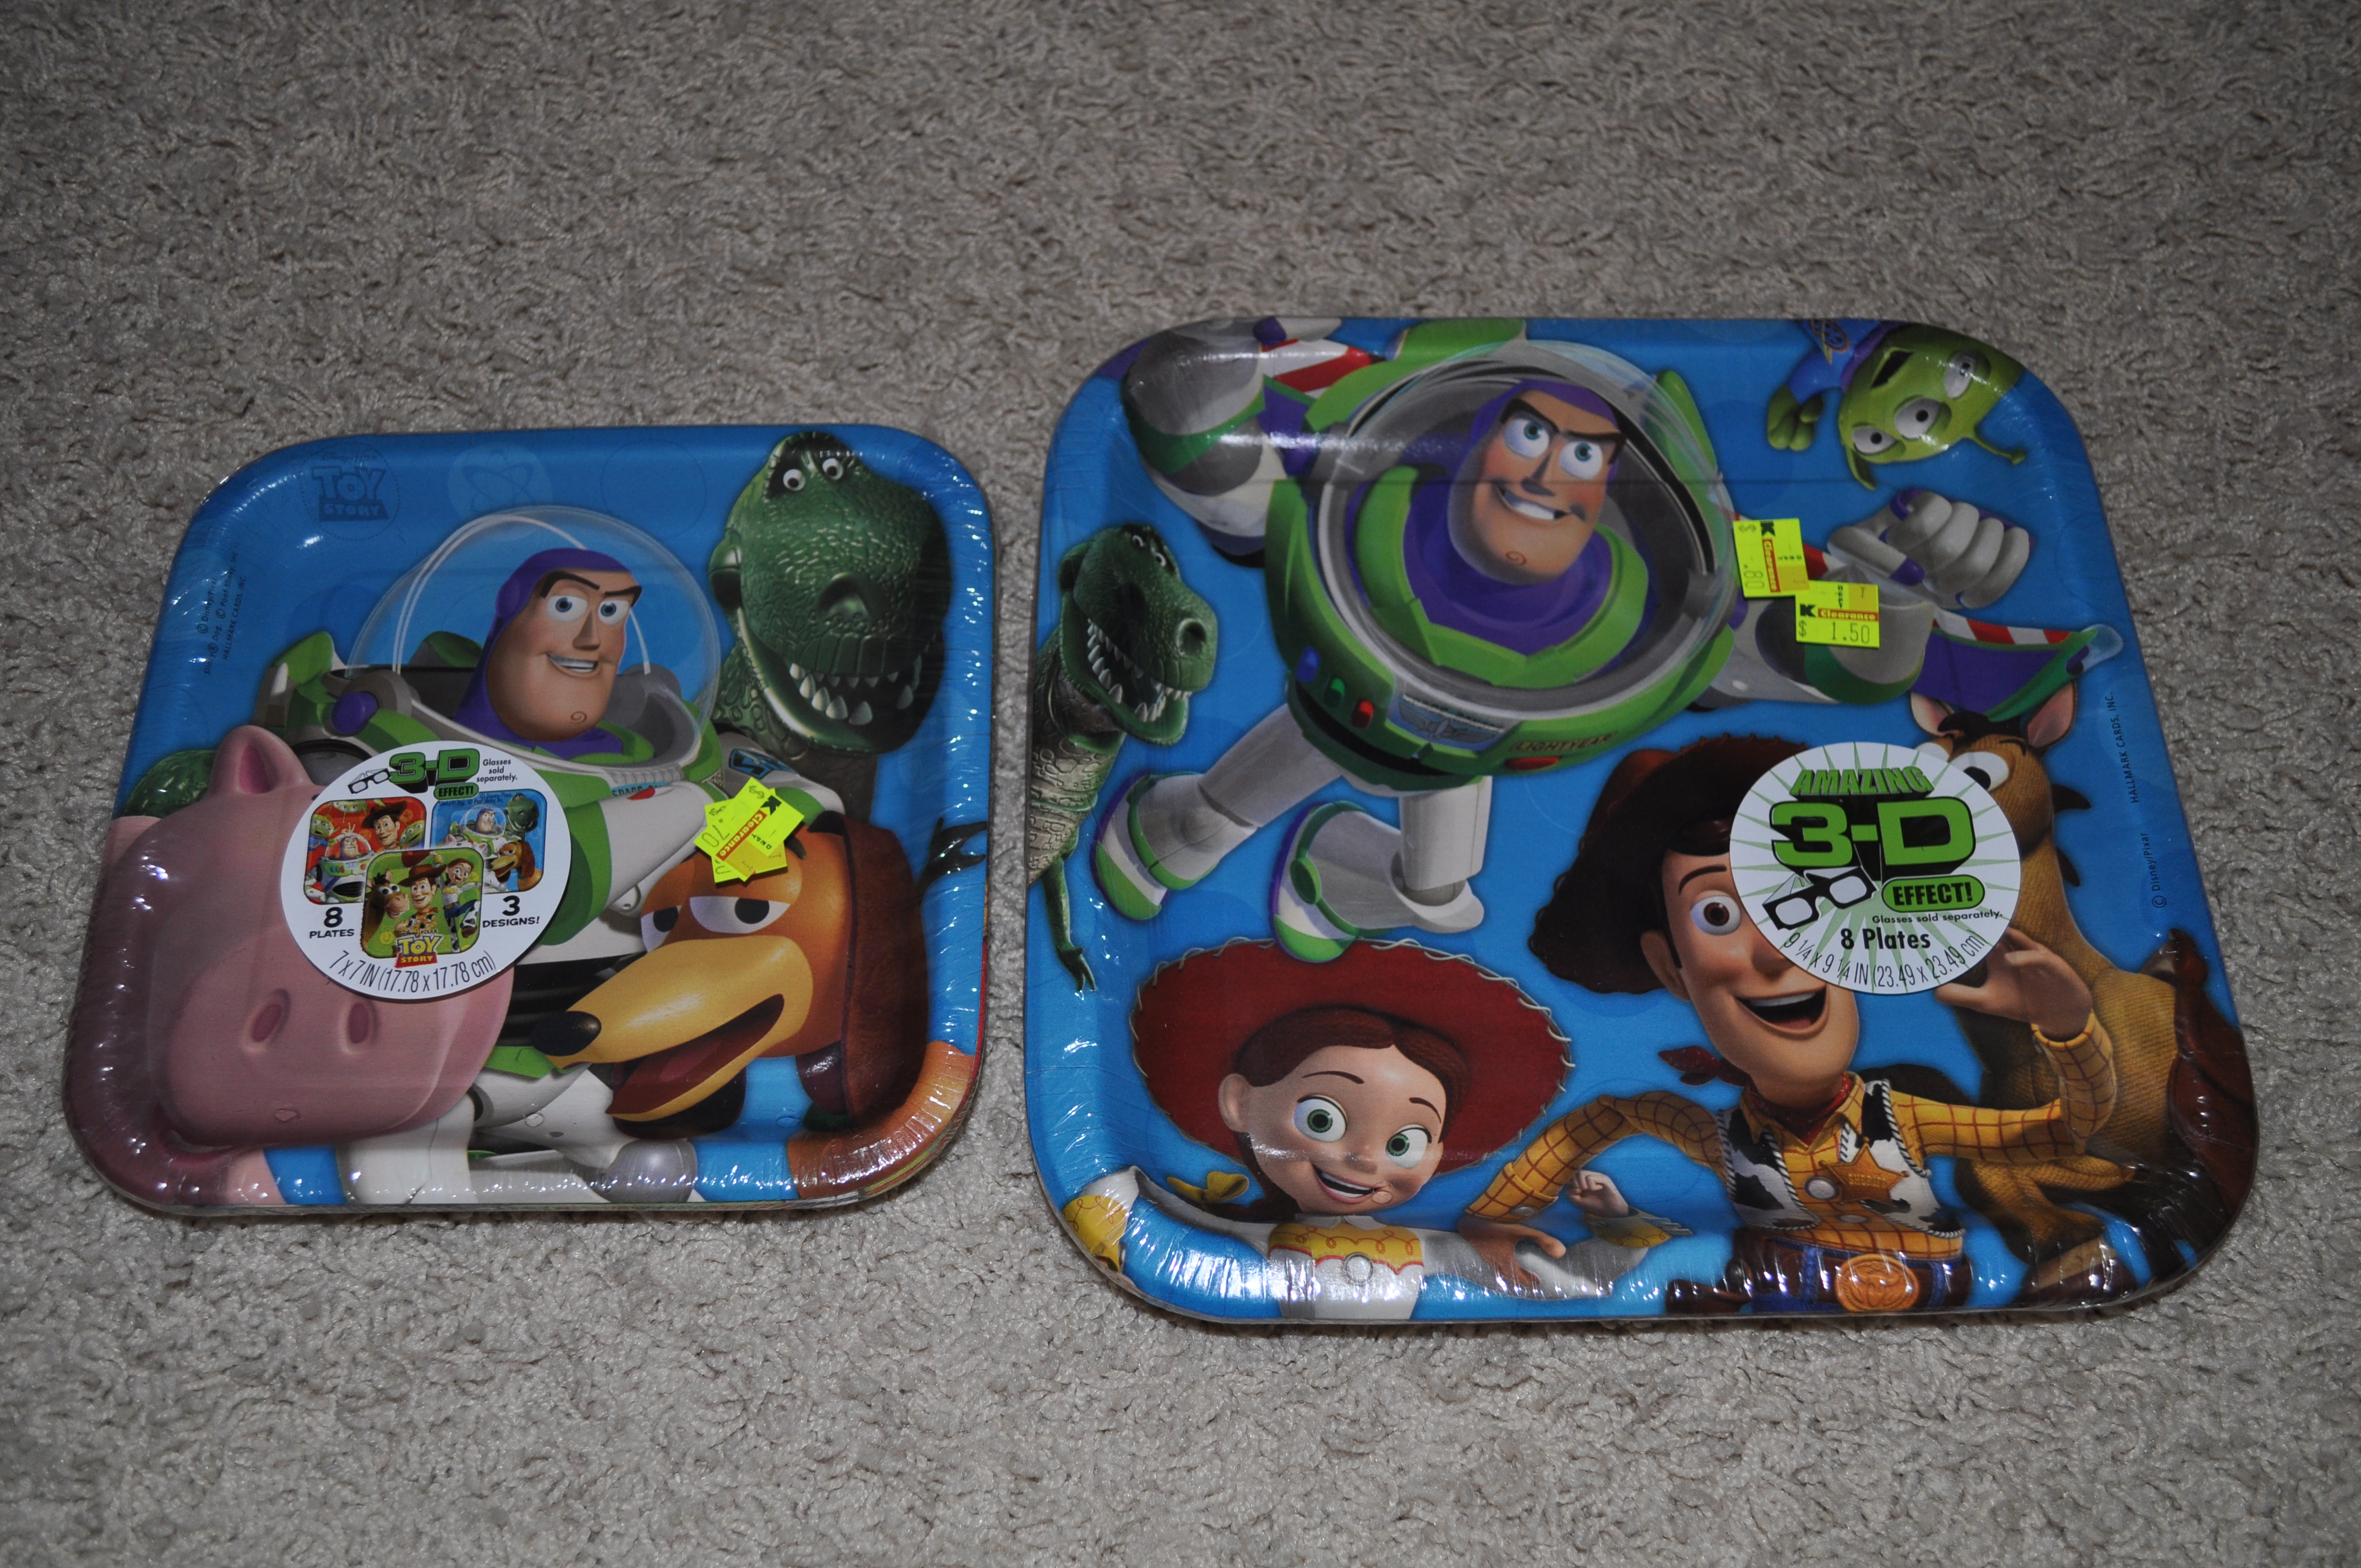
cups and napkins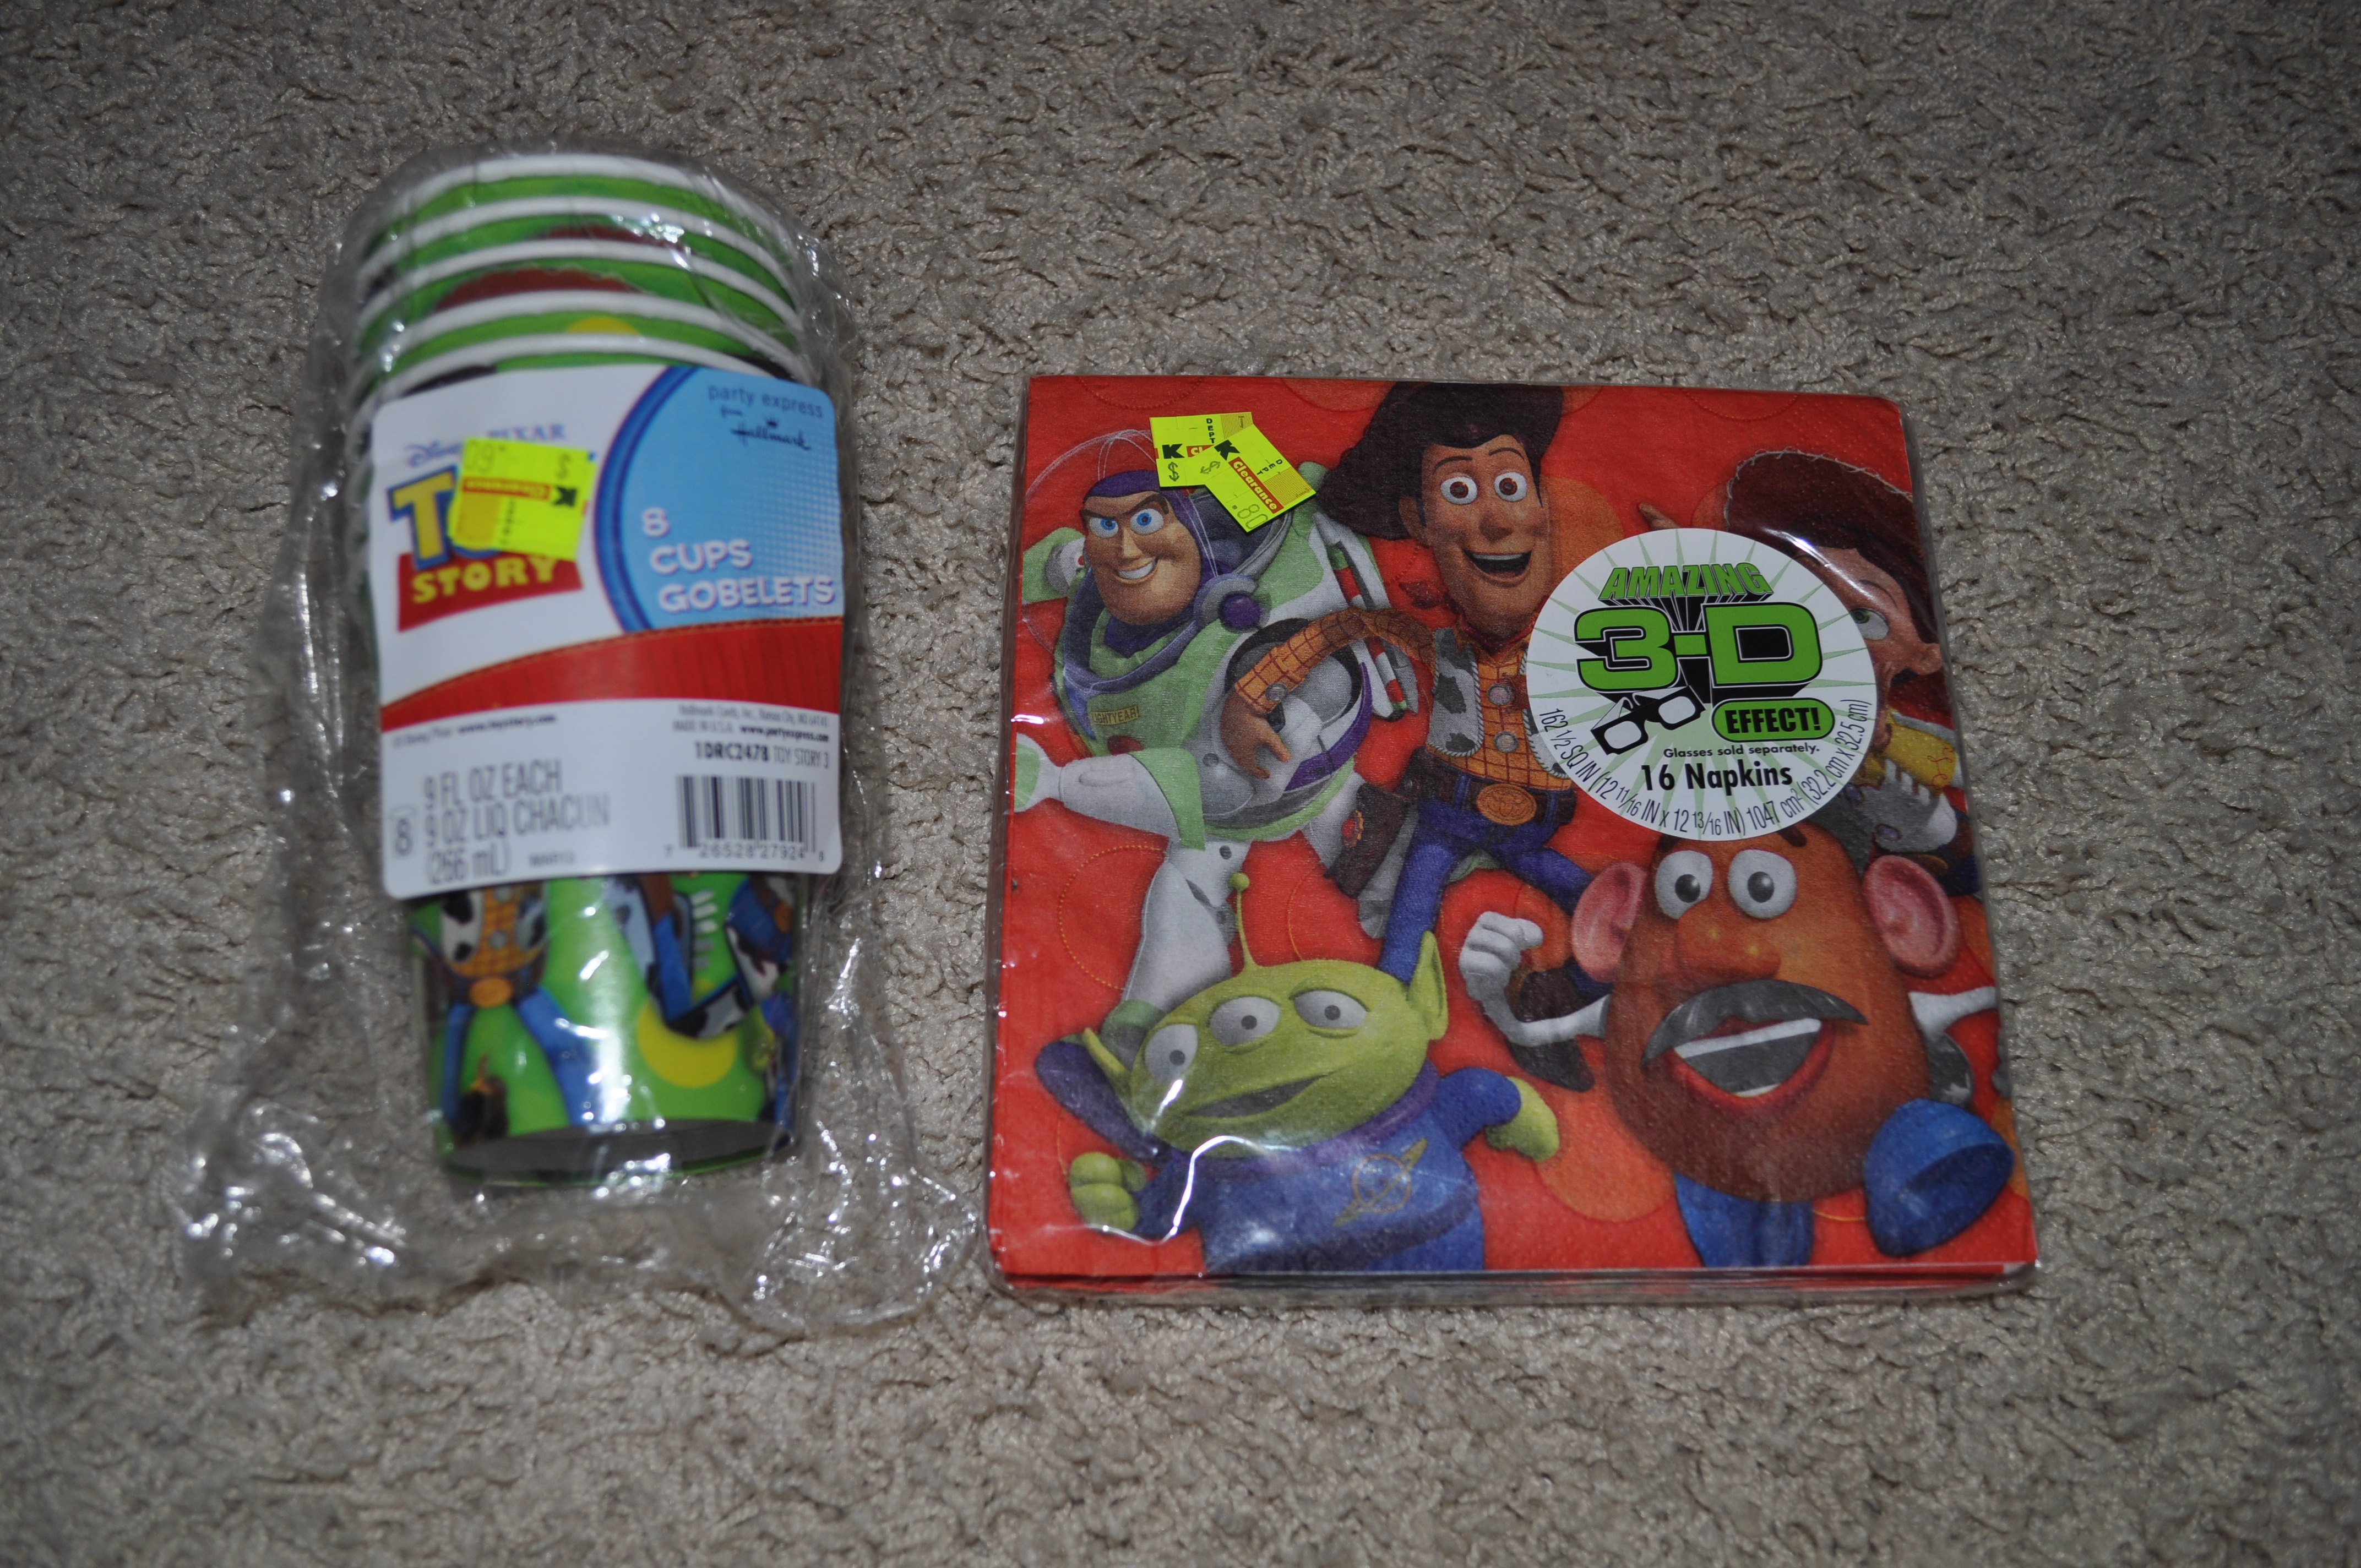
alien party hats (which I didn’t have enough of them for each kid, but not everyone wanted to wear one)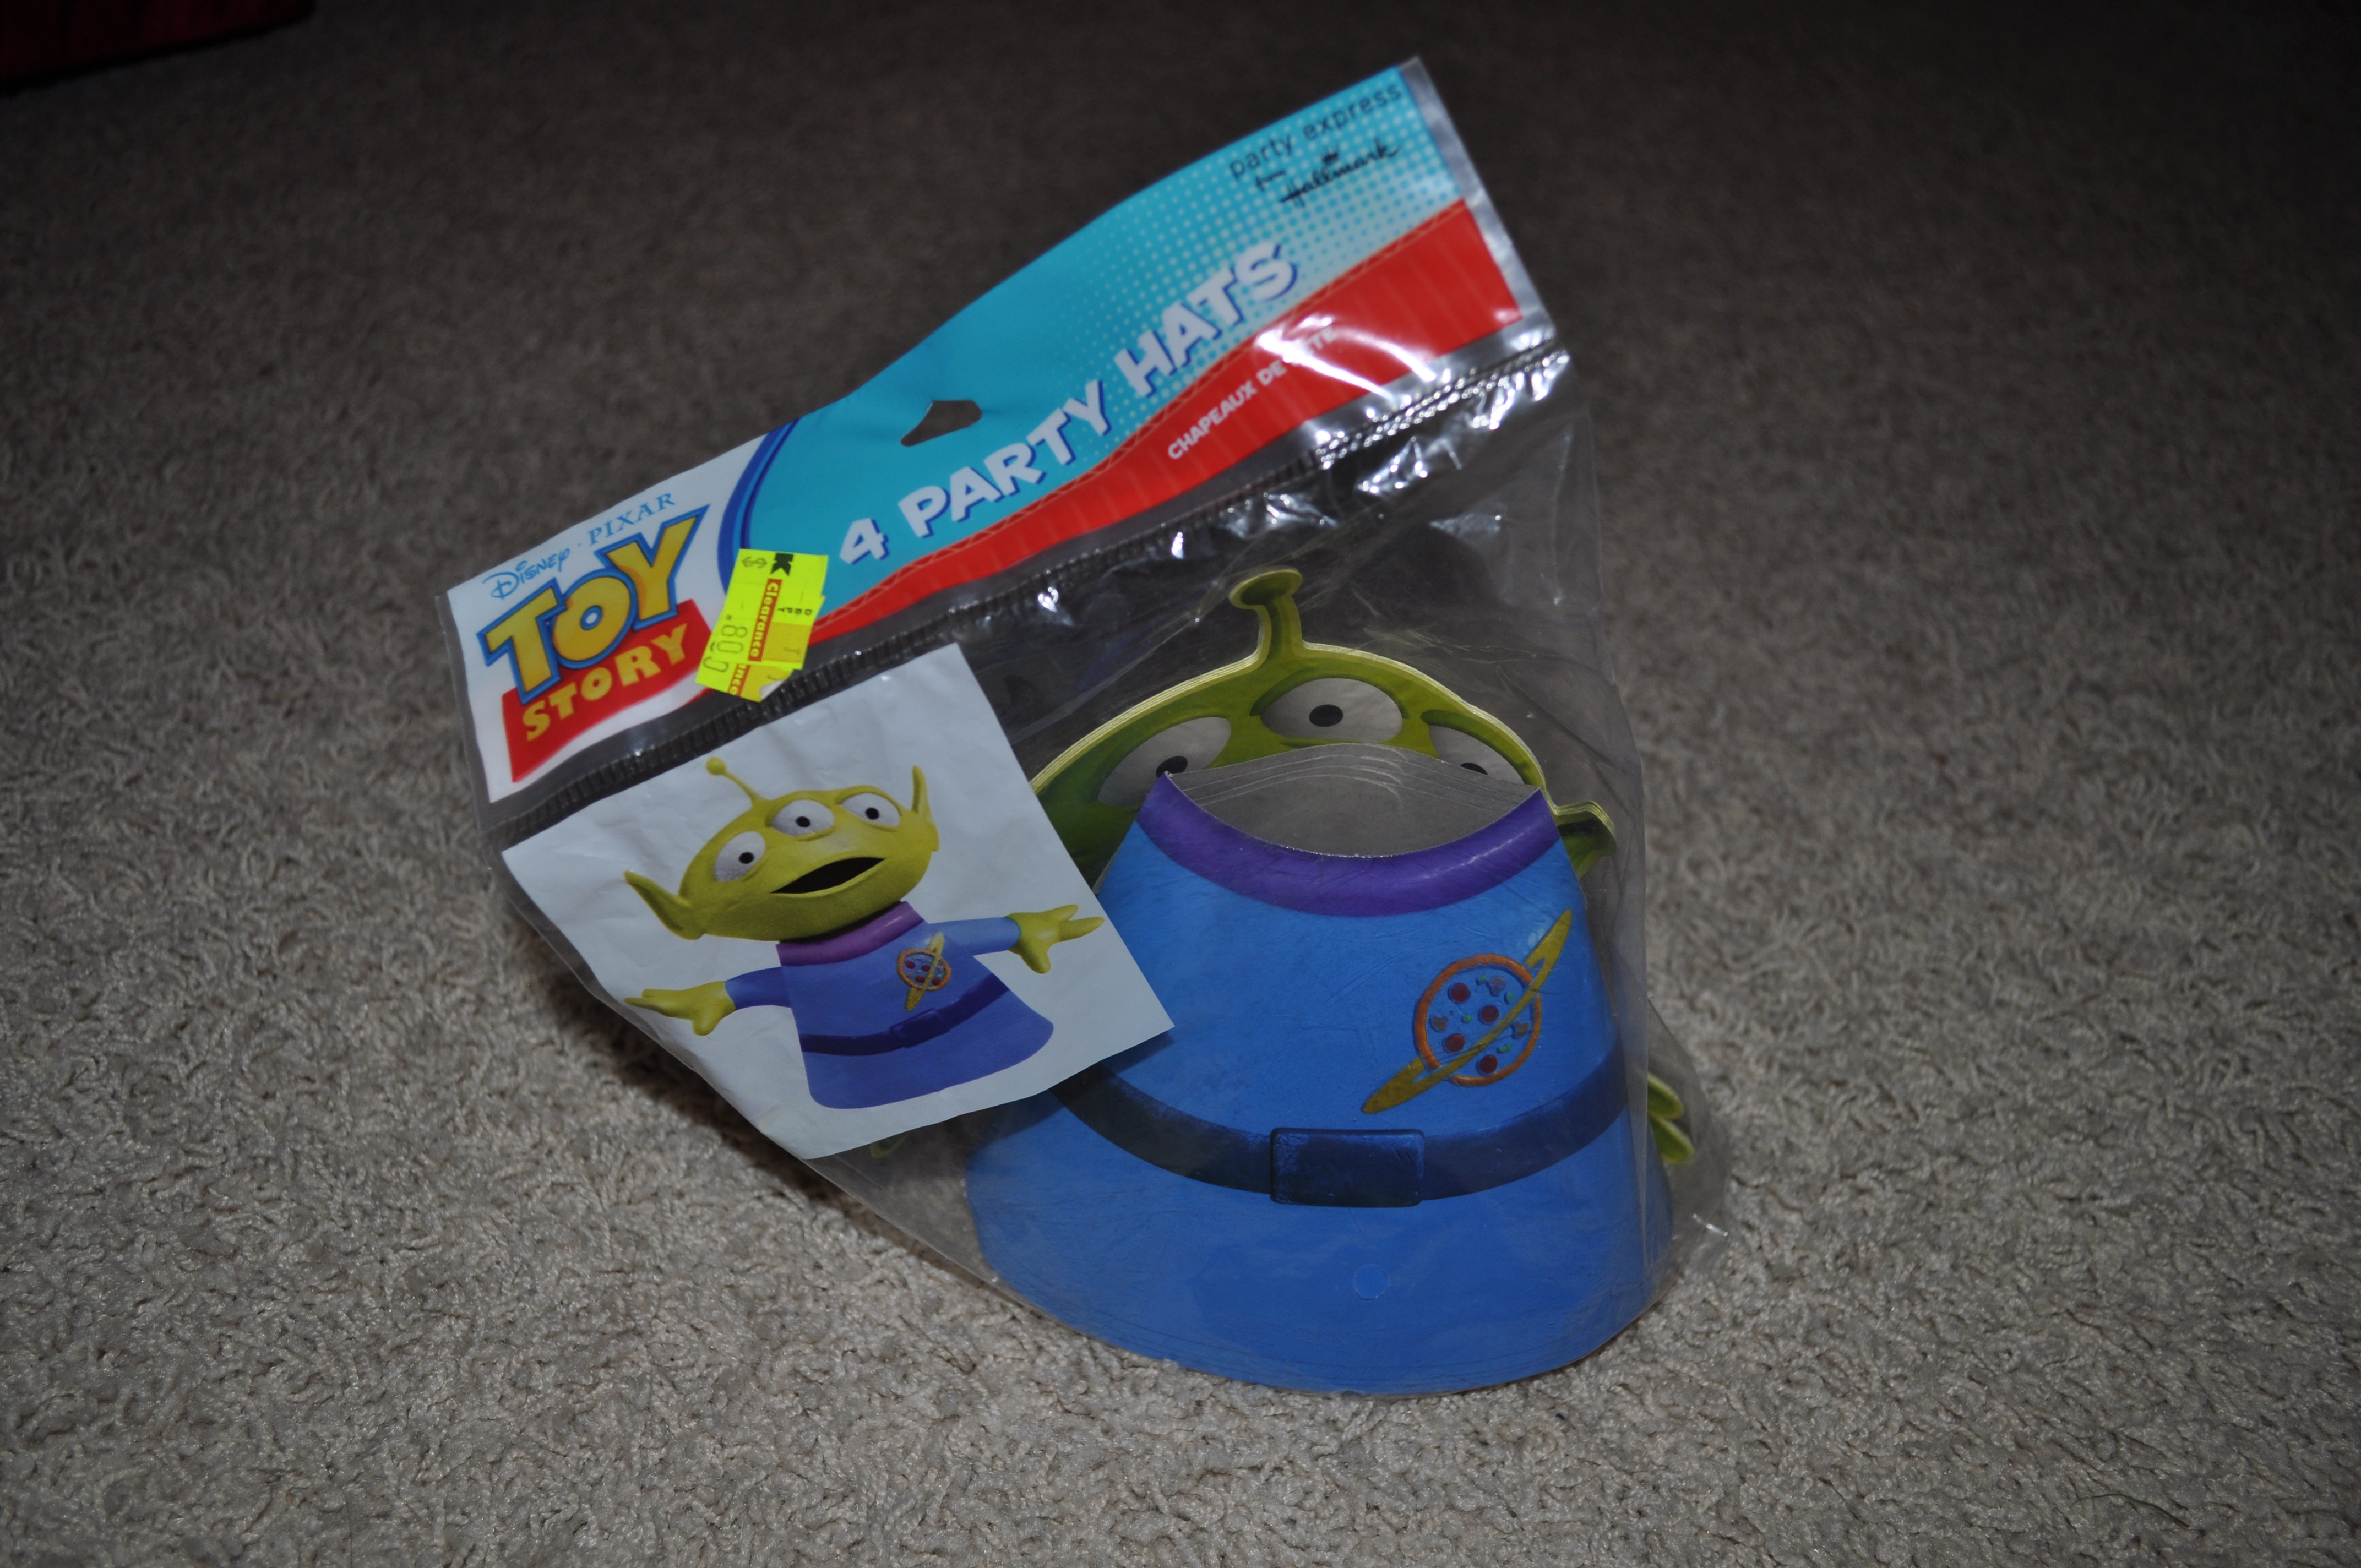
tablecloth and banner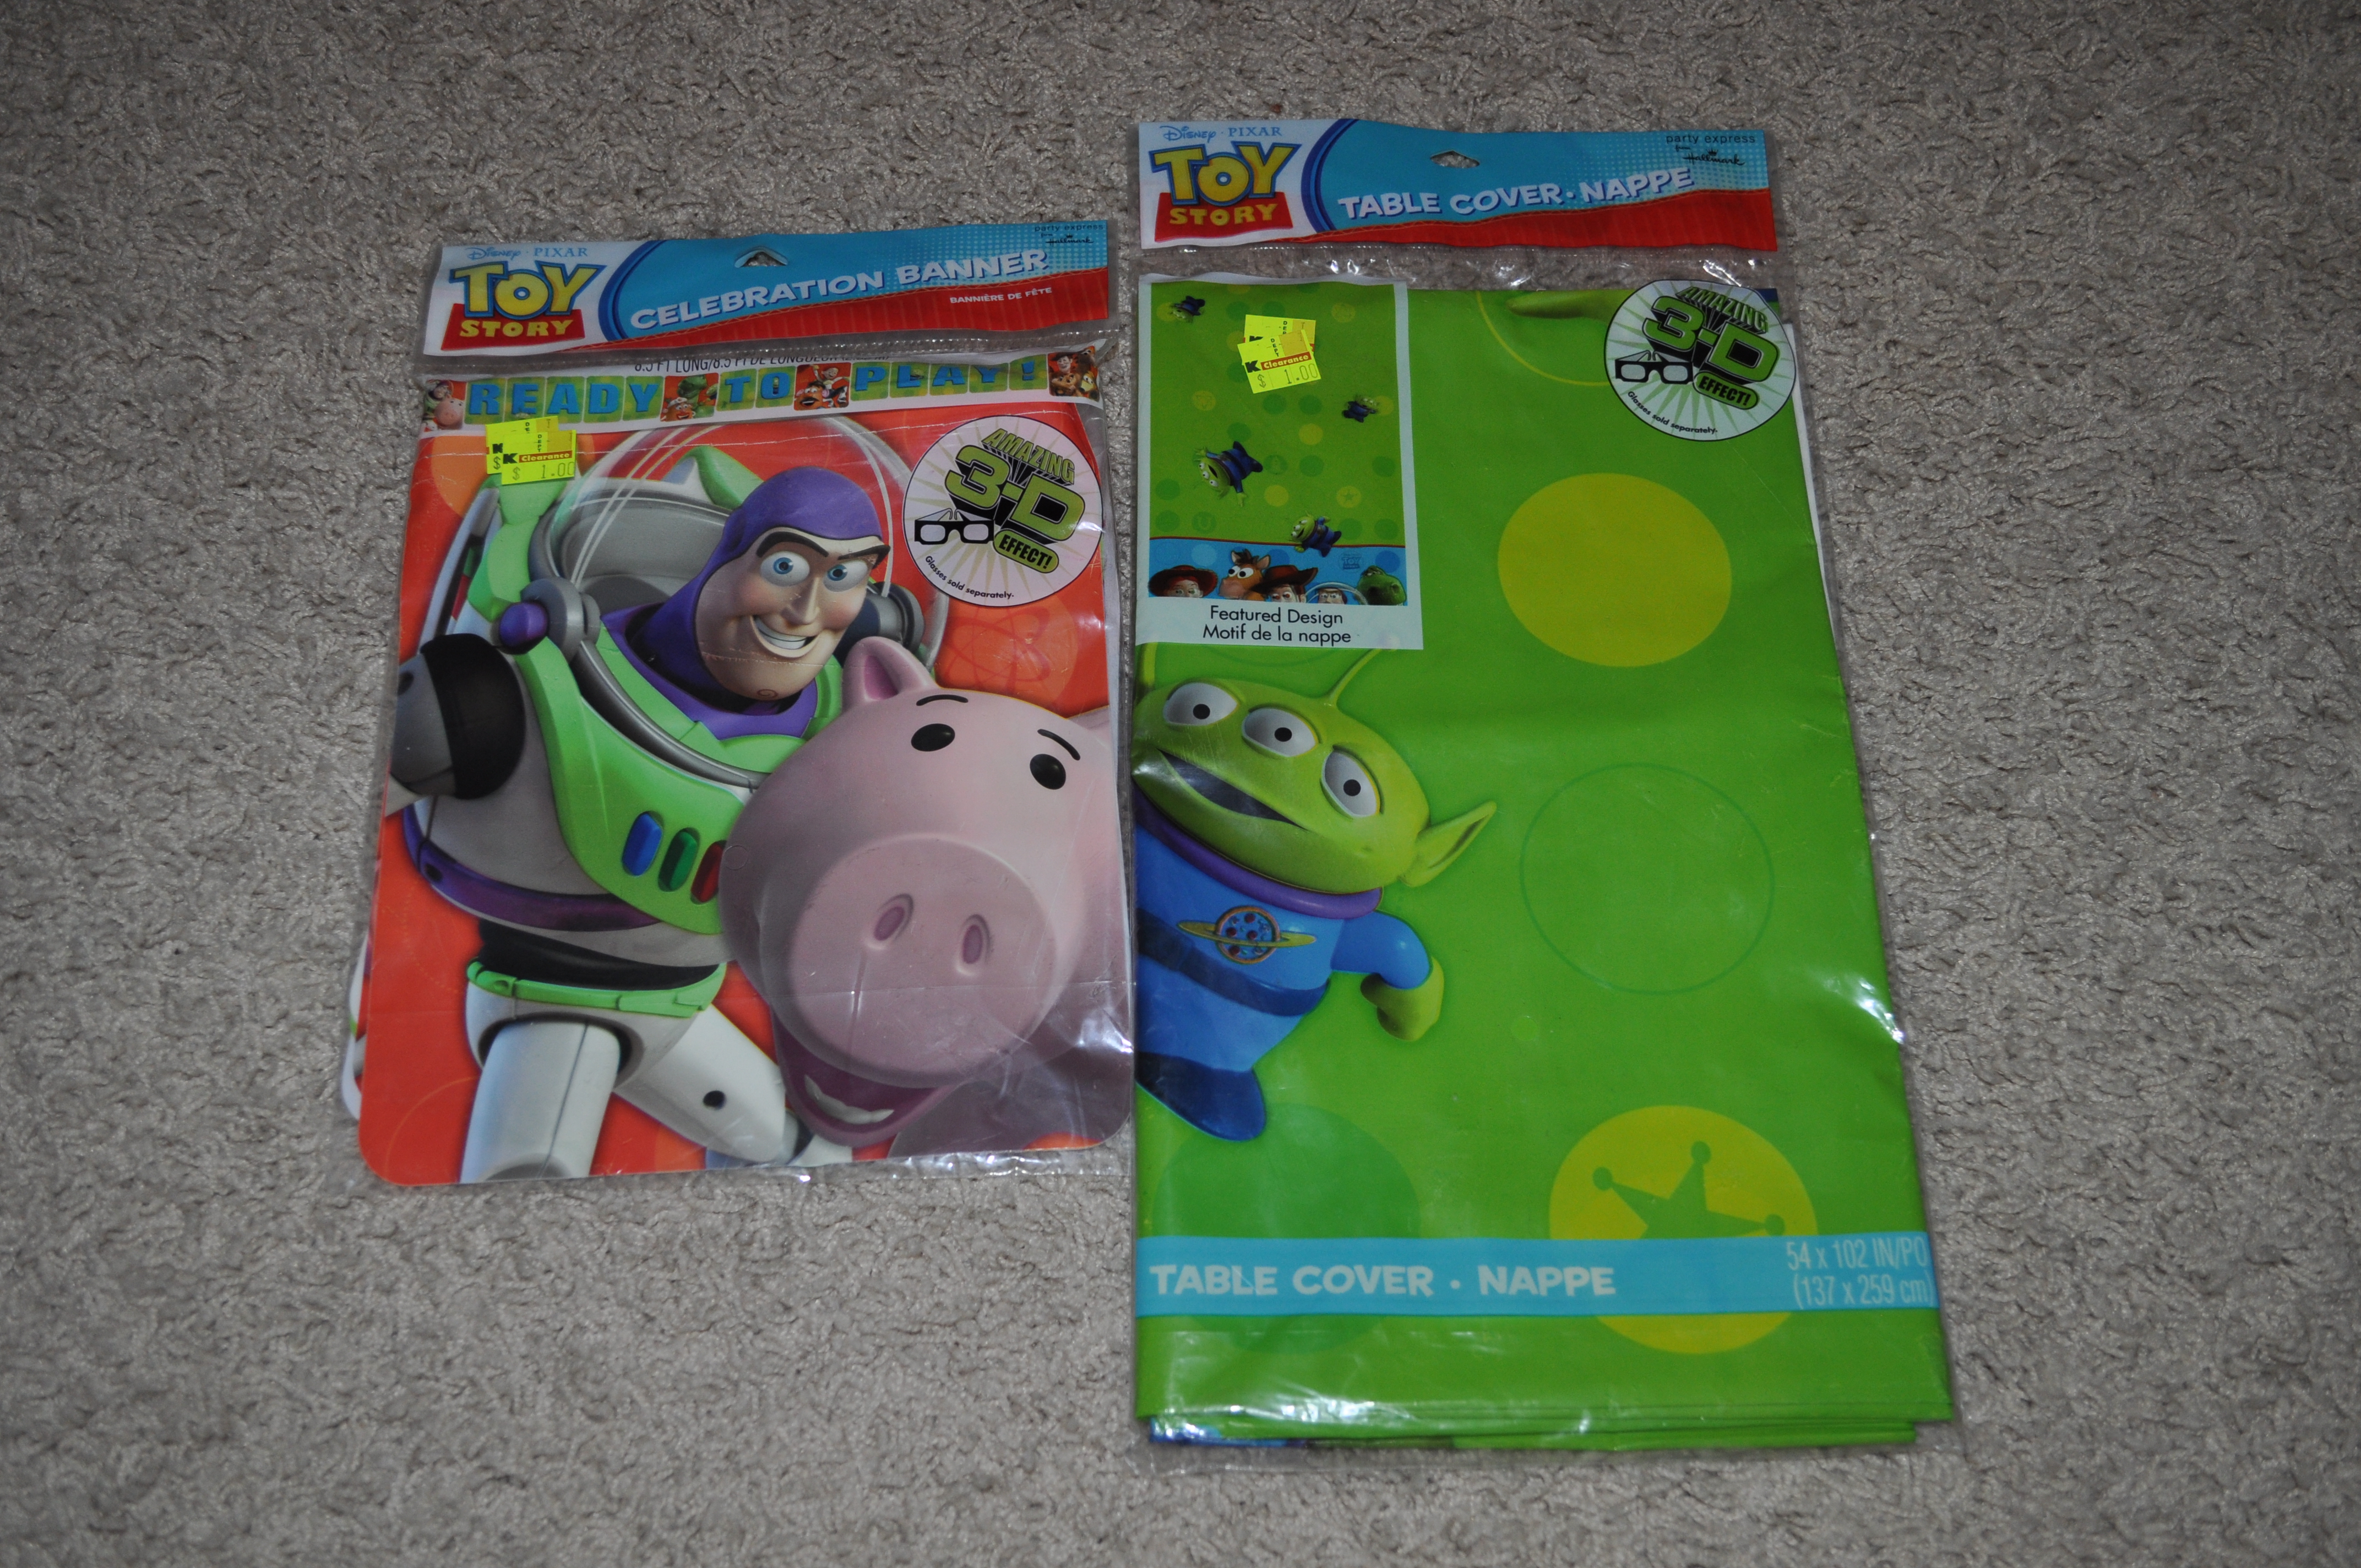
favor bags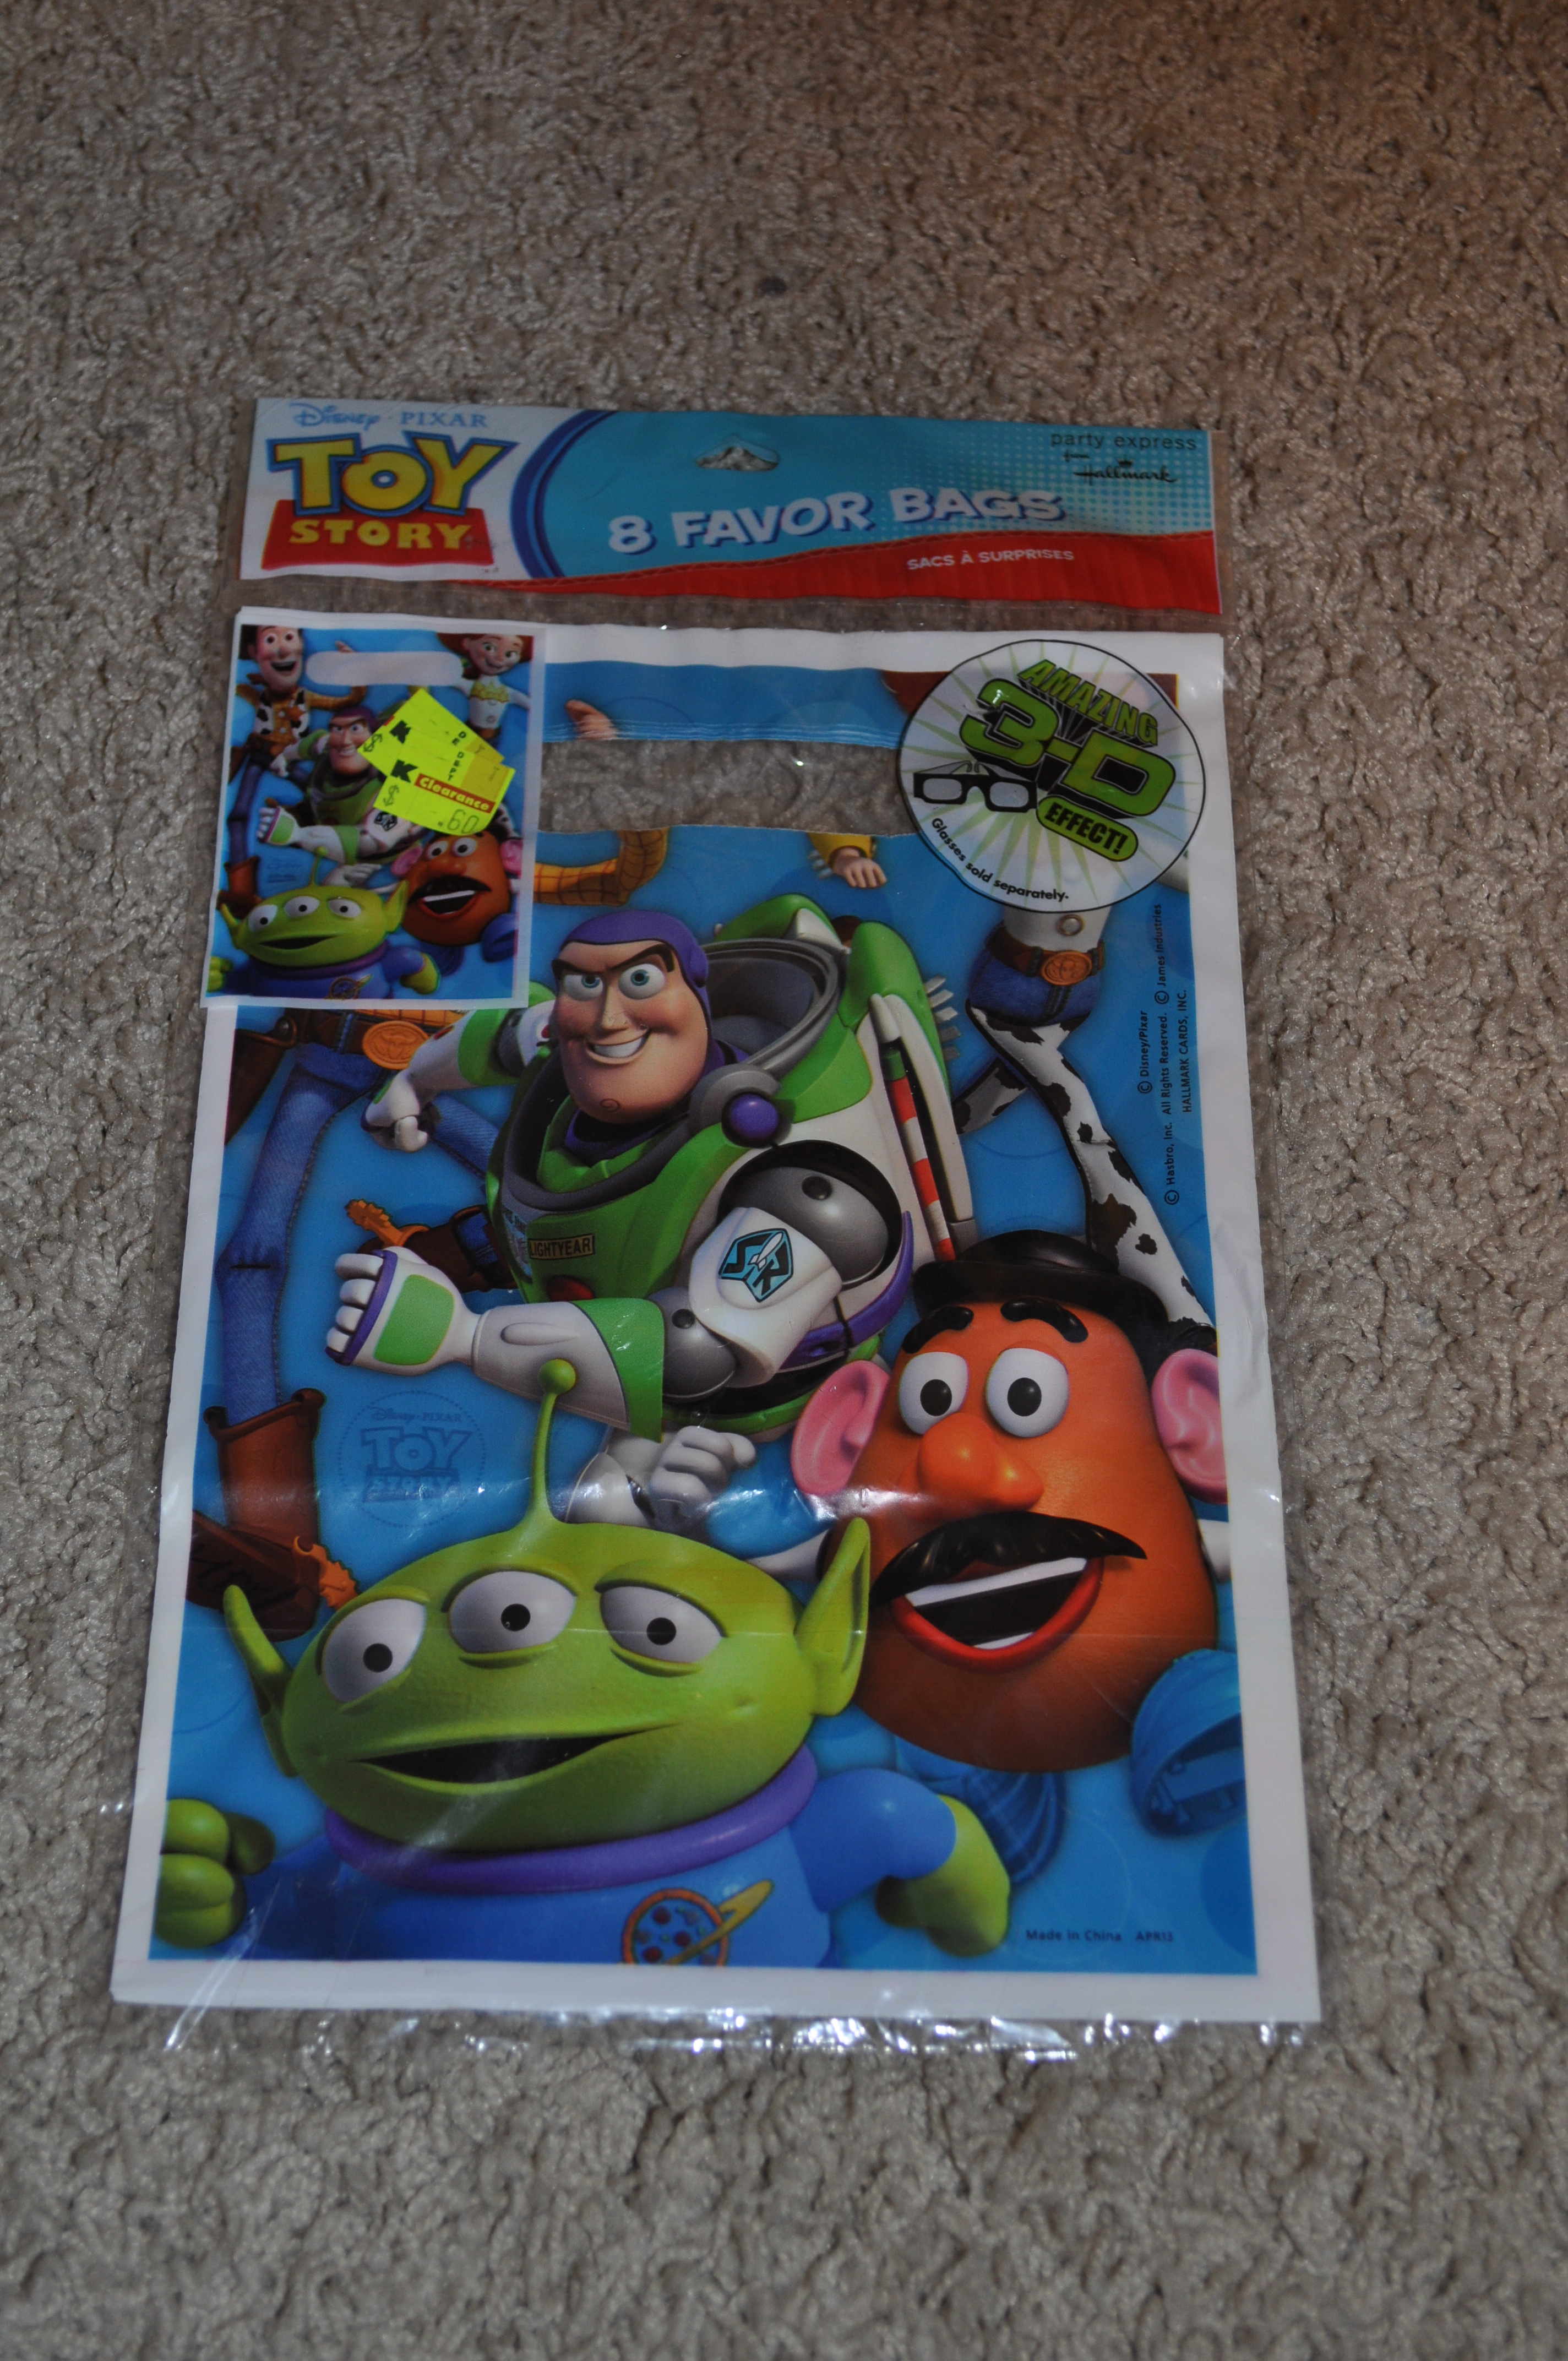
blowout (gift 1 of 4 for favor bag)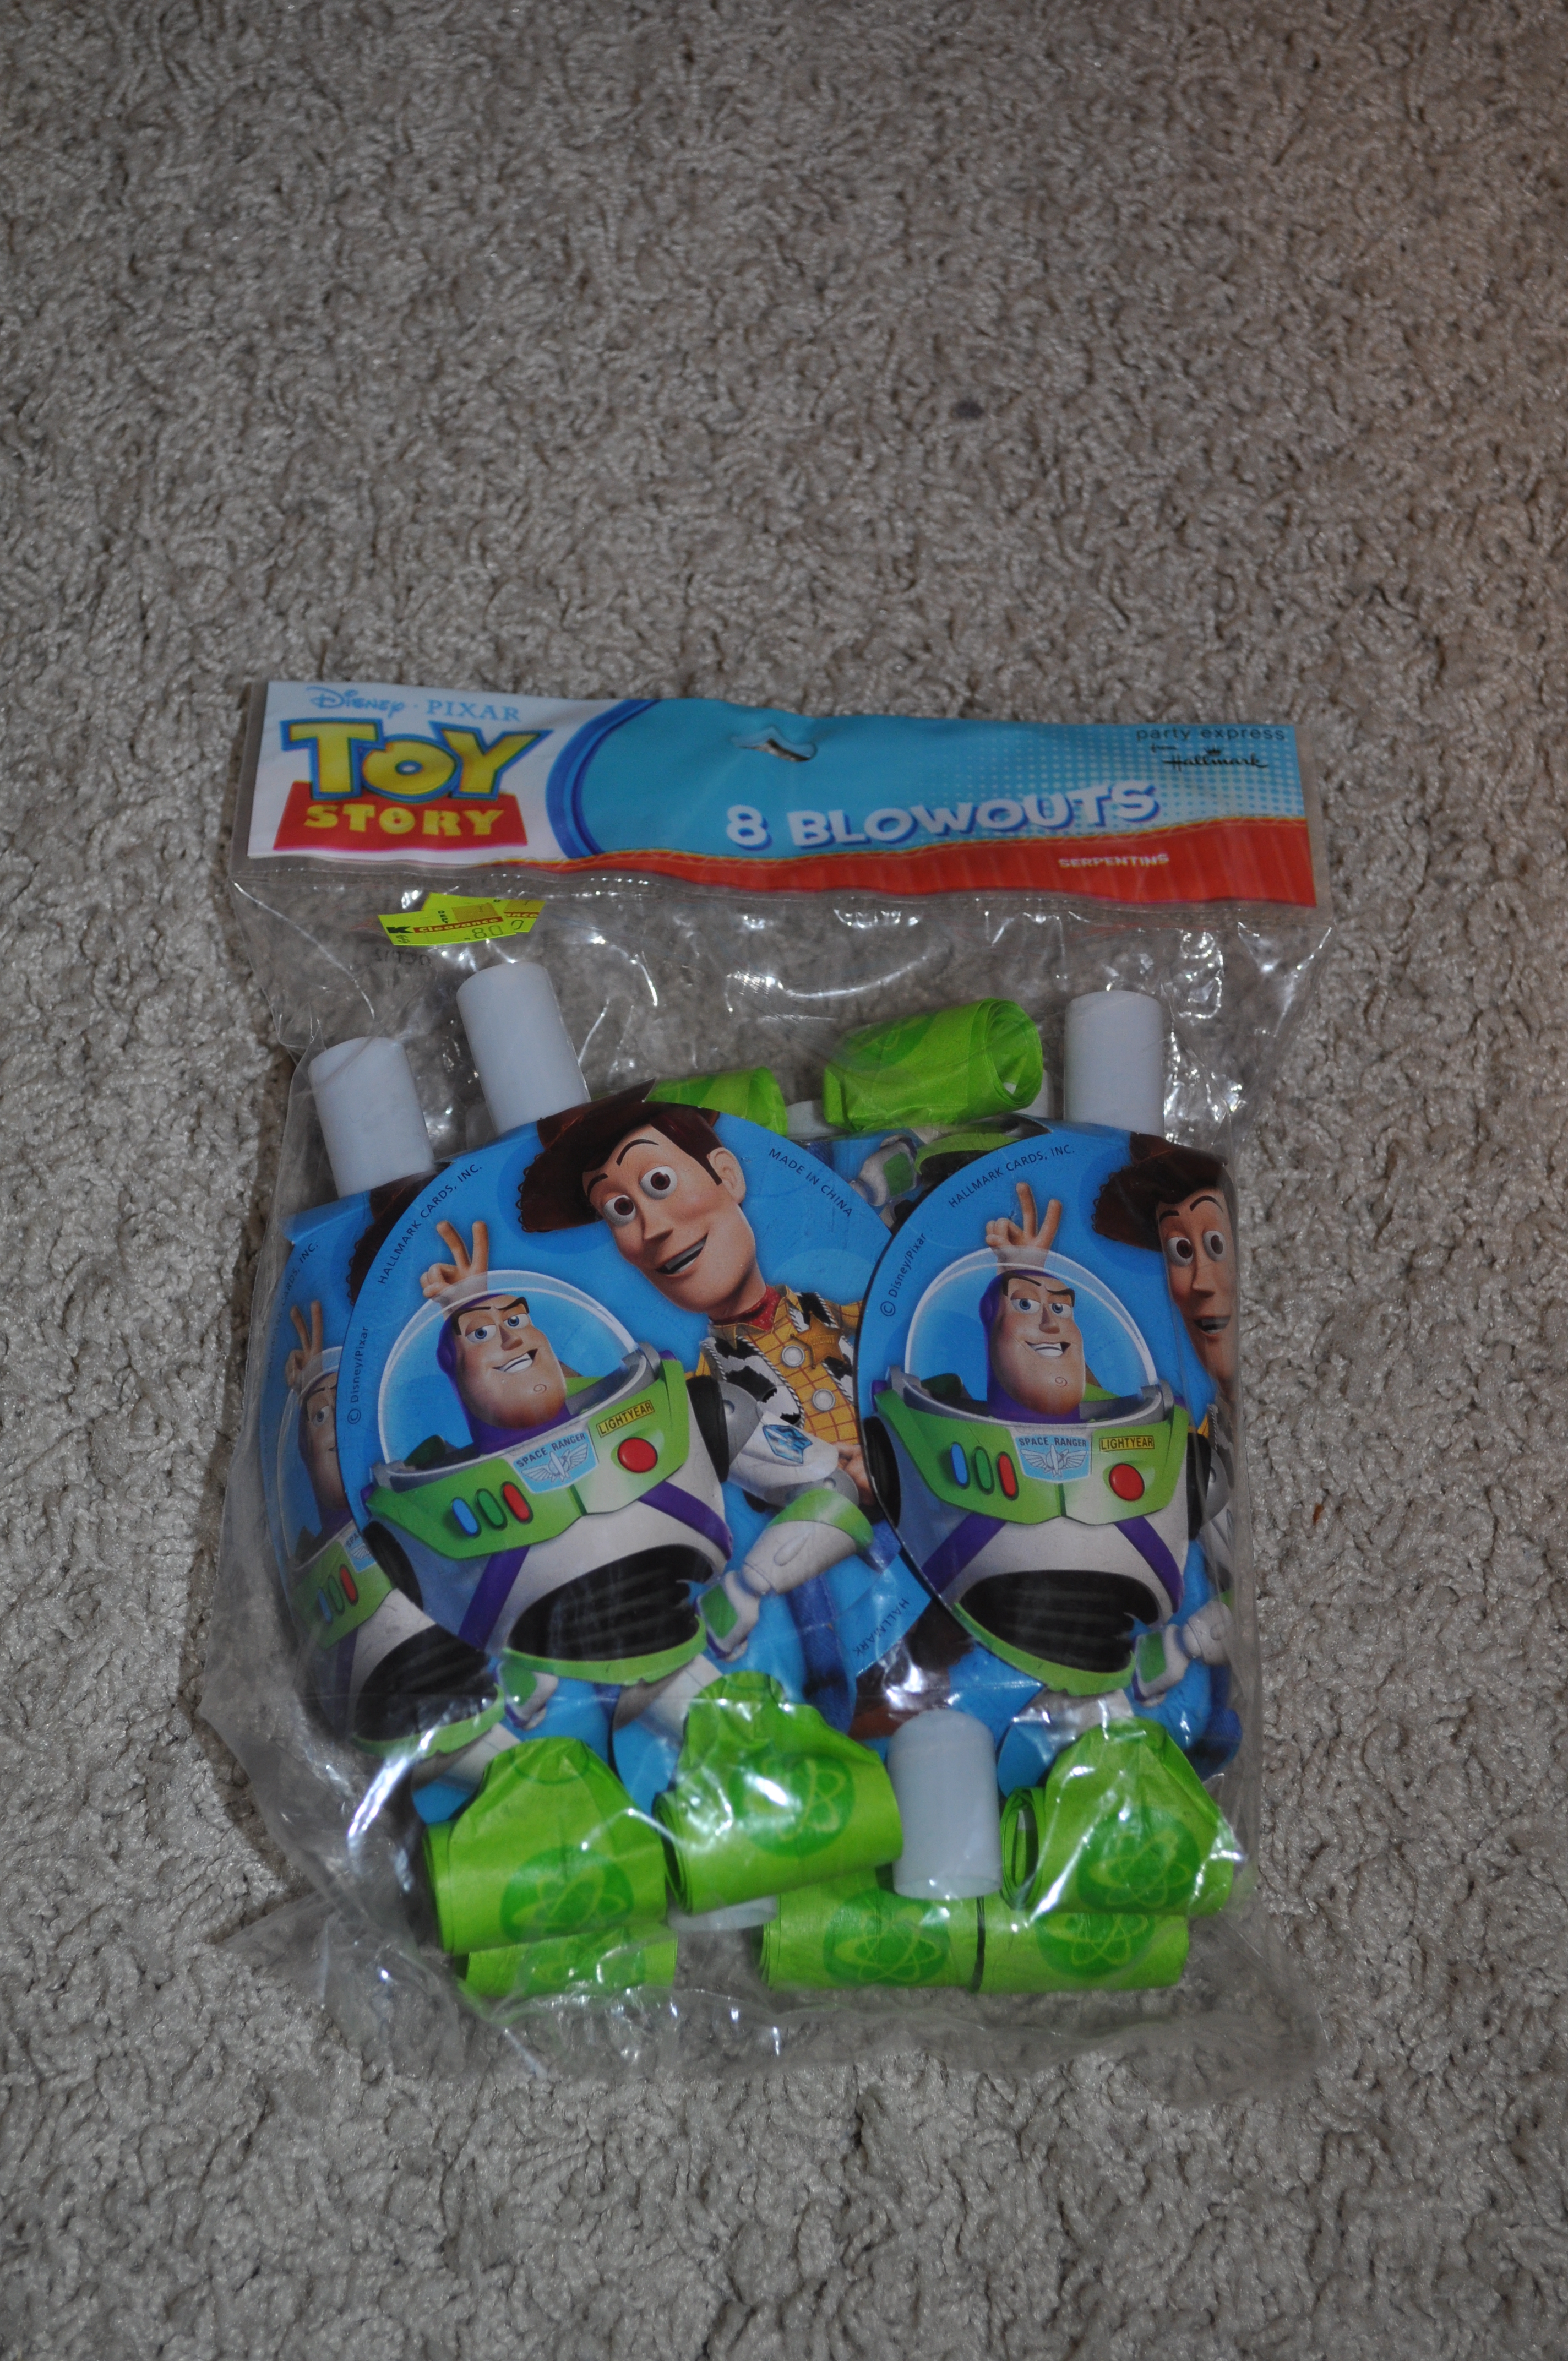
Toy Story Favor Bags, a way to say “Thanks, space ranger!”
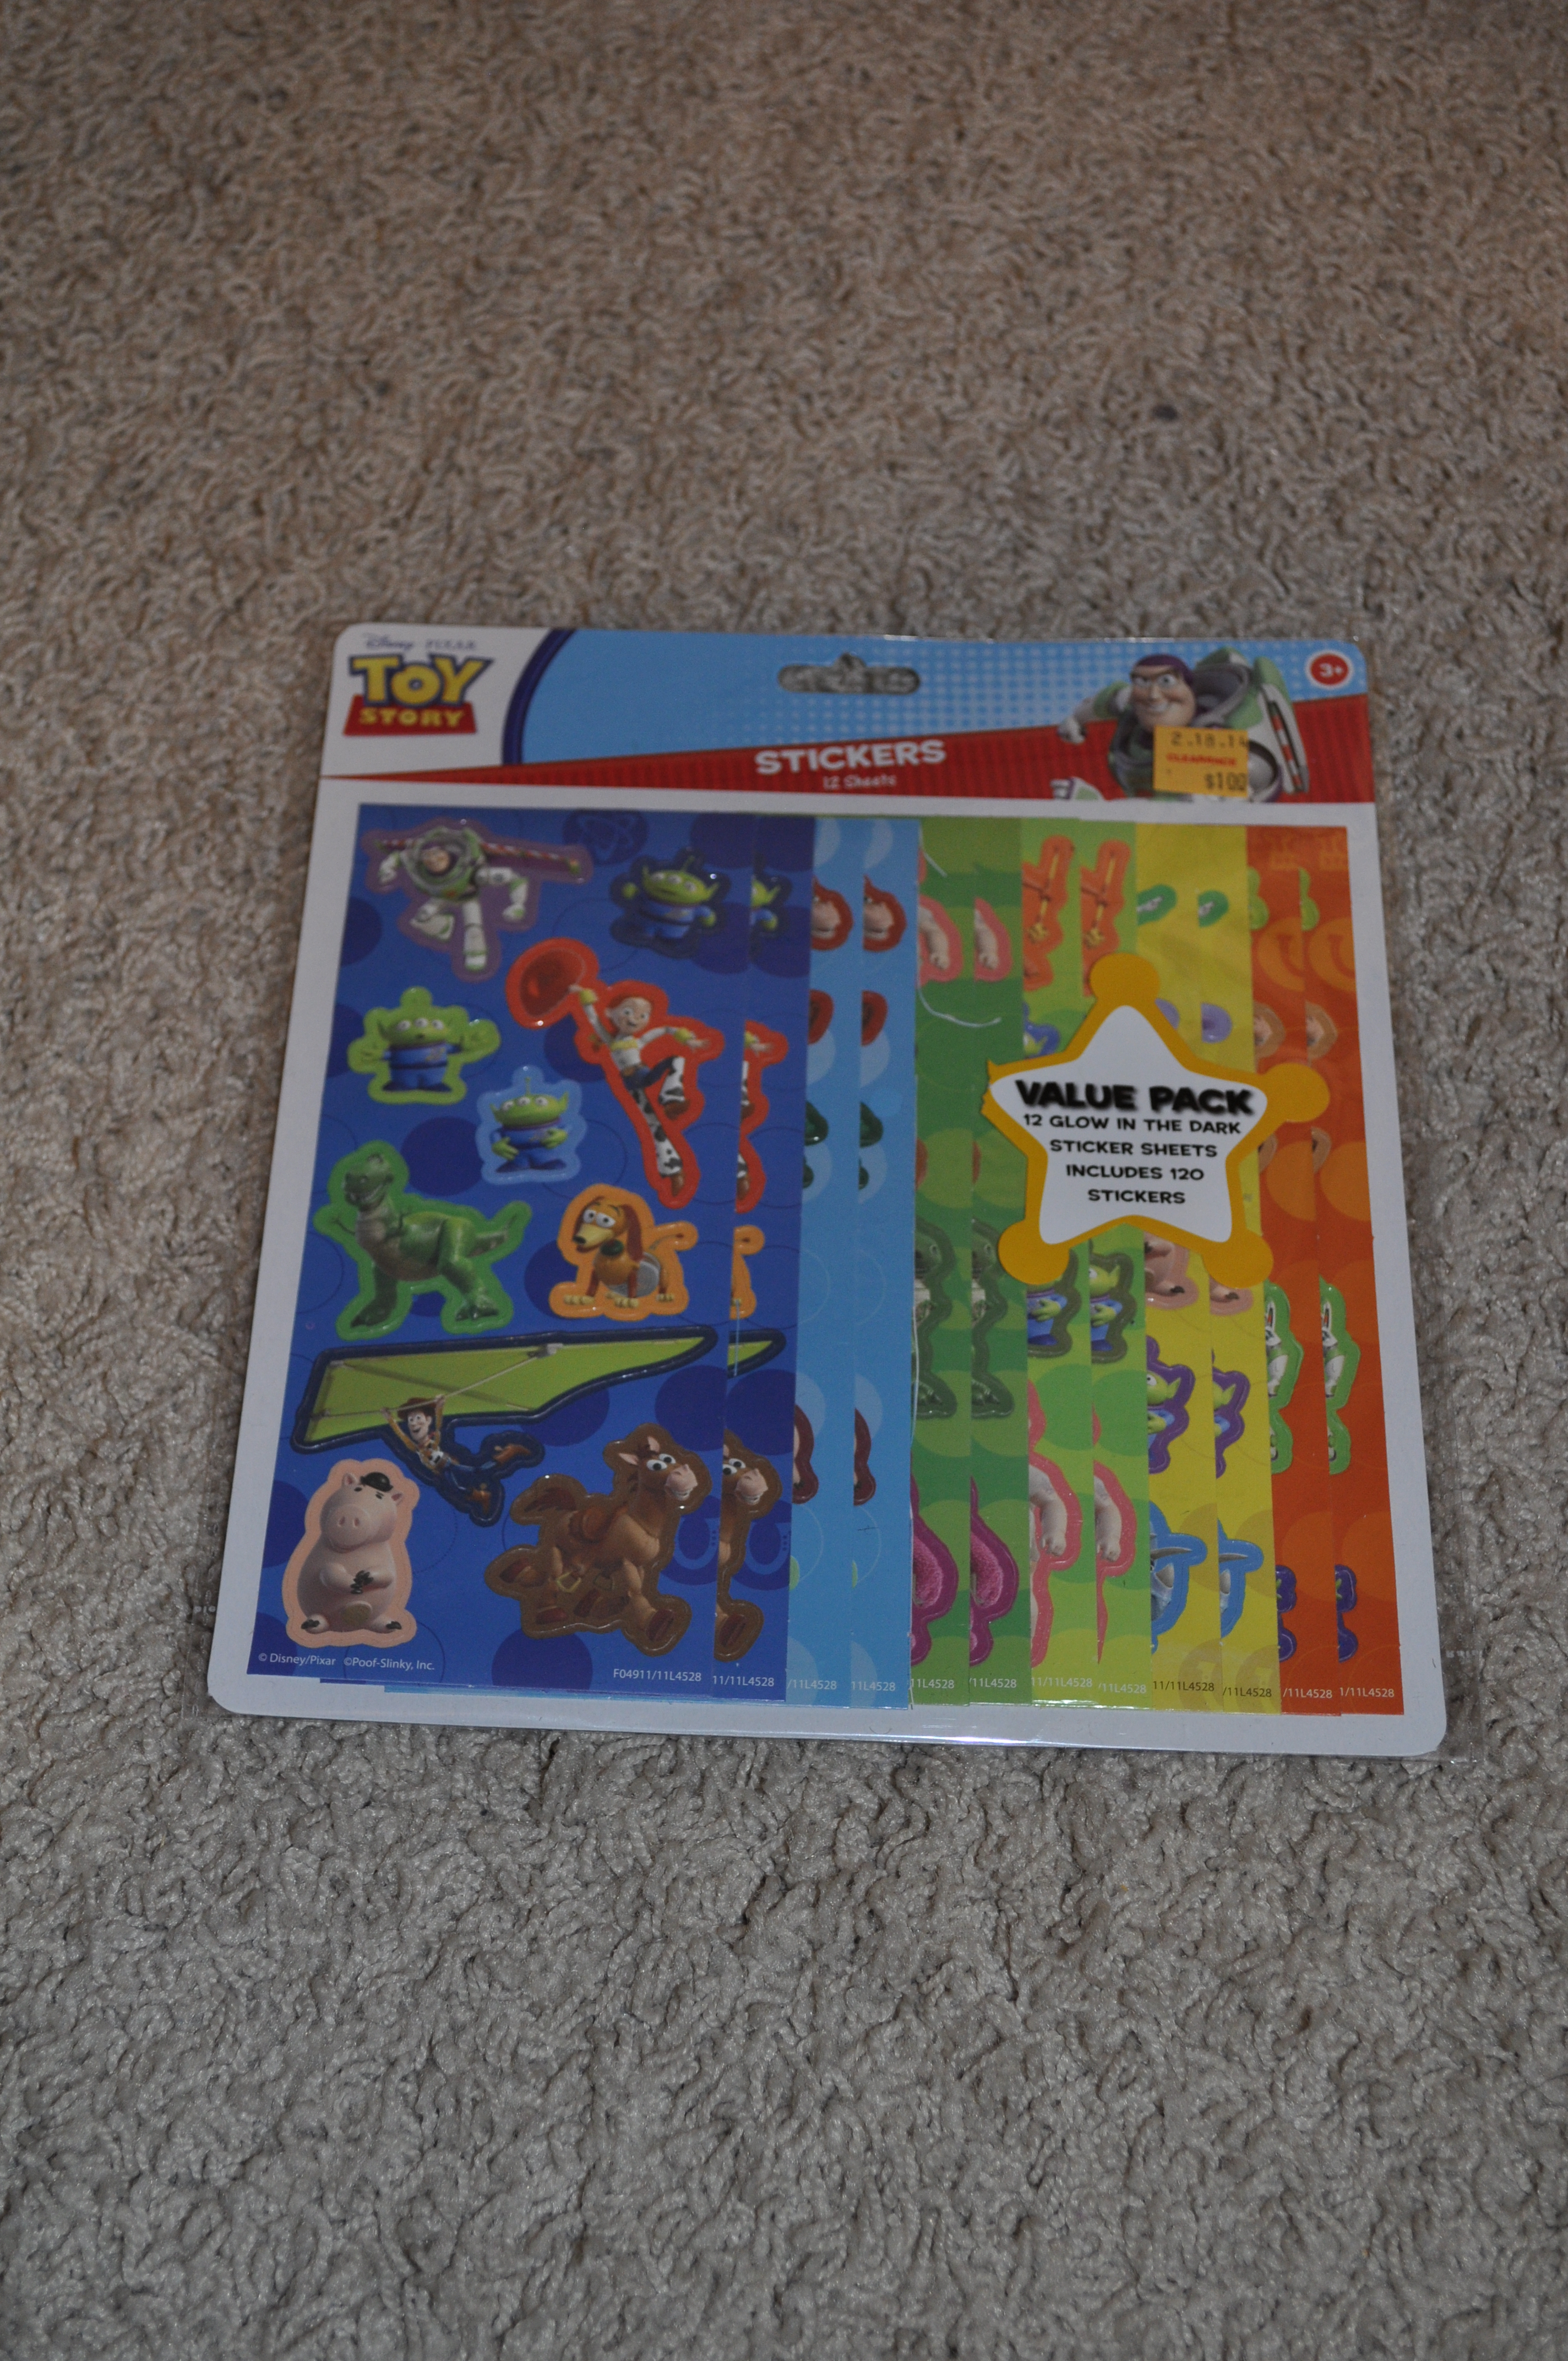
1) One of my students (Yes, I’m an educator!), told me about sticker packs that she saw at Used Books Outlet, which I had never been to. I went there one day after school (yes, I have a full-time job) to look for them, and I found a bunch of them at the checkout. They had 12 sheets in each pack! SCORE!! Not to mention that they were only $1 for each pack of 12. DOUBLE SCORE!
2) I also used the blow outs as mentioned before.
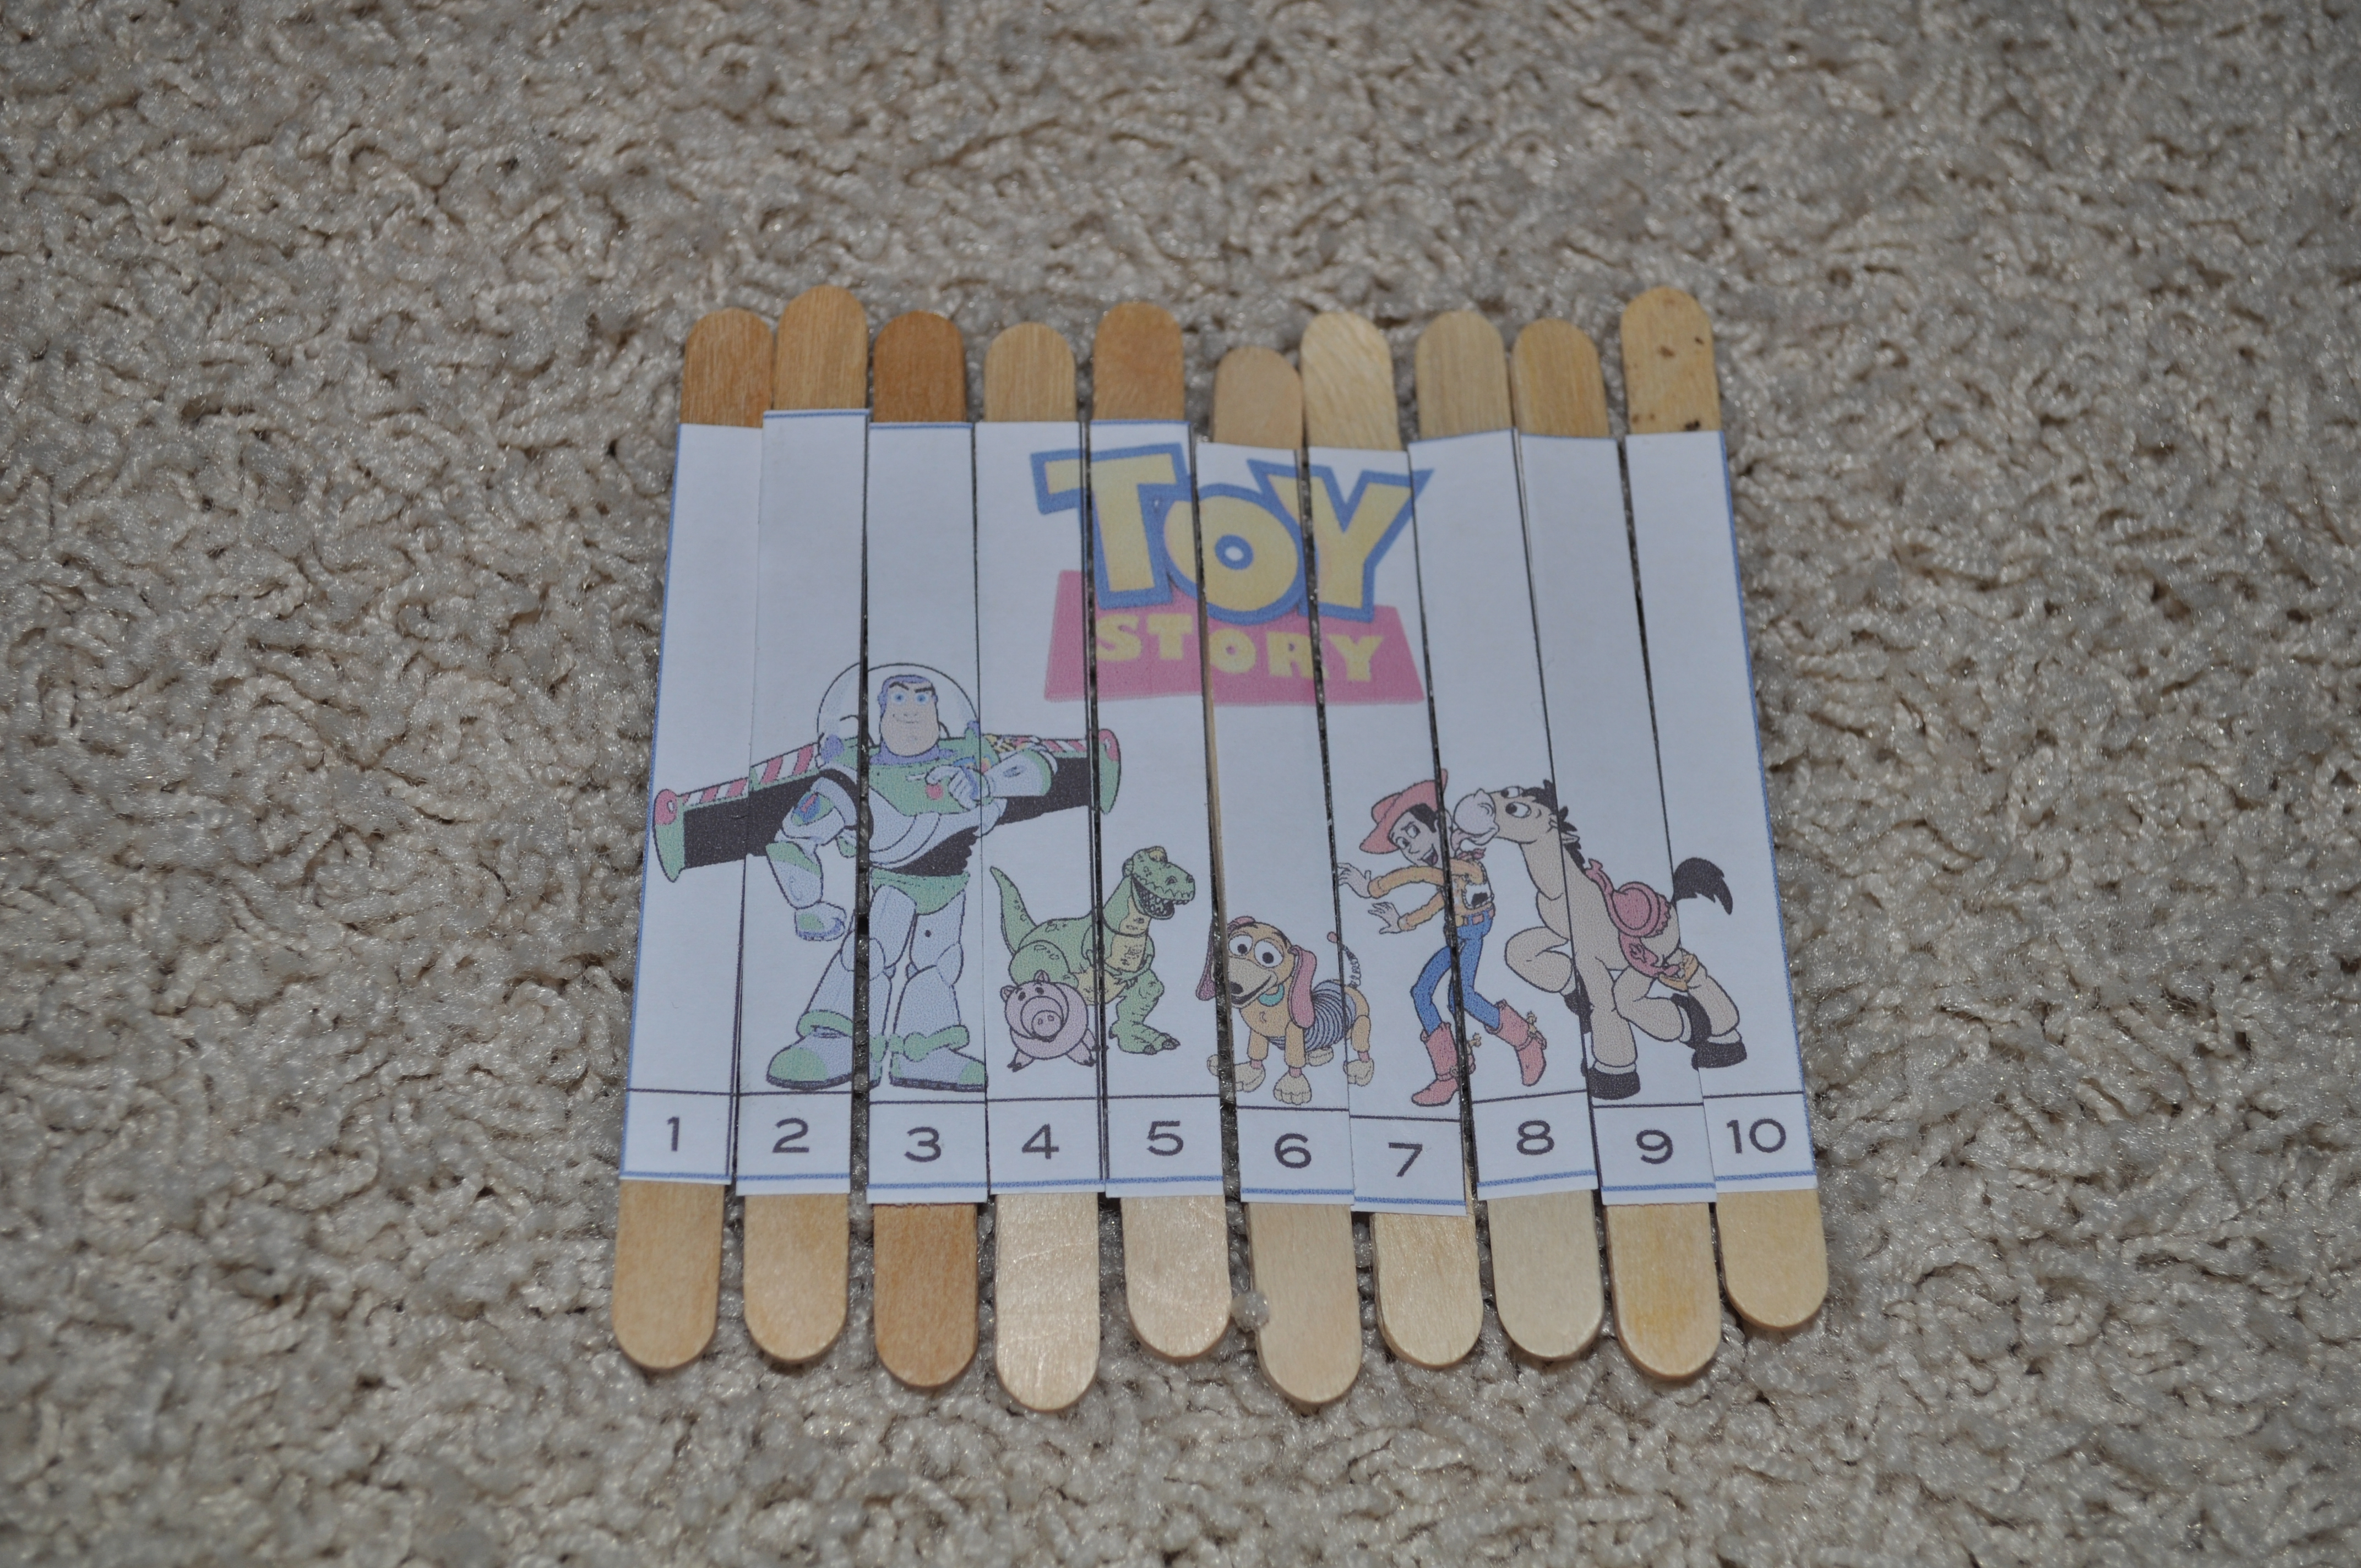
3) Then, I found this really cute site of Toy Story activities at Over the Big Moon, which is where I got the image for the Toy Story Strip Puzzle. When I printed it out, it was the size of a regular piece of paper, so I had to minimize it by 50% or so. I just kept trying to shrink it on my copier until it fit on the small Popsicle sticks that I had.
I bought a really big box of Popsicle sticks at Michael;s for another project, and since there are 1000 or so in a box, I had enough to make the 21 puzzles I was intending on making. (21 is more than I originally said I had at the party, but there were some who cancelled and others who were on vacation, but since they all gave my son a present, I made them all a “thank you” bag.
Luckily, my student assistant made the puzzles. I was going crazy with the last item in the favor bag.) Keep in mind that you will need 10 sticks for each puzzle. I used my paper cutter to cut the strips, which was faster and more accurate, and I used either Elmer’s glue or a glue stick to attach the strips to the sticks. This game/puzzle is a wonder for the diaper bag/purse. We have different ones and have used them at restaurants, church, etc. I wanted to give some gifts that would be more useful.
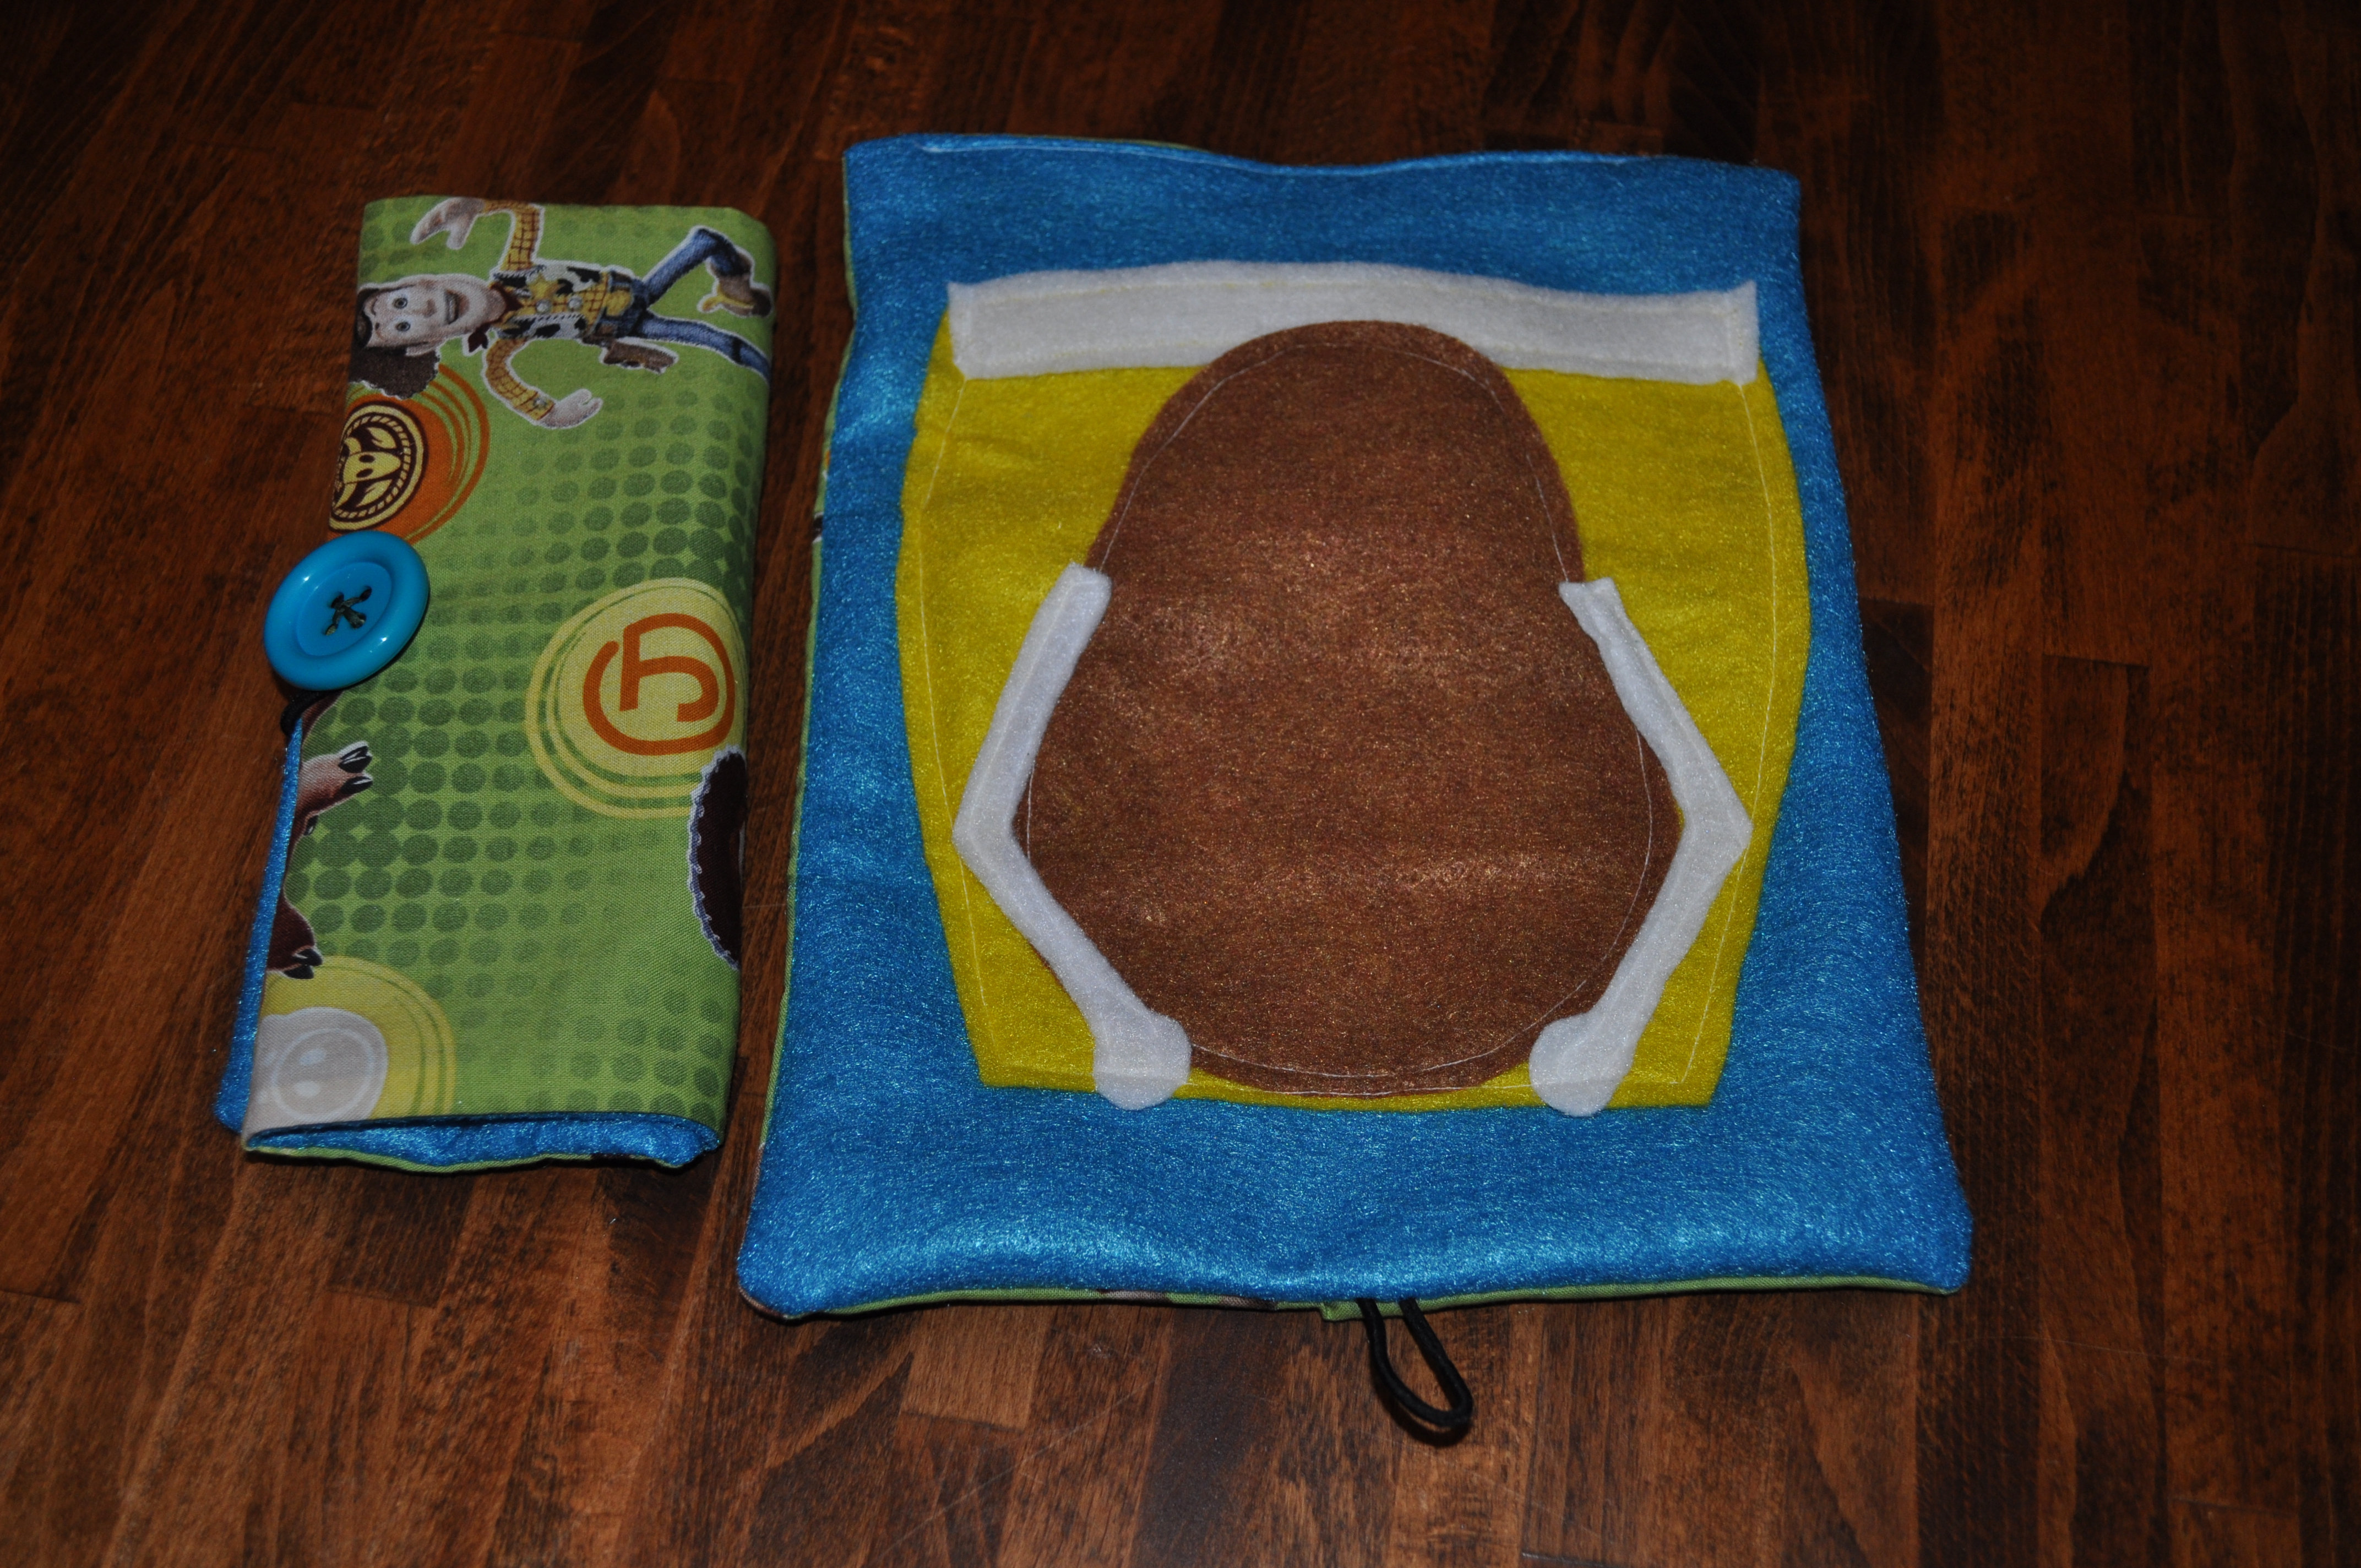
4) The last item in the gift bags took all my spare time for nearly a month…and when I say, all my spare time, I mean ALL my spare time. I also didn’t sleep as much during that month, since being a full-time teacher has lots of work in itself, but adding this task to it was almost more than I could handle!
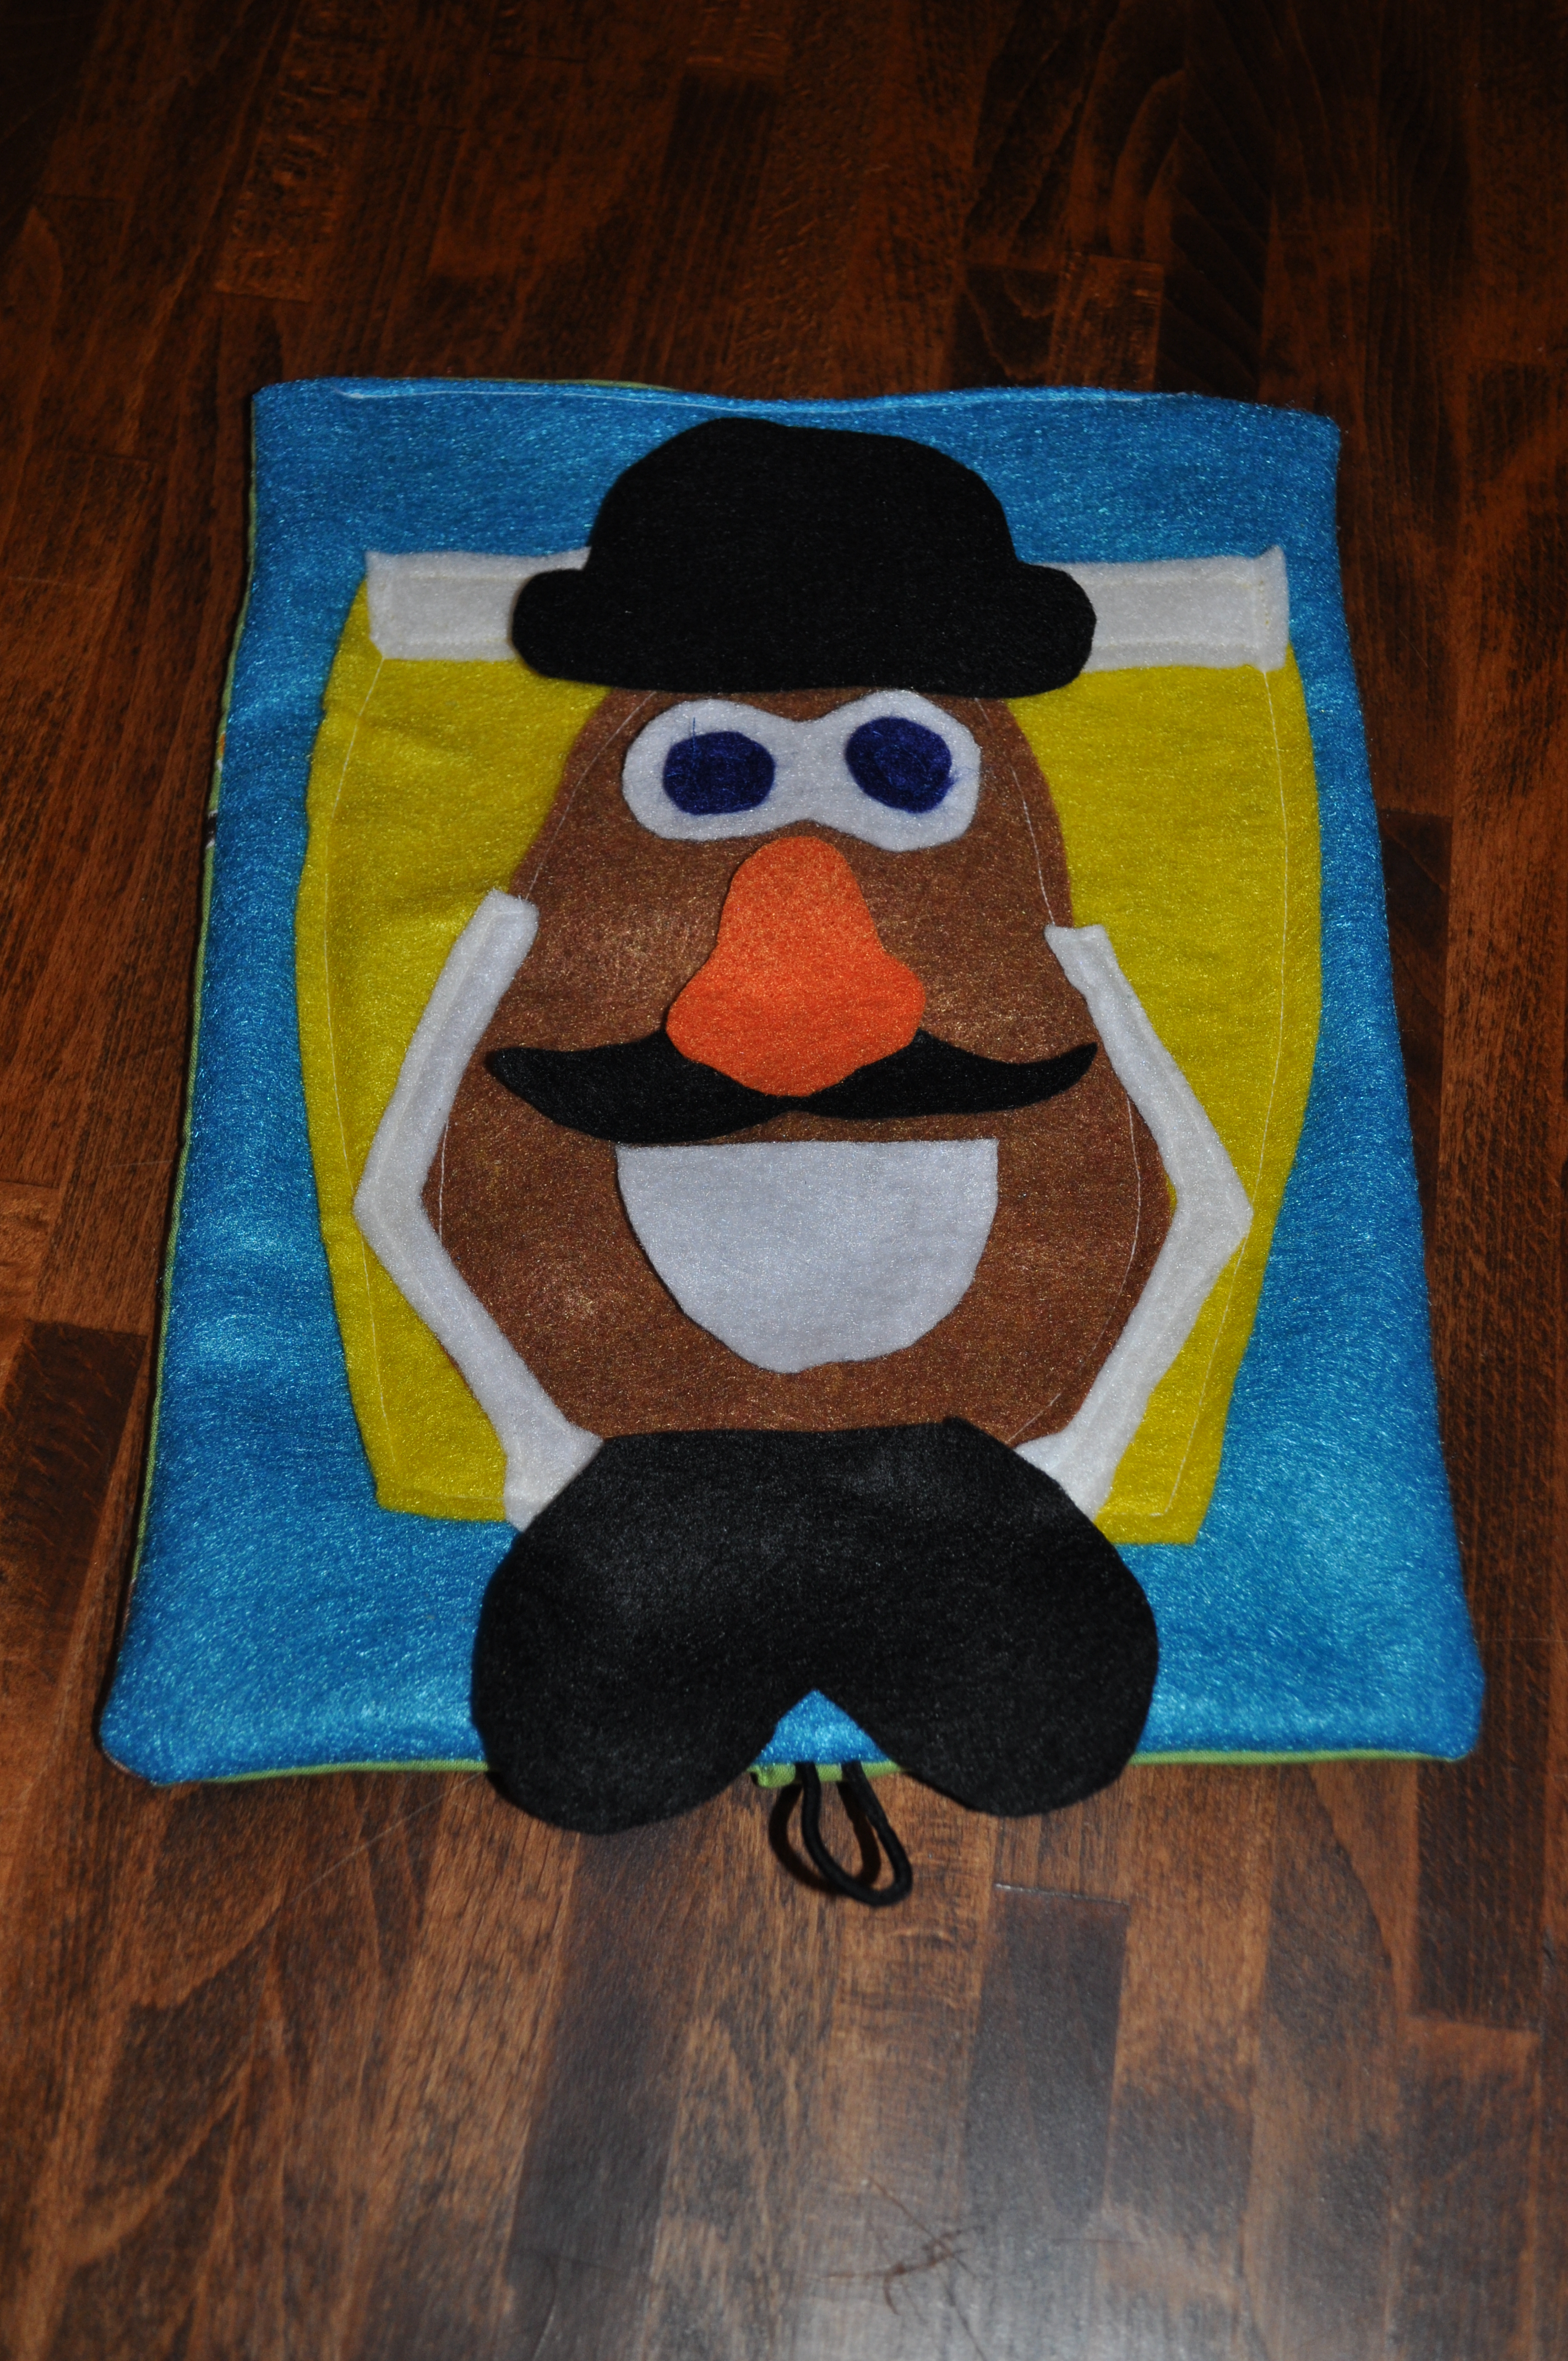
I decided to make travel Mr. Potato Heads. I found the idea from JocelynandJason. I have loved her stuff for the past year, since I took some of her free templates to make my kids’ quiet book. I never did anything with the Mr. Potato Head and thought that this would be a perfect time to do something with it. I have been thinking about doing this idea for a busy bag party, but since I’m so busy with work, I don’t really have the time to attend those anymore. 🙁
I didn’t want to put too much pressure on myself to get it done, but when it was getting close to the party, I felt the pressure BIG TIME! More on this can be found on my blog page for Mr. Potato Head. By some miracle, I was able to get them done for the party! I was beyond happy.
I knew that I had enough in the favor bag without it, but I am so glad I was able to include it. My son has such great friends, and I wanted them to have something that they could use. I know that turning 4 is getting away from things like these, but I know that my kids still like this stuff, so I was hoping the others would too!
5) OPTIONAL: For the babies, who came to either of the two parties, I made princess crowns (they were all girls.) I knew that they wouldn’t be able to do much with a Mr. Potato Head…perhaps try to eat him! 🙂

Happy Birthday!
Overall, it was a great party! We just love Toy Story, and all the kids had a great time at the party!! I am also very glad that my son loved all the Buzz Lightyear aspects of the party that I added just for him!
Like to plan birthday parties? Check out this post for a Sesame Street Birthday Party!
What are you favorite memories of either your own birthday party as a child or one you planned for someone else? Tell me about it in the comments below!!
Don’t forget to follow me on social media!! My Facebook and Instagram pages are really cool! 

Pin it and Save for later
Kelly
Hi! I'm Kelly, an American mom and wife to a Dane. After deciding to move to rural Denmark in 2016, I decided to share the highs and lows of expat life in Denmark with lots of fun family experiences and trips in Denmark to make it all a bit more interesting! :) Welcome to My New Danish Life!


You May Also Like:
Thomas the Train Birthday Party: Choo, Choo! Look Who’s Turning Two!
Sesame Street Birthday Party